|
|
|
|
|
||||
 |
|||||
|
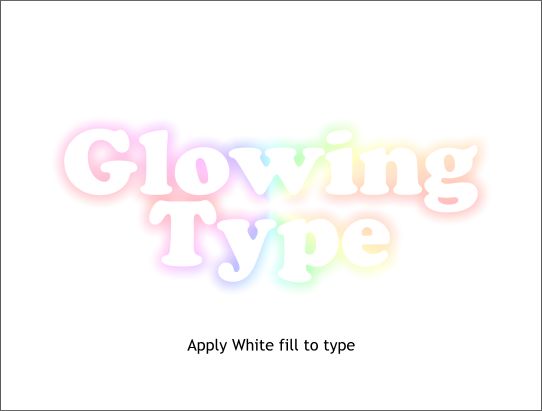
Here is a fun and easy way to create white on white text with a magical rainbow glow appearing to emanate from behind the text. This is based on an art school project in which we would mount Day Glo paper on the back of a white cut out shape, raise the shape about 1/8" off a white surface. The result was very similar to the technique on this page, only 1000% harder.
Step 1 Create some type. I've used Coolsville (also known as Cooper Black), which is on the Xara X CD in the Fonts folder.
Step 2 Select the Shadow Tool. Click the text to select it. Press the Glow icon on the Infobar at the top of the page. (I've sliced the screen capture into two pieces to show all the settings). Increase the Shadow Blur setting to 20pix.
Step 3 Using the Selector Tool, and holding down the Ctrl key, click on the shadow. The status bar should read "1 Shadow on Layer 1" in the lower left corner of the screen. Select the Fill Tool and from the drop down list of Fill Types, select Conical. Click on the square on the left side and change the fill to red. Do the same for the square on the right side. From the drop down list of Fill Effects on the Infobar, select Alt Rainbow.
Step 4 Select the type and apply a white fill.
Here is a variation of this effect which creates an ominous glowing blue text on black à la Steven King movie posters.
Step 1 Apply a Blue Indigo fill to the text. Copy the text to the clipboard (Ctrl c). (The color names on the screen palette appear if you let the cursor rest over them for a second or two).
Step 2 Select the type with the Contour Tool. Drag away from the type to apply an Outer Contour. Change the Contour Steps to 25 and press Enter to apply the change. Change the Contour Width slider setting to about 25 and press Enter.
Step 3 Click the text with the Selector Tool (the arrow). Press the Tab key once. The status bar should read, "1 Contour on Layer 1". Click the black color on the screen palette to change the color of the contour. Press the Position Profile arrow icon on the Infobar to open the Position Profile dialog and select Profile 3 from the drop down list.
Step 4 Place a black rectangle behind the type. Paste the copy of the text from the clipboard using Shift Ctrl v to paste in the same spot from which it was copied. Change the fill to black. Finally to reenforce the defused, glowing quality apply a small amount of feathering to the type. |

|