|
|
|
|
|
||||
 |
|||||
|
Here is an easy tutorial for creating a Brushed Aluminum Effect.
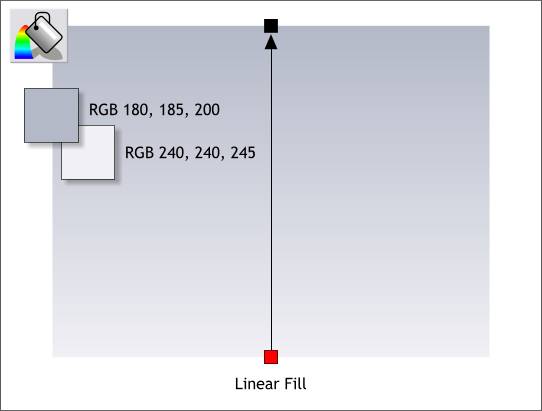
Step 1 Metal has a warm (yellow-orange) or cool (blue-green) cast. We'll create our metal with a very slight blue cast. Create a rectangle about the size of the one shown here. With the rectangle selected, select the Fill Tool, then from the drop down list of Fill Types on the Infobar, select Linear. Drag the small boxes on either end of the fill path arrow until the fill path arrow is vertical. Open the Color Editor (Ctrl e or click the tiny color wheel icon to the left of the screen color palette). Select RGB Color Model from the drop down list. Click the top control box to select it, and enter the three RGB (red, green, blue) values (one value in each text entry box). Press the Tab key on your keyboard to select the opposite control box or click it with the cursor. Enter the three values shown above. This gives a graduated effect characteristic of brushed aluminum.
Step 2 Clone the rectangle (Ctrl k). With the clone selected, select the Fill Tool then select Fractal Clouds from the drop down list of Fill Types. Drag the two control handles so they look like the illustration above. This mimics the linear texture seen in brushed aluminum.
Step 3 Select the clone with the Transparency Tool. Apply a Flat, Stained Glass transparency. Move the Transparency slider on the Infobar to 80%. Select both rectangles and from the Arrange menu, select Create Bitmap Copy. Select the True Color Color Depth option and press Create. Xara places the bitmap in the center of the screen and also places a copy in the Bitmap Gallery.
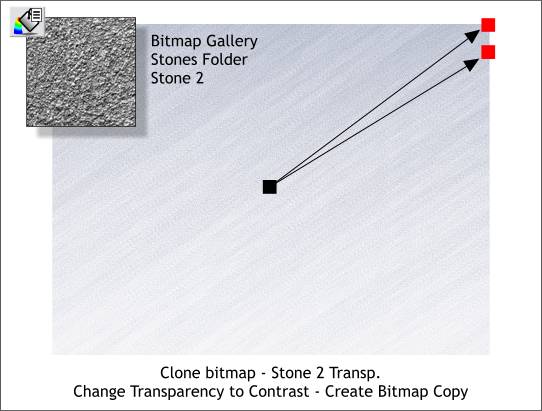
Step 4 Clone the bitmap (you can set the original rectangles to one side or delete them. We only need the bitmaps now). Open the Fill Gallery (the pouring paint can icon on the top left area of the Infobar). Select the Stones folder then select Stone 2. Press the Transp. button to apply the texture of the stone fill as a transparency to the cloned bitmap. NOTE: If you are a new user and do not find any fills in the Fill Gallery, insert the Xara X CD in your drive, open the Fill Gallery and press Disc Fills... Browse to the Fills folder on the CD and double click the Fills folder then press Add. Xara creates all the folders and thumbnail images of each fill. The actual fills remain on the CD. Select the cloned bitmap with the Transparency Tool. Drag the fill path handles as shown. This adds a subtle pitted texture to the aluminum. Create a bitmap copy of the two bitmaps. Save this copy and move or delete the other bitmaps.
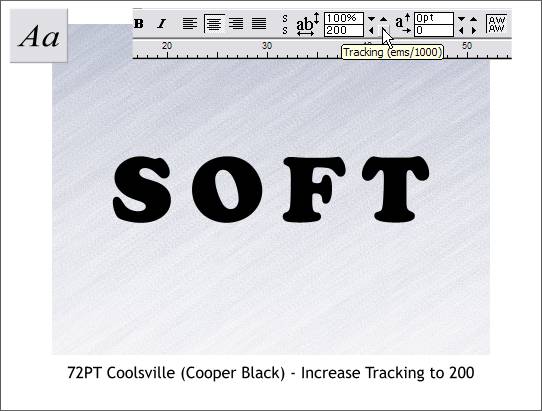
Step 5 Select the Text Tool. Click on the rectangle to place the text cursor and key in SOFT (or any text you wish). The font I have used is called Cooper Black (called Coolsville on the Xara X CD) in the Fonts folder. Make the size 72pt. Highlight the text by dragging the Text Tool cursor across it, and increase the Tracking setting (the space between all the characters) to 200. If you keyed in the tracking amount, instead of using the arrow buttons, press Enter to apply the changes.
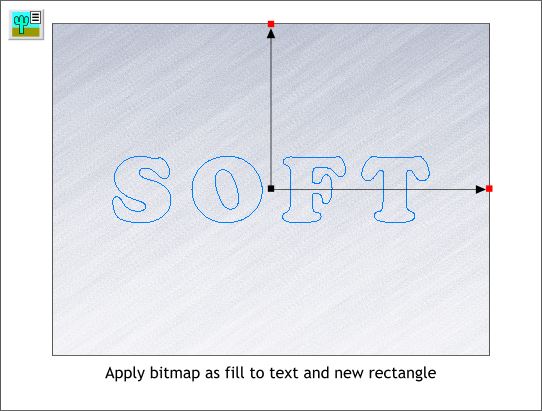
Step 6 Create a rectangle the same size as the bitmap. Select the text and the bitmap. Open the Bitmap Gallery. Find the last brushed aluminum bitmap, click it and then press Fill. This fills the text and the rectangle with the same bitmap.
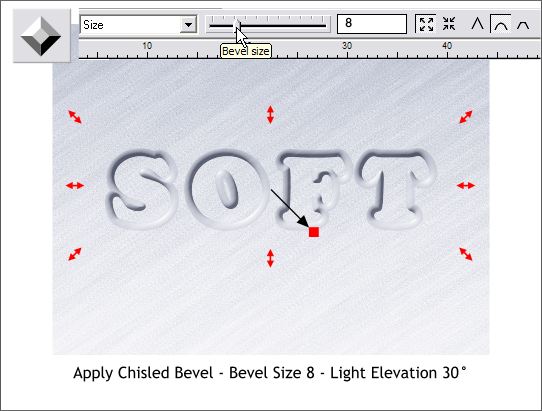
Step 7 Select the text with the Bevel Tool. Select Chiseled from the drop down list of Bevel Types on the Infobar. Xara automatically applies an Outer Bevel (indicated on the Infobar by the outward facing arrows icon). From the drop down list of Slider Options, select Size and change the size to 8. Press Enter to apply the change. Select Light Elevation from the drop down list and change the setting to 30. Finally drag the arrow in the center of the bevel (the Light Angle indicator) 180 degrees as shown above. This moves the light source to the bottom right of the text and gives the bevel a recessed look.
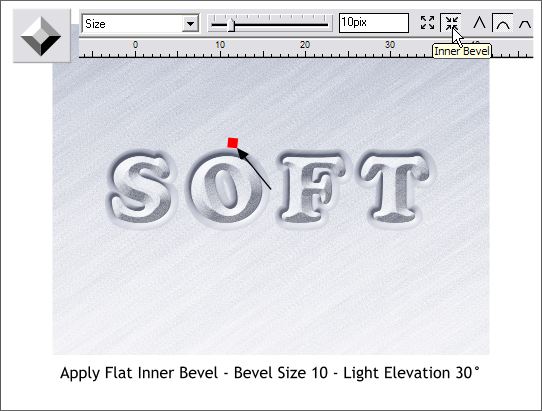
Step 8 Clone the beveled text. Select the text with the Bevel Tool and change the Bevel Type to Flat. Drag the Light Angle indicator arrow up and left and shown and change the Bevel Size to 10. And that is brushed aluminum with a embossed and debossed text effect thrown in at not additional cost. |


|