|
|
|
|
|
||||
 |
|||||
|
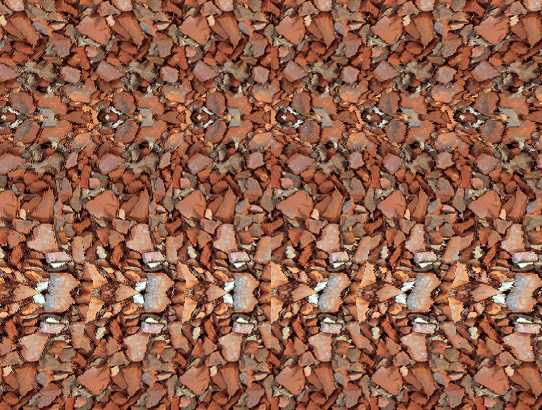
A passion of mine is creating 3D stereograms, such as the one shown below. Stereograms at first appear to be a random pattern of one sort of another but when you stare at them for a little bit, a hidden shape appears. In the image below, the hidden image is looking down upon the mouth of a volcano.
In a nutshell, stereograms are made by combing a grayscale depth image, and a repeating panel, in this case of rocks. If you look closely you can see the panel repeats 6 times. You can also see that each panel is slightly distorted. The software I use to create stereograms makes subtle shifts of the pattern in order to create the 3D hidden image which your brain sees and interprets as 3D. It is a fascinating and fun process and if there is any interest, I will create a tutorial to show you how an image such as the Volcano is created. You can also create stereograms, called "Float Objects" stereograms, using everyday objects (Zapf Dingbats symbols in the case of the following tutorial).
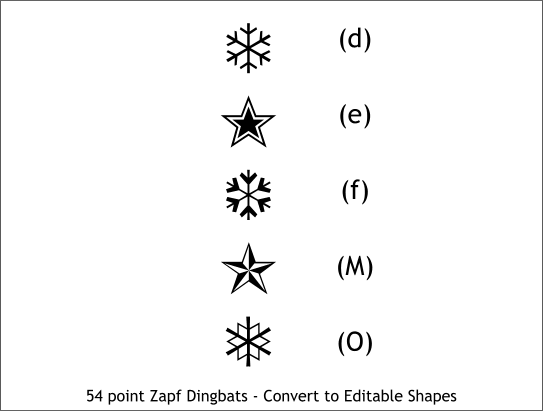
Step 1 Create a rectangle about the size of the above image and add the following Dingbats to the size shown. The letters in parentheses are the characters that produce the stars and snowflakes when formatted in Zapf Dingbats. Select all the symbols and Convert to Editable Shapes (Arrange). This step is very important so do not omit it.
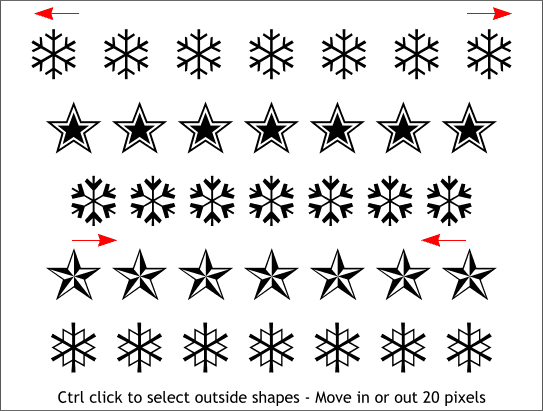
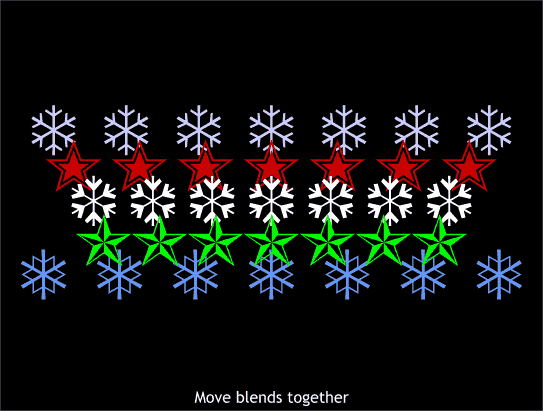
Step 2 Center align all the symbols and move them to the left side of the page. Clone the symbols (Ctrl k) and move the clones to the right side of the page. Select the Blend Tool and click on the first symbol and drag across to the clone. This creates a 5-step blend. Repeat this and create blends for the other pairs of symbols. If you stare at all the stars and snowflakes in the image above, you should get a sense of depth with everything appearing to float on the same level.
Step 3 Ctrl click on the top left snowflake and move it a bit with the left arrow key. Ctrl click on the top right snow flake and move it the same number of clicks to the right. Ctrl click on the left snowflake in the center row and more it towards the center a few clicks. Repeat to the right snowflake and move it the same distance to the center. Now when you stare at all the symbols the top row of snowflakes should appear to be behind all the other symbols and the middle row of snowflakes should appear to be in front of all the symbols. This is what makes all floating object stereograms work. The closer the objects are evenly spaced, the more they come forward. The farther apart they are evenly spaced the more they recede. By creating blends of the symbols the symbols will be evenly spaced when you move the firstr or last symbol one way or the other.
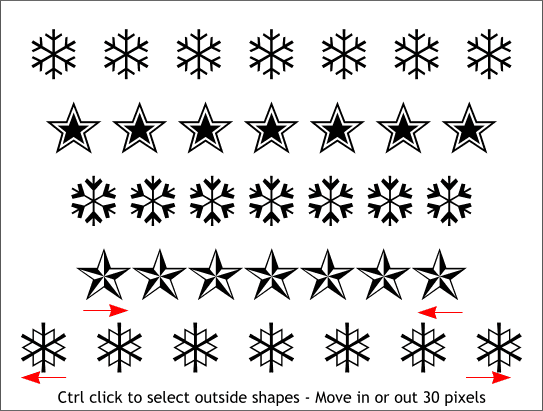
Step 4 Reposition the end symbols of the bottom two rows as shown. Now when you look at all the symbols you should see five distinct depths.
Step 5 Coloring the symbols, placing them over a dark background and overlapping the symbols according to depth makes the difference more obvious.
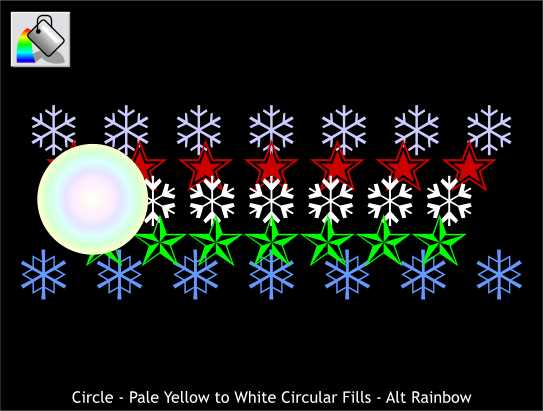
Step 6 We can add a dash of pizzazz by adding a flare to the middle row of snowflakes. Create a circle about the size shown and apply a pale yellow and white (center) Circular fill with the Alt Rainbow option.
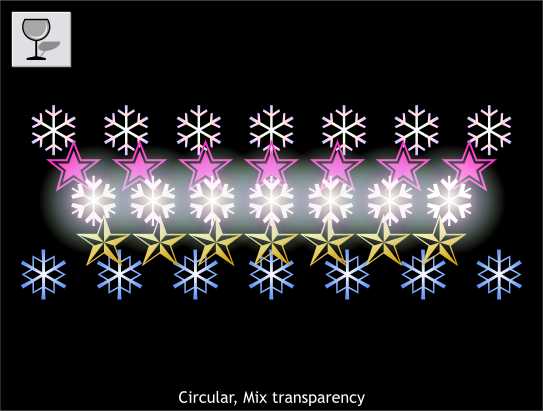
Step 7 Apply a Circular, Mix transparency to the circle. Duplicate the circle 6 times and center each over the center of the snowflakes. This adds a magical glow.
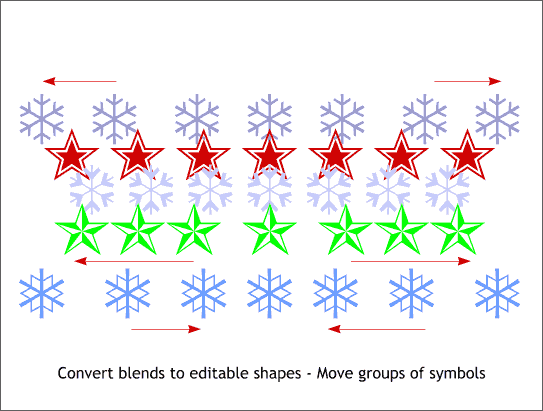
Step 8 Now here is another wrinkle. You can move opposing symbols in the same row to create a variety of depths. Select each of the blends, Convert to Editable Shapes (Arrange menu) and then ungroup. Select the top left two symbols and move them a few clicks to the left. Move the top right two the same distance to the right. This creates the effect of the two left symbols being in front of the third symbol, then the next two coming forward, etc. Move the other rows as indicated with the arrows and see what happens when you do this. Do you get the idea that this is something that could keep you from doing any serious work for days on end?
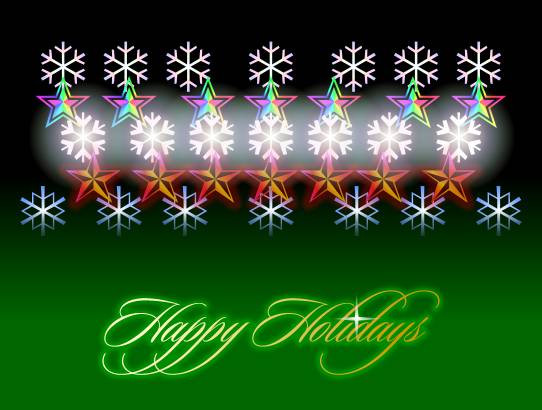
And here is the floating object stereogram taken to the next level and made into a holiday greeting card. Because of all the different depths on each row the symbols should appear to dance in and out. Have fun!
|

|