 |
 |
| H 1 2 3 4 5 6 |
|
|
|
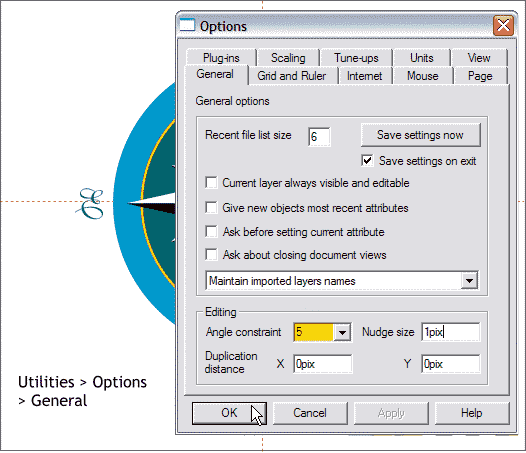
From the Utilities menu, select Options.... In the General tabbed section change the Angle of Constraint amount to 5. Press OK.
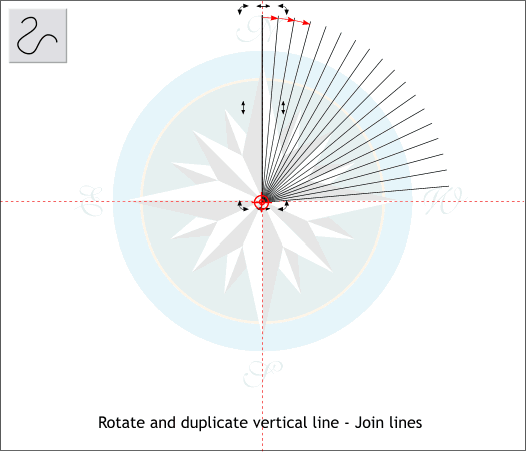
Using the Shape Editor Tool, create a line beginning at the intersection of the two guidelines and extending vertically beyond the largest circle. Switch to the Selector Tool and click twice to enable rotate/skew mode. Drag the center of rotation bulls eye to the intersection of the two guidelines. Hold down the Ctrl key and drag the top right curved arrow to the right until the line snaps 5 degrees (the amount we just set in the Page Options dialog). Before you release the left mouse button, click the right mouse button to drop a duplicate line. Repeat this until you have all lines except the one at the 3:00 O'clock position. Select all the lines and Arrange > Join.
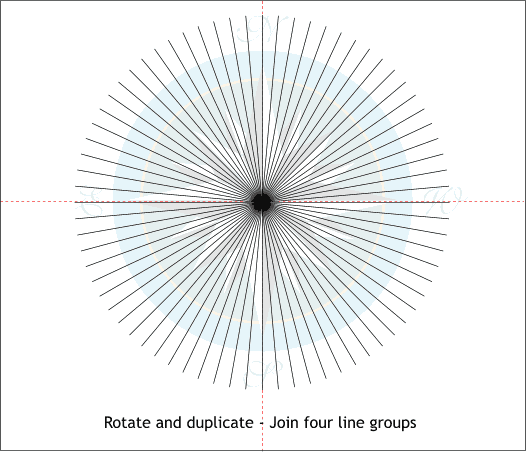
Click twice on the joined lines, drag the center of rotation bulls eye to the intersection of the two guidelines. Rotate and drop three more duplicates. Select all four line groups and Arrange > Join.
Hold down the Shift key and select the lines and the orange circle and bring them to the front (Ctrl f). With the lines and the orange circle selected, select Combine Shapes... Subtract Shapes (Arrange ). Then from the Arrange menu, select Break Shapes. The joined lines will disappear (indicated with the blue dashed lines) and the orange circle will be split into 72 pieces.
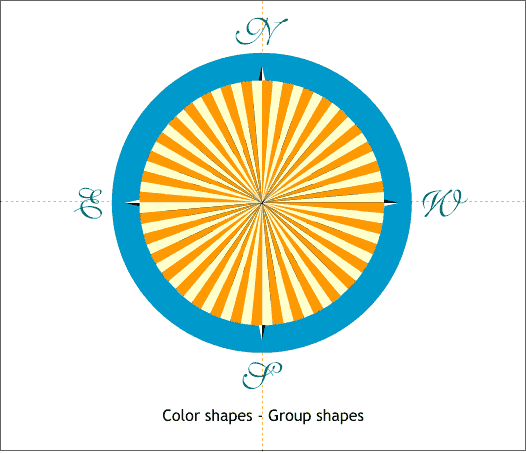
Color every other slice pale yellow. Group all the orange and pale yellow objects.
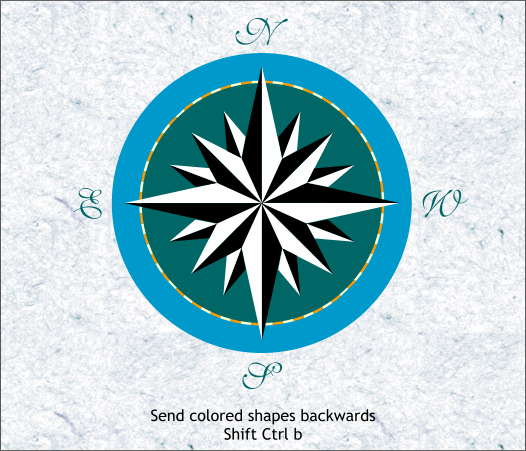
Select the grouped compass rose and ungroup it (but not the yellow and orange group). Select the orange and yellow group and repeatedly press Shift Ctrl b until the orange and yellow slices fall into place behind the blue green circle.
|
|
|
|
|
|
|