 |
 |
| H 1 2 3 4 5 6 |
|
|
|
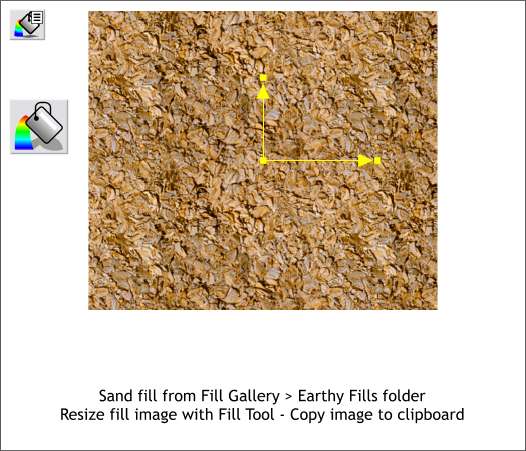
In this tutorial, you'll create the look of sun-baked earth with a series of deep cracks.
Create a rectangle about 350 x 300 pixels. With the rectangle selected, open the Fill Gallery on the Infobar and select the Sand fill from the Earthy Fills folder. Press Fill to apply the fill to the rectangle. Select the rectangle with the Fill Tool. Edit the resizing control handles as shown. TIP: You can also right click on the filled rectangle with the Fill Tool and change the Bitmap Resolution number on the Infobar to 295dpi. Press Enter to apply the change.
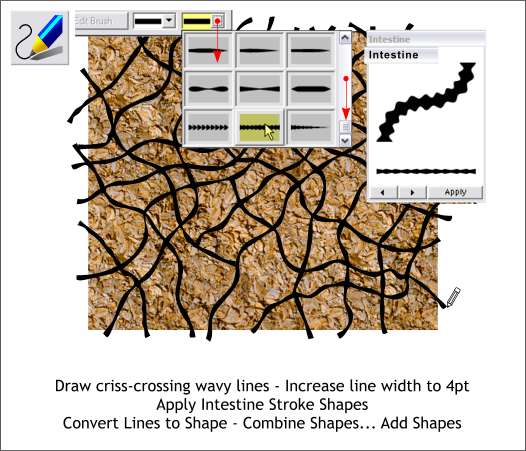
Select the Freehand and Brush Tool. Set the Smoothness slider on the Infobar to about 30%. Draw a series of crisscrossing wavy lines making a sort of grid pattern. Select all the lines (Drag a rectangle around all the lines with the Selector Tool, then Shift click the rectangle to deselect it). Select the Freehand and Brush Tool. From the Select an Existing Brush Shape drop down list, select Intestine (all the way at the bottom). Set the outline Width to 4pt. Select all the lines and Arrange > Convert Line to Shape. Then Arrange > Combine Shapes... Add Shapes.
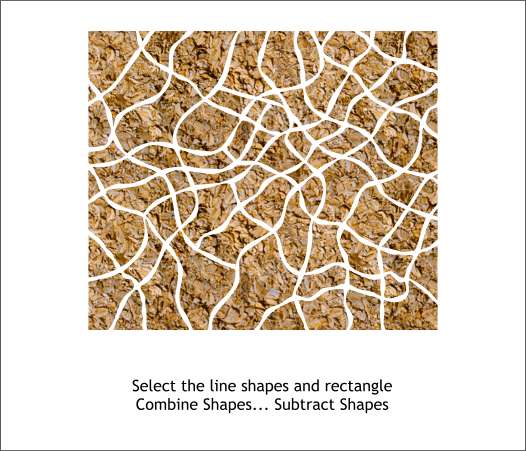
Copy the earth-filled rectangle to the clipboard (Ctrl c).
Select the combined lines and the filled rectangle. Arrange > Combine Shapes... Subtract Shapes. The lines and the portion of the rectangle beneath the lines will disappear.
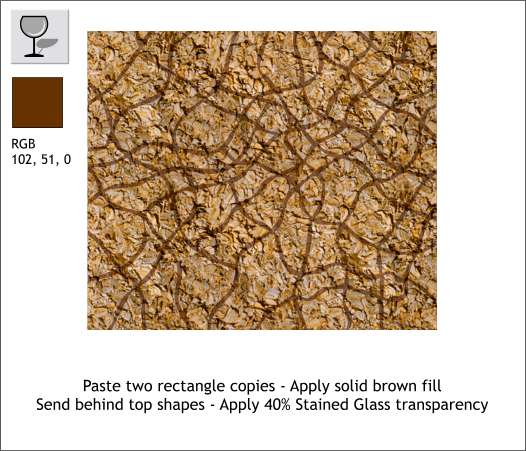
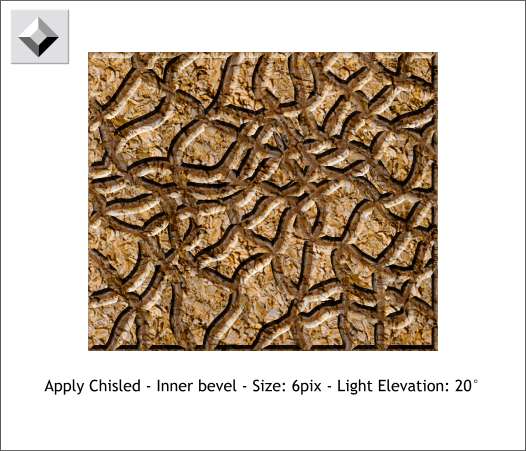
Press Shift Ctrl v 2 times to paste two copies of the filled rectangle on top. Select the top rectangle and change to fill to Flat and the Fill color to dark brown. Select the rectangle with the Transparency Tool and apply a Flat, Stained Glass transparency. Move the Transparency slider to 40%. Hold down the Alt key and click twice on the top rectangle to "drill down" and select the next rectangle down. Hold down the Shift key and click on the top rectangle. The status bar in the lower left corner of the screen should display 2 Objects on Layer 1 Selected. Press Ctrl b to send both selected rectangles to the back. Your drawing should look that the illustration above.
Select the top rectangle (actually a group of shapes) with the Bevel Tool. Drag any of the red arrow control handles towards the center a small amount to apply an Inner Bevel. Select Chiseled from the Bevel Type drop down list. From the Slider Type drop down list on the Infobar, select Size and change the Bevel Size to 6pix. Press Enter to apply the change. Select Light Elevation from the drop down list and set the slider to 20 degrees. Press Enter to apply the change.
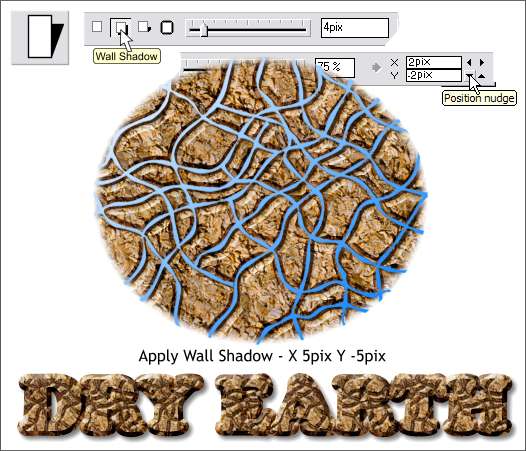
Using the Shadow Tool, apply a Wall Shadow. Change the X and Y coordinates for the shadow offset to X 2pix and Y -2pix. I made a bitmap of the fill and used it to fill some type to which a bevel was added. This same technique could be used to make alligator skin. I also added a copy of the crisscrossing line shapes, trimmed to the shape of the oval, and applied a Linear fill to look like rain water in the cracks.
|
|
|
|
|
|
|