 |
 |
| H 1 2 3 4 5 6 |
|
|
|
When you first install Xara X, the Galleries, which are located in the top right area of the Infobar, such as the Fill Gallery and the Clip Art Gallery are bare. The Xara X CD contains the content for these galleries as well as a collection of Fonts. The process for adding content to any of these galleries is the same.
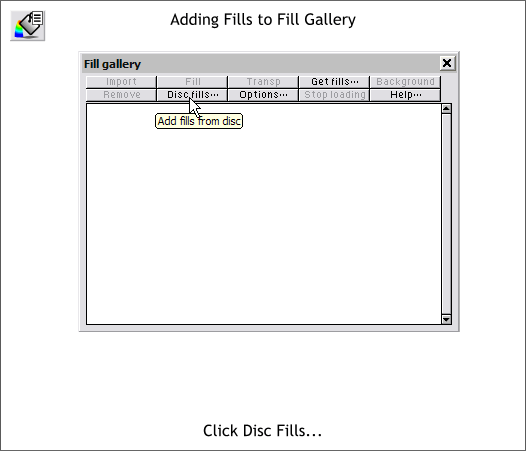
Step 1 If you open the Fill Gallery or the Clip Art Gallery and what you see is a lot of white space, or there are folders but with nothing in them, here is what you need to do. Insert the Xara X CD in your computer's CD drive. Open the Gallery (We will use the Fill Gallery for this example) and click Disc Fills...
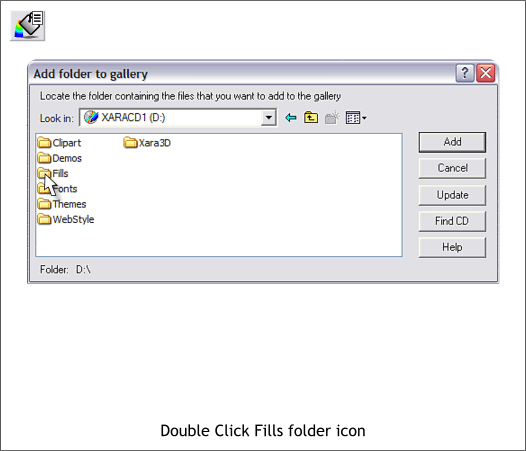
Step 2 Xara will attempt to located your CD drive. If it cannot find the drive, browse (search in the Look in: drop down list) to the drive containing the XaraXCD1 disc. Double Click the Fills folder icon.
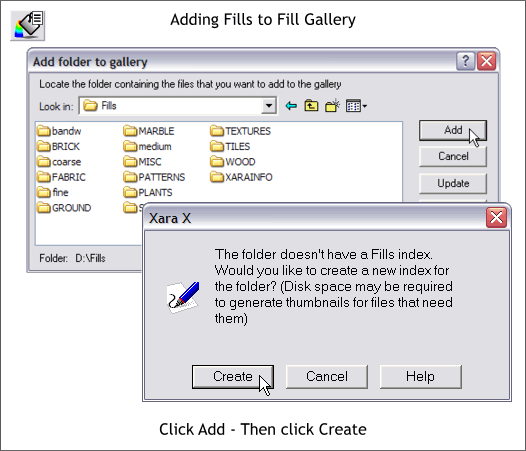
Step 3 After you double click the Fills folder icon, press Add. Xara will inform you that the Fills Gallery does not have a Fills index and would you like Xara to create this index for you. Click Create (Yes).
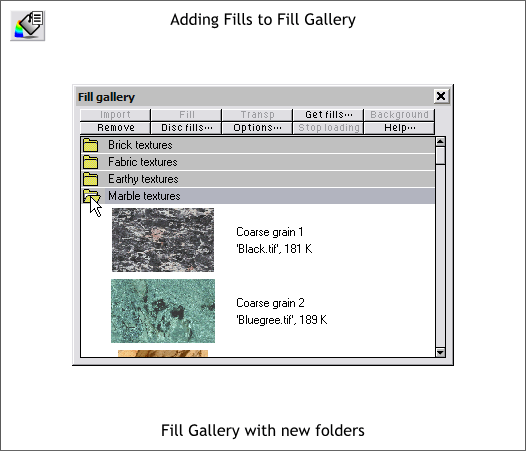
Xara will create an index for all the fills and create a small thumbnail image for each fill. This may take a few minutes so be patient. The index tells Xara the location of the fills, clip art or fontsusually the Xara X CD. The actual fills remain on the CD disc unless you copy all the folders to your hard drive. So in order to apply any of the fills, or open any of the clip art images, or install any of the fonts on the disc, you need to have the Xara X CD in your CD drive. NOTE: You can also create your own folders of images and fills on your hard drive. To add these to your Clip Art or Fill Gallery, click Disc Fills... then browse to the folder on your computer containing the fills or clip art and press Add. You will also need to create the Index file (XaraInfo).
|
|
|
|
|
|
|