 |
 |
| H 1 2 3 4 5 6 Download Zipped Tutorial |
|
|
|
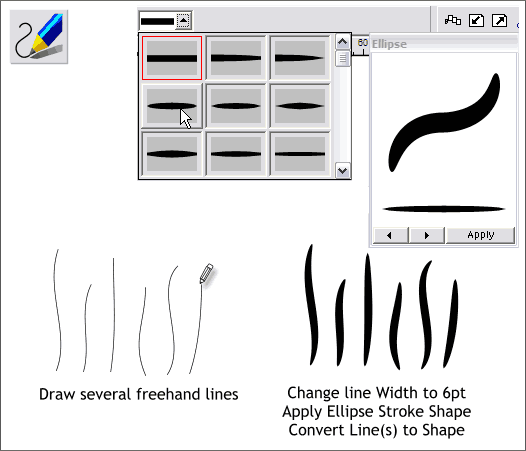
For our final mini-tutorial we'll create a pine tree branch and decorate it with some of the ornamental things we have created in the other tutorials.
Select the Freehand and Brush Tool and draw a series of lines about the height of those shown above. Select all the lines with the Freehand and Brush Tool holding down the Shift key to multiple select and change the line Width to 8pt. From the Select an Existing Stroke Shape drop down list, select the Ellipse stroke shape to create a pine needle shape.
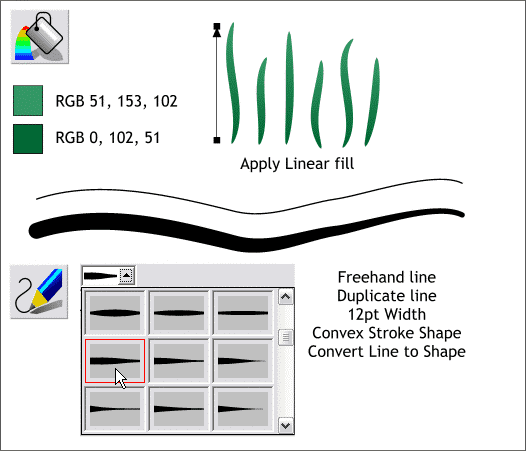
Select all the lines and Arrange > Convert Line to Shape. Apply a Linear fill using the 2 colors shown. Create a longer branch shape. Duplicate the line (Ctrl d). Change the duplicate line's Width to 12pt and apply a Convex stroke shape. Open the Line Gallery (the arrow icon on the upper right area of the Infobar). From the Set Line Cap drop down list, select Round Cap.
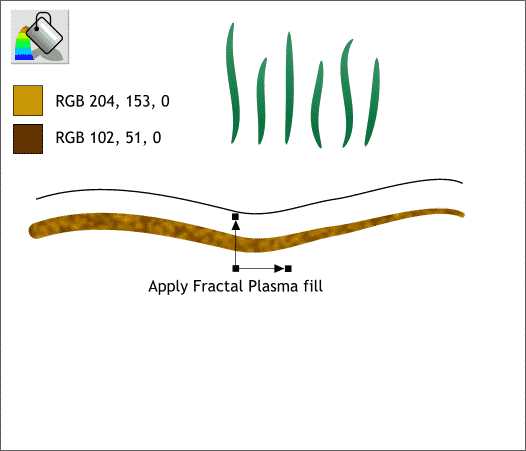
Convert the line to shape (Arrange) and apply a Plasma Fill. Reduce the size of the fill pattern as shown to give the branch a mottled appearance.
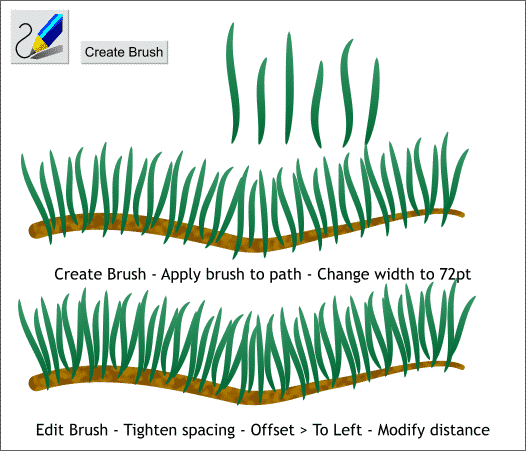
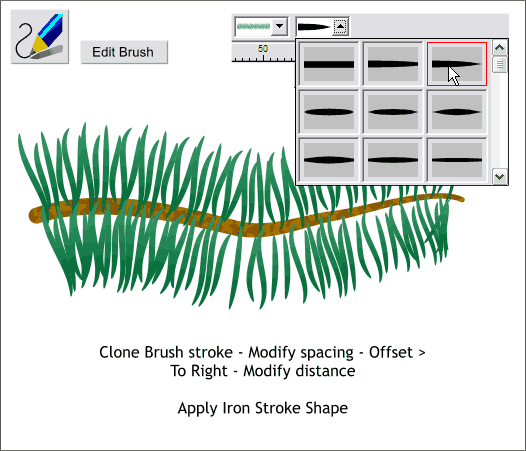
Select the pine needle shapes and then switch to the Freehand and Brush Tool. Press Create Brush. Place the original line over the branch shape and open the Line Gallery > New Brush Strokes folder. Select the Pine needles brush and press Apply to apply the brush to the selected line. Press the Edit Brush button and modify the Spacing. In the Offset tabbed section, select To Left from the drop down list and move the slider until the bottom of the needles are over the branch.
Clone the stroked line. Modify the spacing so the needles are not mirroring the top row. Modify the Offset to To Right and modify the distance. Apply an Iron stroke shape to each stroked brush to create a mild tapering.
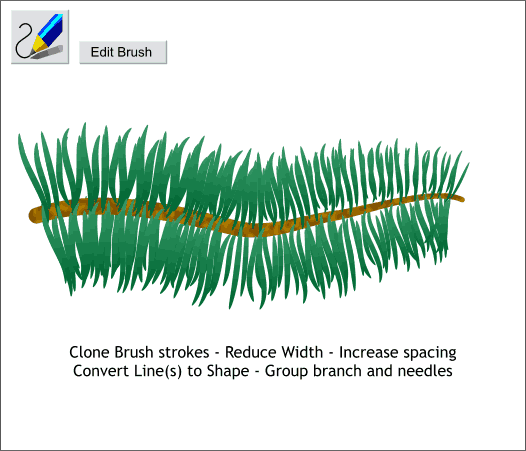
Clone the two strokes and reduce the line Width and increase the Spacing settings. Group the branch and needles (Ctrl g).
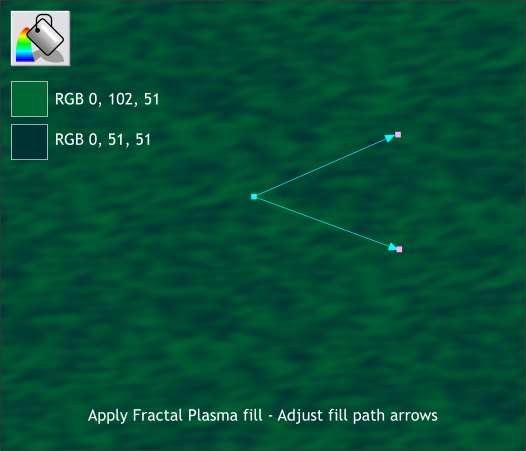
Draw a rectangle about the size shown above. Apply a Fractal Plasma fill using the 2 colors shown. Adjust the fill path arrows as shown.
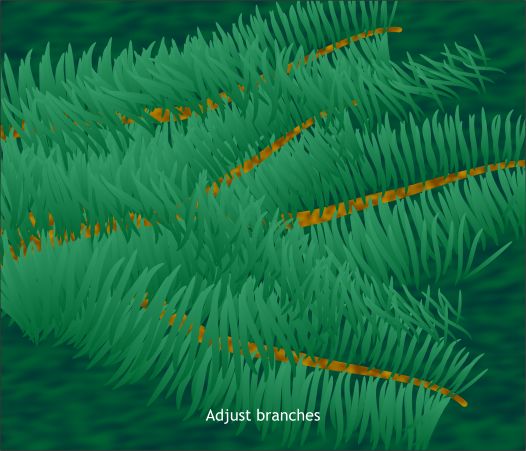
Make a few duplicates of the pine branch and arrange them over the background rectangle. With the Freehand and Brush Tool, select the pine needles brush from the Select an Existing Brush drop down list and draw in some extra needles freehand.
This is the last Workbook. At least for this year. If you have enjoyed these tutorials and find them useful or even challenging, I'd love to hear from you. Please use the feedback form on the next page to send me your thoughts. Wishing all of you a Joyous and Peace-filled Holiday Season. Gary W. Priester
|
|
|
|
|
|
|

 Apply some of the brushes we created and add a Buckyball ornament or the Christmas Tree ornament
we created. To create the glow over the lights, create a circle with a Circular fill. Create a blend of circles with the Alt Rainbow option. Convert to Editable Shapes and Ungroup. Apply a
Circular transparency to each of the circles and center them over the lights and in the reflection of the Buckyball ornament.
Apply some of the brushes we created and add a Buckyball ornament or the Christmas Tree ornament
we created. To create the glow over the lights, create a circle with a Circular fill. Create a blend of circles with the Alt Rainbow option. Convert to Editable Shapes and Ungroup. Apply a
Circular transparency to each of the circles and center them over the lights and in the reflection of the Buckyball ornament.