|
|
|
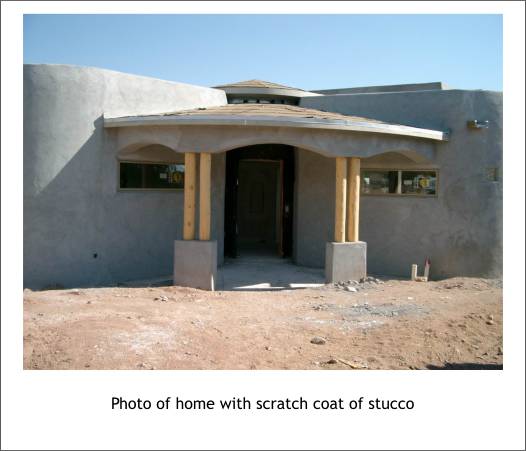
The builder of this home needed a photo for publication in which the final "color coat" of stucco was applied. The local building practice is for two coats of gray stucco and a final coat of colored stucco to be applied to all stucco buildings. A week to 10 days are needed between coats for the stucco to cure. As the deadline occurred before the final color coat could be applied, I was asked to fake the color coat. Here is how I did it, plus a few other bits of retouching I added to make the house look more finished.
The photo provided had only the scratch coat (the first of 3 coats) of stucco applied. And as the home was still in the building process, there were stickers on the windows, two pipes sticking up to the right of the door, and the ground was a mess of bits of stucco and other debris.
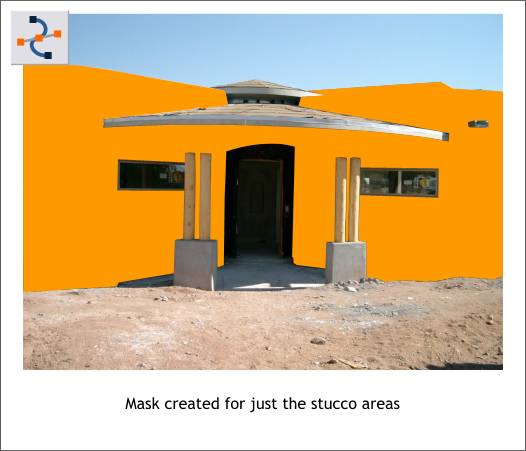
Using the Shape Editor Tool, a shape (shown in orange) of the areas that needed to appear to be stuccoed was created.
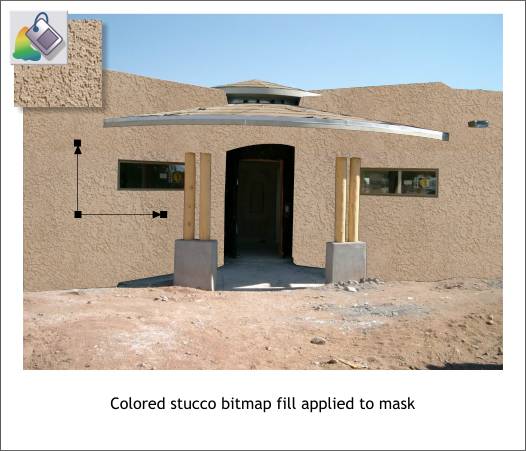
A personal photo of stucco was imported into Xara automatically placing it in the Bitmap Gallery. The stucco image was selected, the orange mask shape selected, and the bitmap fill applied. Selecting the filled shape with the Fill Tool, the size of the fill was reduced to a more appropriate scale.
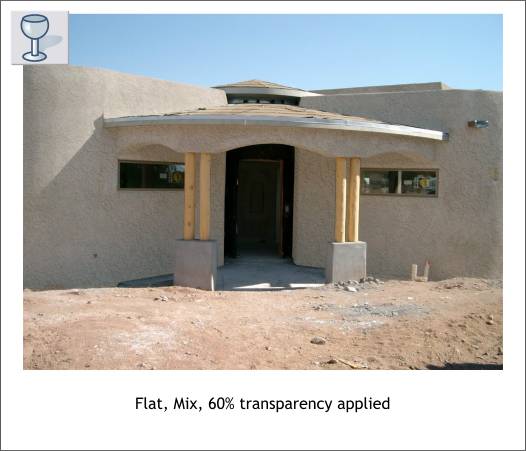
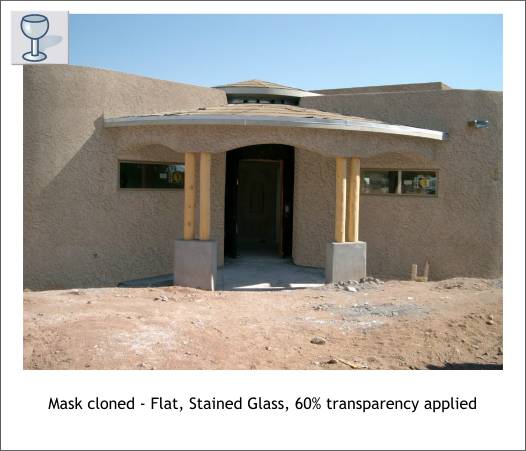
A Flat, Mix, 60% transparency was applied to the stucco filled shape revealing the light and dark portions of the photo below.
The mask was clone duplicated (Ctrl k) and the transparency type changed to Stained Glass which deepened the color of the stucco and made it closer to the desired stucco color. This was all that had been requested.
I went further. A new mask was made for the area around the door and the same technique used to mimic the stucco. Shapes covering the windows were created and a Fractal Plasma fill applied using the dark of the window and reflected sky colors sampled from the actual photo with the Color Editor's eyedropper tool. Linear transparency was applied to reveal the portions of the windows without the manufacturer's stickers. A bitmap of the door area was created and lightened considerably in the Xara Picture Editor. A mask of just the inside of the door shape was created and the lightened area inside the house was masked inside the door shape using Arrange > Combine Shapes... Intersect Shapes.
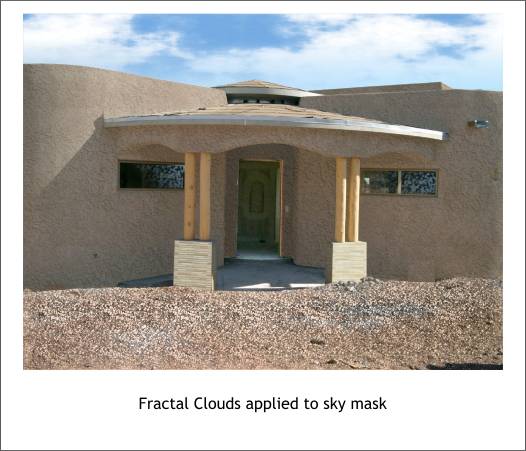
A small bitmap was made of the stucco next to the two pipes to the right of the door and was used to cover the pipes. A two color Fractal Clouds fill was applied to a shape matching the sky. A Linear transparency faded the bottom of the fill into the real sky.
So while the photo does not look like the home is finished, it does look a lot better than the original. And the best part, it was all done in Xara X1.
This wraps up Workbook #29. I hope the material presented was helpful and presented in a way you could understand and reproduce. Your comments, questions, and other thoughts are always encouraged. Please use the feedback form on the next page to let me know how I did. Gary W. Priester
|
|
|
|


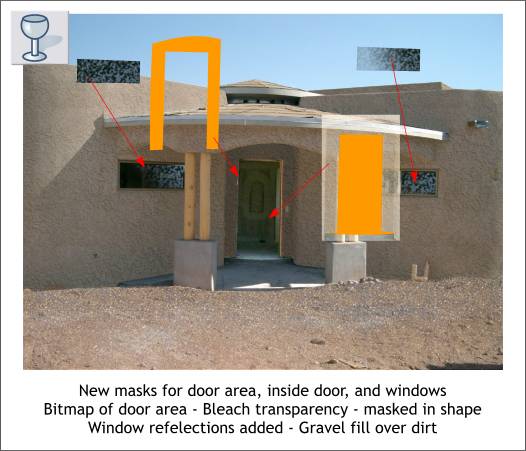
 A mask was created covering the dirt area and a Gravel fill applied from the Fill Gallery >
Earthy Fills folder. A Linear, Brightness transparency revealed the shading of the foreground dirt making it appear a little bit cleaner. And finally, I create a
sandstone fill (shown left), which I applied over the cement blocks under the pine beams as the builder intends to cover the cement with thin pieces of sandstone.