|
|
|
There was a request recently by Paul B in the Xara X Conference for a reflection tutorial. So here goes.
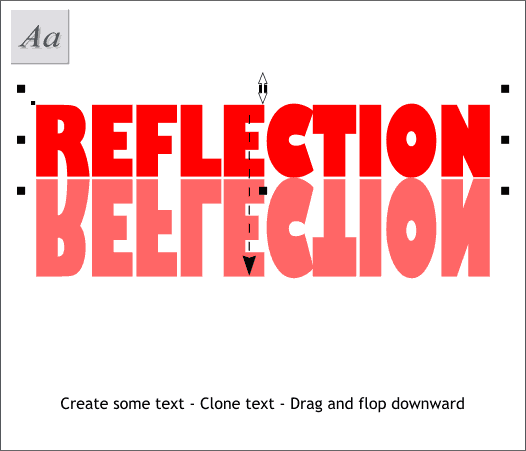
In this tutorial, we'll create a reflection of text onto water. Using the Text Tool, create the word REFLECTION (or a word of your choosing) using a bold font about the size shown above. Clone the text (Ctrl k). Drag the top center bounding box handle (the small black boxes) down past the bottom of the text and about 1/3 again as tall.
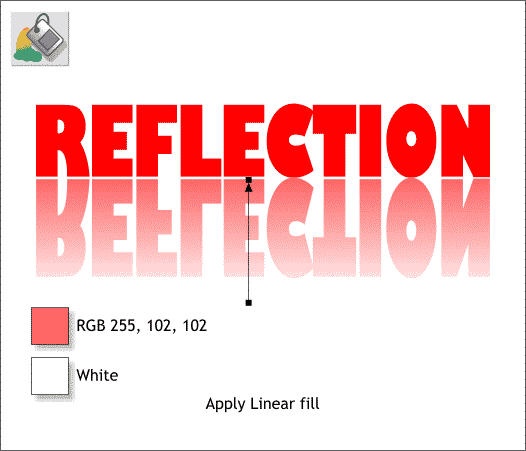
Select the flipped text with the Fill Tool. From the drop down list of Fill Types on the Infobar, select Linear. Arrange the fill path arrow as shown. Change the top color to RGB 255, 102, 102. (Click the top control point then open the Color Editor (Ctrl e)). TIP: You can apply an "interactive Linear fill" by clicking on the object with the Fill Tool then dragging in the direction you want the fill to go.
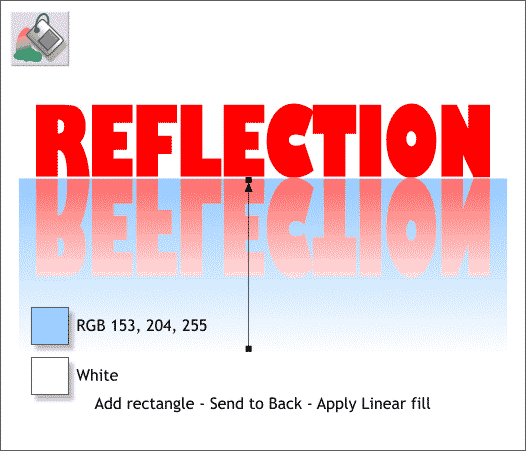
Add a rectangle behind the text (Ctrl b for Send to Back) and apply a Linear fill using the 2 colors shown. Adjust the fill path arrow as shown. This is a simple reflection. Next we will make a more complex reflection. TIP: A reflected object is usually lighter than the reflecting object. In a reflection, lights are a bit darker and darks a bit lighter.
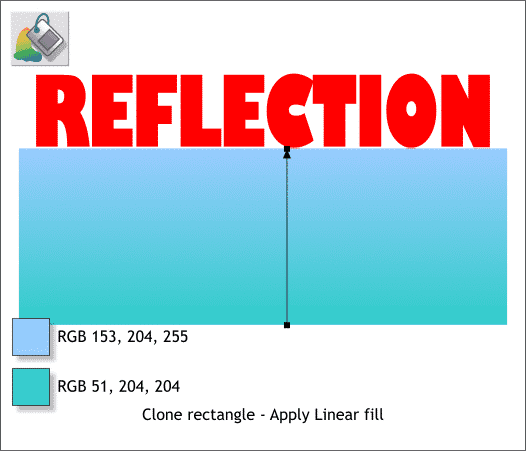
Clone the rectangle and change the fill colors.
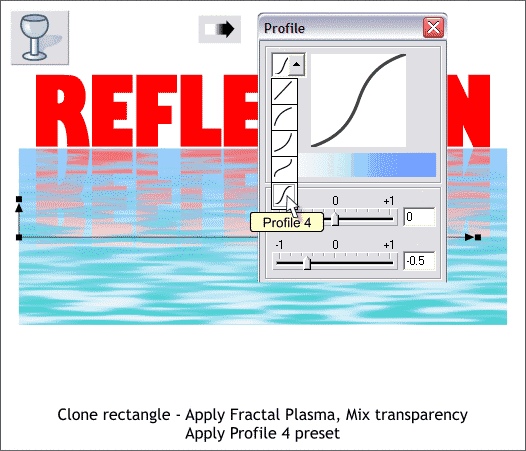
Select the rectangle with the Transparency Tool. From the drop down list of Transparency Shapes on the Infobar, select Fractal Plasma. Adjust the fill path arrows as shown. Click the Profile arrow icon on the Infobar to open the Profile dialog. From the drop down list, select Profile 4.
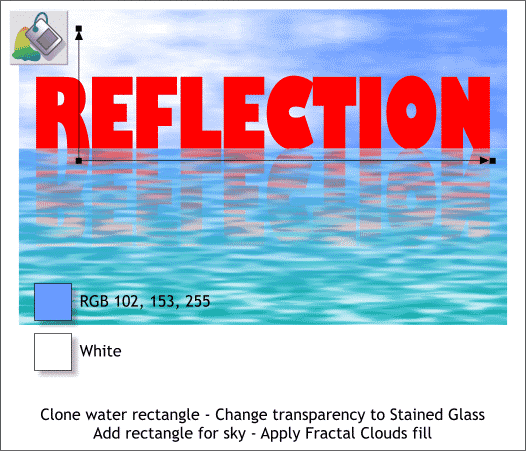
Clone the water rectangle and change the Transparency Type to Stained Glass. Add a rectangle behind the text and above the water for the sky. Apply a Fractal Clouds fill using the 2 colors and adjust the fill path arrows as shown. The problem with the water and reflection is it is too uniformly sharp. In reality as the the water gets farther away it will not be as in focus. We'll address this in the next step.
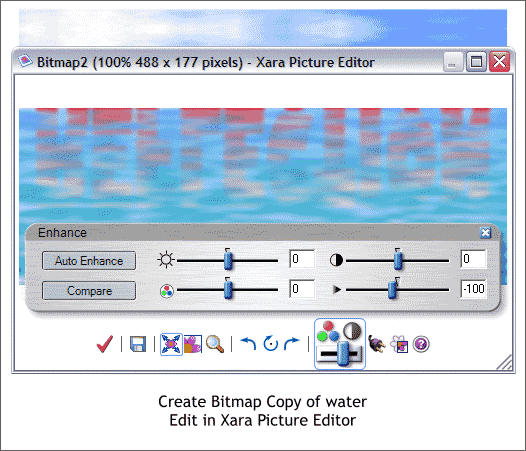
Select the reflection and water objects. From the Arrange menu. select Create Bitmap Copy... Use the True Color color depth option, and hold down the Shift key and press Create to place the bitmap directly on top. Double click on the bitmap to open the Xara Picture Editor (Xara X1 only). Press the Enhance icon (or Ctrl e). Move the Blur / Sharpen slider to the left to about -100. Press the red check icon and accept the changes.
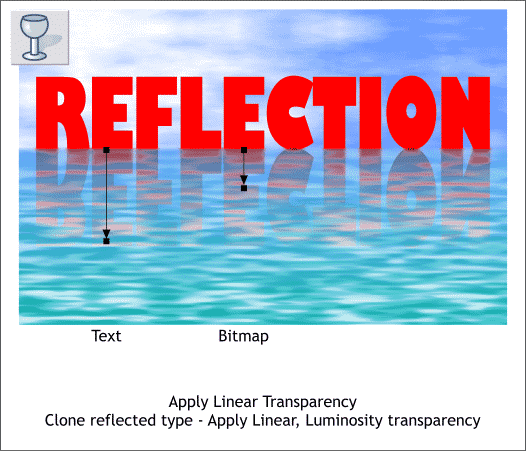
Final steps. Apply a Linear, Mix transparency to the bitmap. Adjust the fill path arrow as shown with the top value at 0% (no transparency) and the bottom at 100% (totally transparent). This softens the water closest to the reflecting text. Hold down the Alt key and click over the reflected text until you "drill" down through the layers and select the reflected text. Clone the text (Ctrl k). Apply a Linear, Luminosity transparency adjusting the fill path arrow as shown. We could go on and on, but I think you get the idea. Thanks Paul for the request. I hope this answers your question.
|
||
|
|


