|
|
|
One of the most powerful operations included in the new Live Effects Tool (Ctrl F5) is 3D Bump Map. In it's simplest form, the bump map is what most pixel editing applications call Emboss. But it is a lot more than just an emboss effect as we shall see.
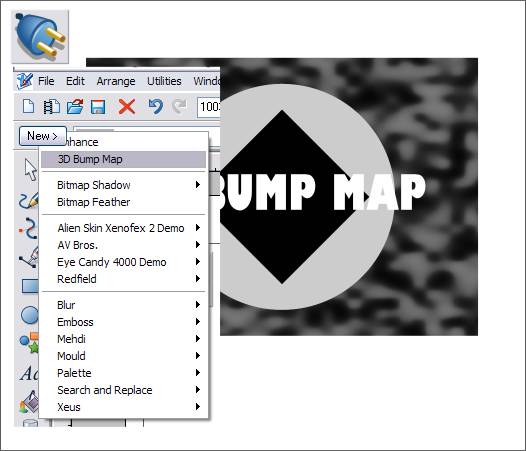
Bump Maps, as with all of the Live Effects Tool filters and tools, can be applied to vector objects as well as bitmaps. The example above that we will use to demonstrate the Bump Map options consists of a 2 color Fractal Plasma-filled rectangle, a circle, rotated square, and some text. The objects do not have to be grouped but they must all be selected at the same time. For the best effects, there should be a lot of light and dark differences. Select the objects or bitmap to which you wish to apply the 3D Bump Map. Click the Live Effects Tool button then New. From the drop down list, select 3D Bump Map. NOTE: The option on the drop down menu just above 3D Bump Map is Enhance and is the same Enhance dialog found in the Xara Picture Editor. You can Enhance vector and bitmap objects. Bitmap Shadows and Bitmap Feather are also included in this menu. The advantage of applying these effects with the Live Effects Tool is the effects then are saved with the image and may be edited at a later time.
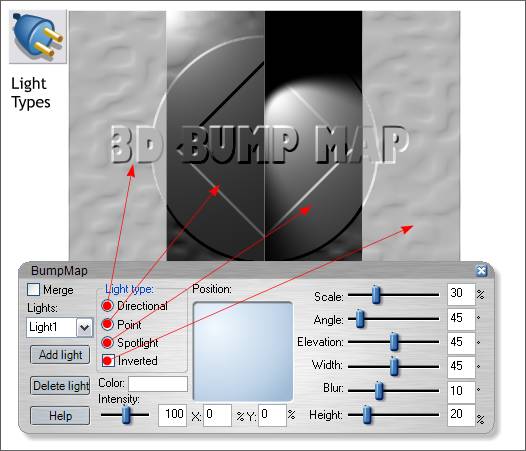
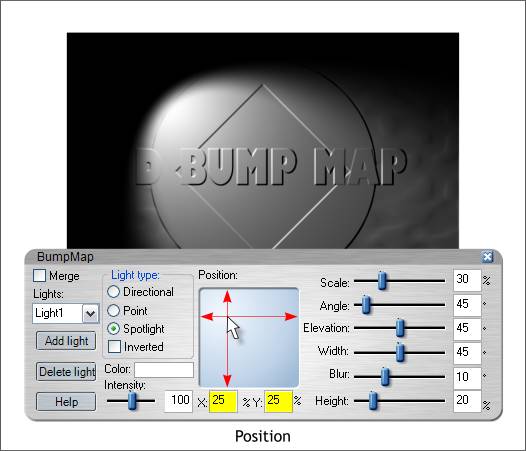
I'll try to cover the main controls and explain how they work. There are 4 Light Type settings as illustrated above. Directional is similar to the traditional emboss tool with which you may be familiar. Inverted, the last option, reverses the embossed effect and creates a debossed effect (objects pressed in instead of popping out). Point and Spotlight are two directional lighting effects.
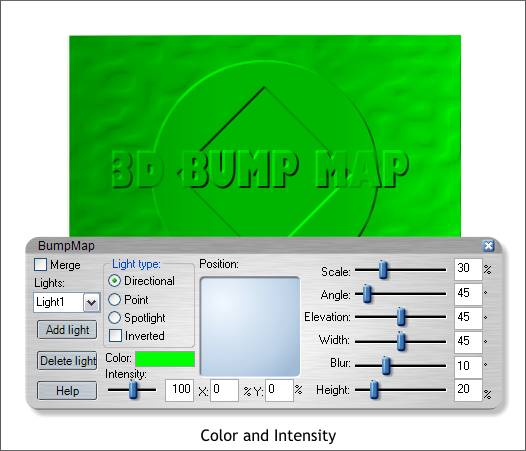
Click the Color swatch to open a palette of colors which you can select for an overall lighting effect color.
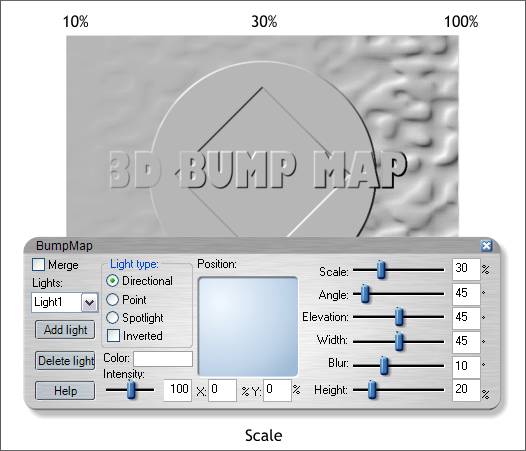
The Scale slider determines the strength of the emboss effect. 30% shown center is the default setting. Increasing the setting to 100% makes the embossed effect most pronounced while at 10% the effect is very subtle.
When you select Spotlight, you get an lighting effect that resembles a spotlight. You can drag the source of the spotlight in the blue Position window or you can enter specific numbers in the X and Y text entry boxes. In either case the spotlight changes position on the image in real time. NOTE: You can add more lights if you wish by clicking Add Light. New lights are added to the drop down list and may be edited individually.
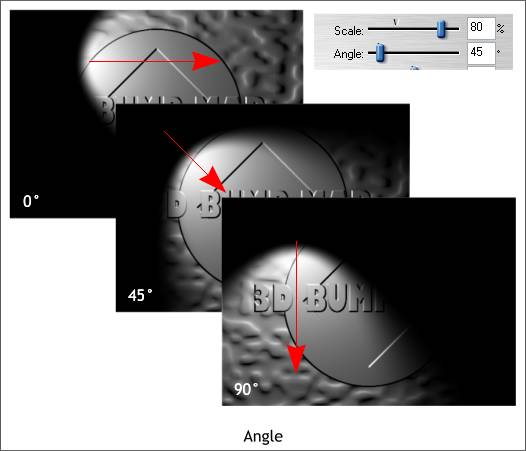
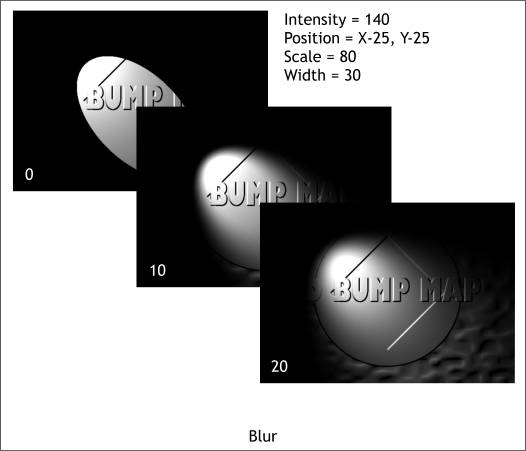
The above example uses the Spotlight setting. The Scale has been increased to 80% which makes the embossing effect more dramatic. At an Angle of 0 the spotlight shines from left to right. At 90 degrees the light shines from top to bottom. As you move the Angle slider the new light direction is displayed in real time.
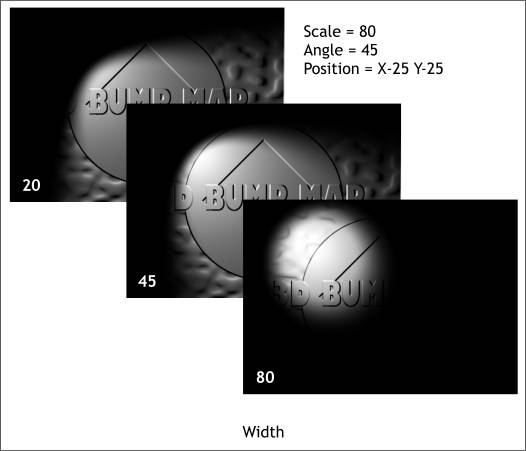
Width is similar to having an iris control on the spotlight. At 20% the opening is large and at 80% the opening is almost a circle.
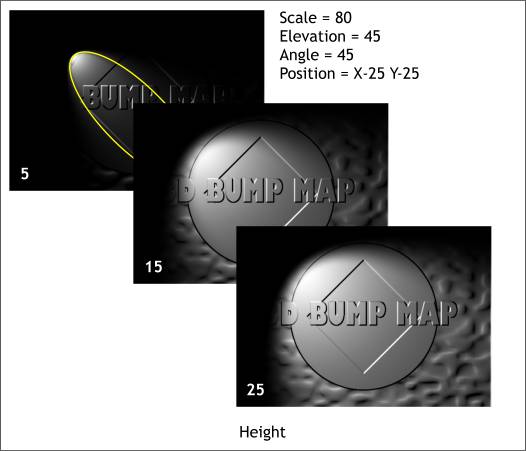
Height is like a barn door lens cover like what you would find on a theater spot light and which controls the amount of light released. At lower numbers the focus of the spotlight is very narrow. At 25% the focus is very wide.
Blur, as shown above, determines show sharp or diffused the spotlight appears. 0% produces a very hard edge to the light while 20% is very diffused. Again, this is similar to a glass focussing lens that you might find in a theater spot light. The best way to see how these controls work is to play around with the different settings. (You can't break it you know).
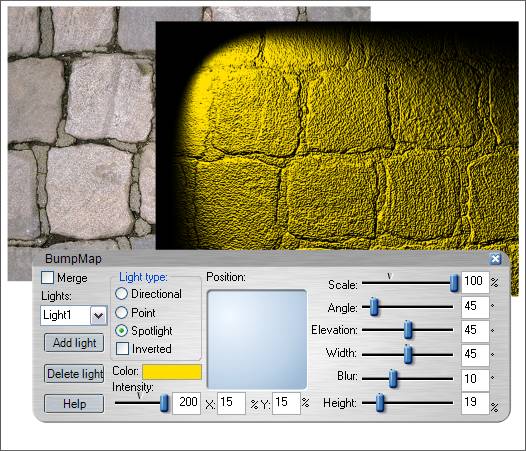
In this next series of examples, well apply a yellow spotlight to the cobble stone image found in the Fill Gallery (Shift F11) > Earth Fills folder. The Color setting is a modified warm yellow and the Intensity setting which is like a dimmer switch on the spotlight has been set to maximum intensity, 200% The Scale setting has been set to the maximum amount to emphasize the depth of the image.
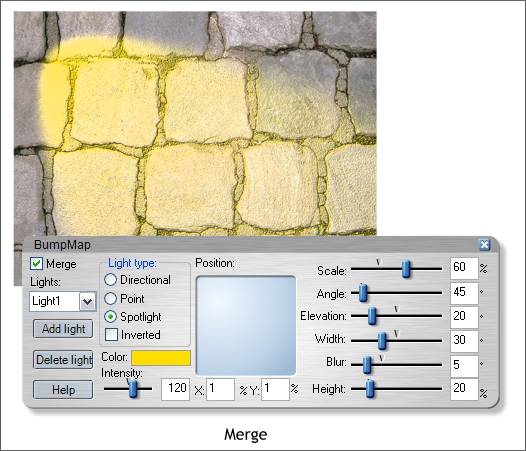
Merge applies the bump map embossed and lighting settings to the selected image and creates a blend of the two. In the example above, the Intensity setting was reduced to 120. The Scale setting reduced to 60. And the Elevation, Width, and Blur settings modified. The Position of the light source was reduced considerably. Once you merge the image, you will need to do more editing to achieve the best results.
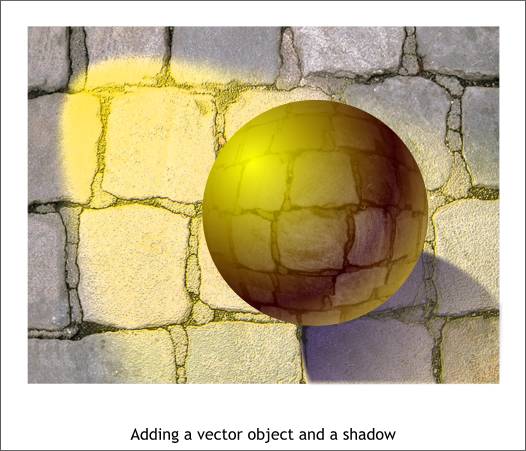
This is an example of a vector object introduced into the merged bump map effect. There was a lot of complex steps that went into the image above. The shadow was an ellipse, filled with the cobblestones before the lighting effects were applied, contoned to a purple image, and modified with the Enhance setting to reduce the saturation and contrast. There were way too many steps to go through here but maybe in a future tutorial.
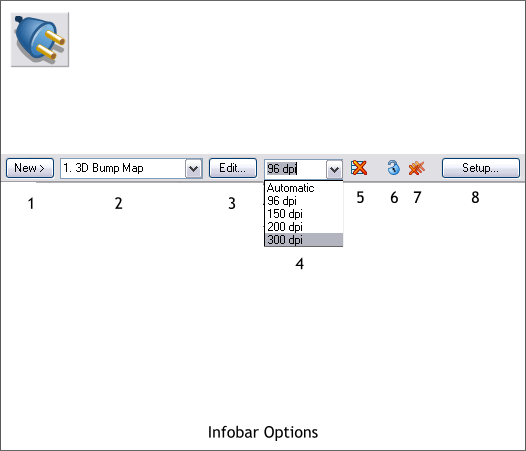
Finally, 3D Bump Map, like any of the other effects and filters found in the Live Effects Tool, remains attached to the image and can be edited at any time whether five minutes from now or five months from now (maybe even longer :-) ) When you select an object to which an Live Effect Tool effect or filter has been applied, a set of icons appears on the Infobar.
|
||
|
|
