|
|
|
One of Xara's most powerful tools, and one which sets it apart from every other application, is the Transparency Tool (F6). When Xara was introduced and demonstrated at the CorelWorld Conference in Dallas over 10 years ago (Corel marketed Xara for a few years until Xara Ltd. took control of the product back), the Transparency Tool blew everyone away. All of the attendees at the conference could not wait to get their hands on this incredible new product. While at this time CorelDRAW 6 had some flat transparency abilities, it had absolutely nothing that could compare with Xara's gradient transparencies. Corel quickly copied Xara's best features, including gradient transparency. But they have never matched the ease of use or Xara's exceptional anti-aliased display which makes the gradient transparency so smooth. So your editor thought it might be nice to cover the Transparency Tool in depth for some of the newer users who may not have discovered the power, depth, and beauty of this unique tool.
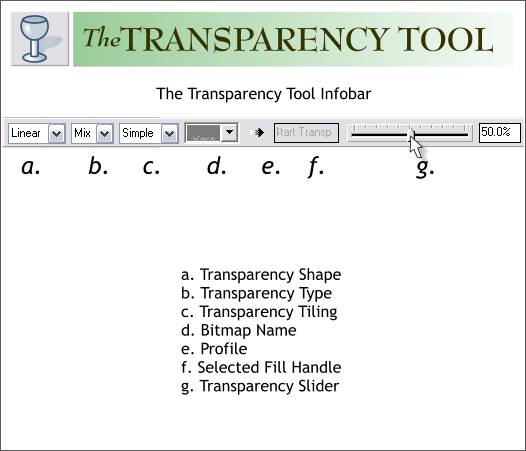
Select any of Xara's tools and the context-sensitive Infobar at the top of the screen changes to present a series of options available for the selected tool. (Another feature Corel was quick to "borrow" in CorelDRAW 7). When you select the Transparency Tool (F6) these are the Infobar options.
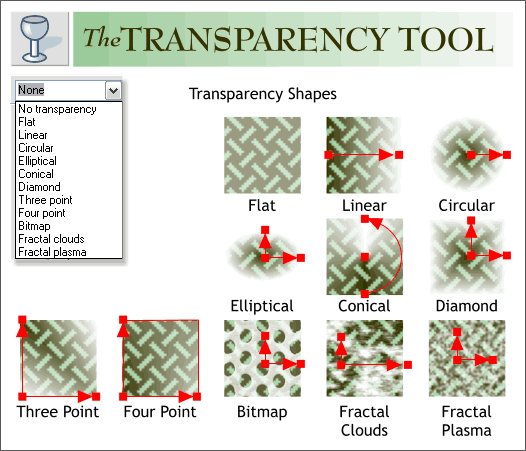
Shown above are the Transparency Shapes. Flat applies an overall transparency to the selection. Linear, Circular, Elliptical, Conical, Diamond, Three and Four Point are all gradient transparencies. Bitmap applies a selected bitmap image transparently, and Fractal Clouds and Fractal Plasma are two transparencies that uses fractals to shape the transparency.
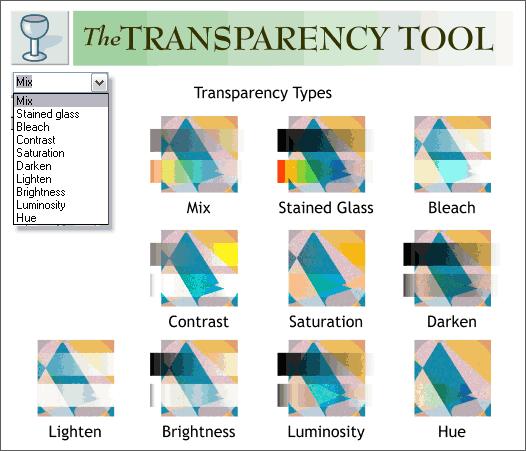
Shown here are the Transparency Types which include:
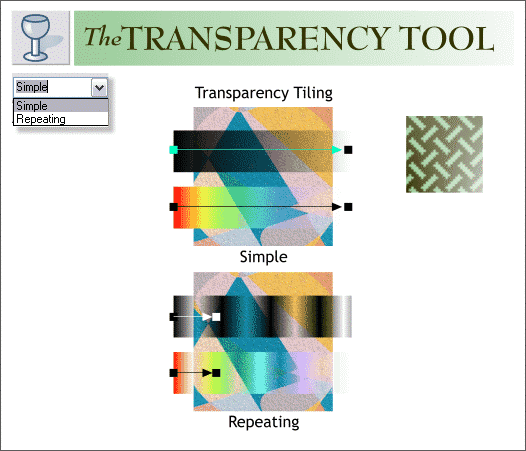
Transparency Tiling has two settings, Simple and Repeating. In a Simple, Linear Transparency, the transparency is gradual and consistent from the start point to the end point. Repeating causes the transparency to repeat at least once depending on the length of the fill path arrow.
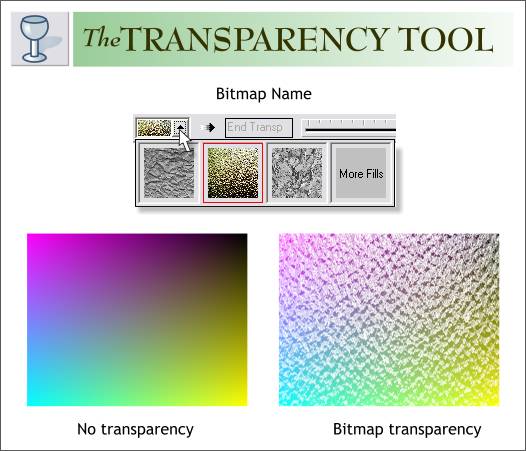
Bitmap Name is a drop down list of available bitmaps which can be applied as a transparency shape (when the Bitmap Transparency Shape option is selected). Any bitmap in the Bitmap Gallery is available.
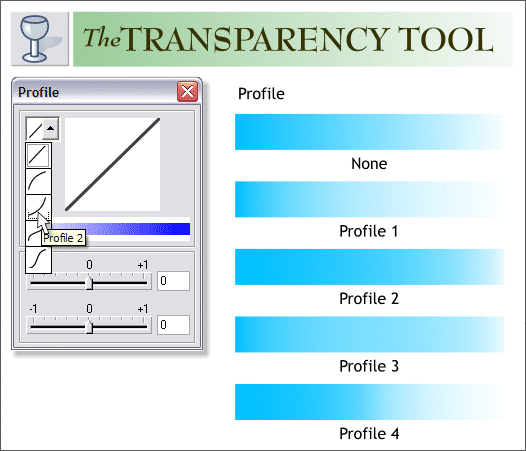
Profiles (Covered in Workbook 47) effect the distribution of the transparency and change the weight with which the transparency is applied.
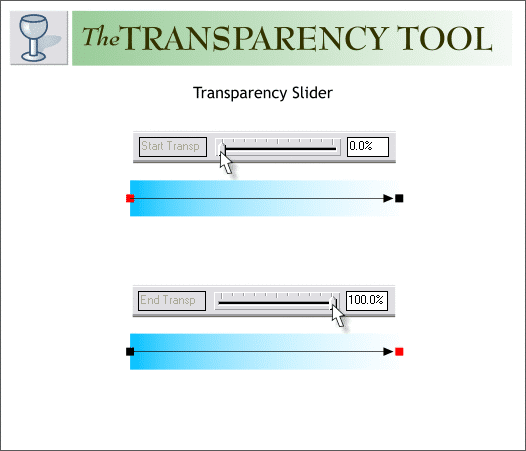
The Transparency slider adjusts the amount of transparency for a selection or selected control handle. The grayed out box to the left of the slider, shows (if you look real carefully) whether the start or end control handle is selected. There are two ways to use the slider. Drag the handle to the desired value, or key in a number in the text entry box and press Enter. For a detailed description of the Transparency Tool (and all other tools and functions) press F1 with the tool in question selected. Xara not only has a context-sensitive Infobar, it also has context-sensitive Help.
|
||
|
|


