|
|
|
A new user by the name of Jaques wrote your editor (still me) and asked why Xtreme did not have palettes like Adobe Illustrator. Trying not to be too offended, I suggested he could create his own custom palette that would be ten times better than Illustrator's (well maybe I was exaggerating a bit), but you can create your own palette of custom colors and even have the colors displayed on the on-screen palette for your convenience.
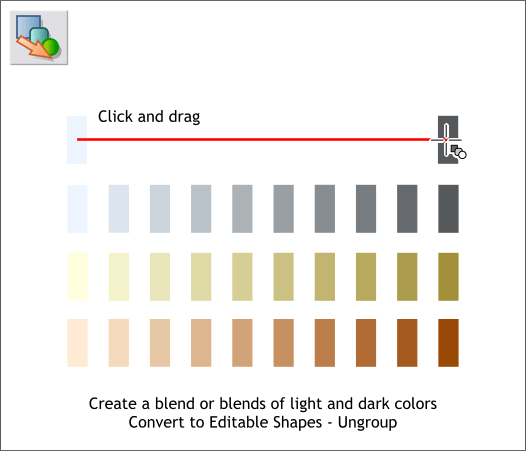
In Workbook 37 I showed you how to create Metallic Fills. In a nutshell, the method involved creating blends of 2 colors per metal like those shown above. We can do the same thing and then save these colors as a custom palette. So first using the Blend Tool (F7), create a blend or two different colors. After you create your blend, from the Arrange menu, select Convert to Editable Shapes and then Arrange > Ungroup . TIP: You can create a whole rainbow palette of colors by blending 2 of the same colors then selecting Alt Rainbow from the Blend Effects drop down list on the Fill Tool Infobar.
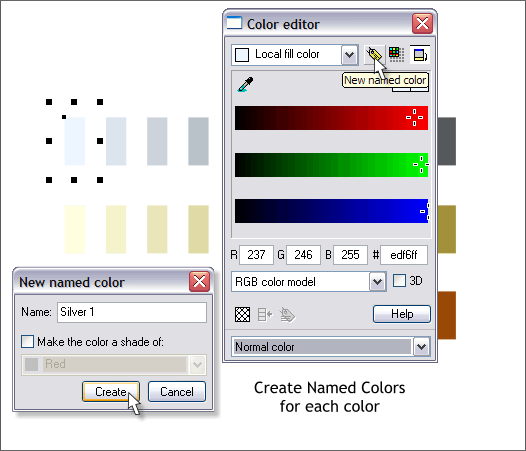
This process is a bit labor intensive but think of it as a ZEN meditation exercise. Select the first color then open the Color Editor (Ctrl e). Click the yellow hang tag icon (New Named Color). In the New Named Color dialog, name the new color, in this case since I have created a range of silver colors, I have named the color Silver 1. Press Create. The new color will appear on the Color Line (the screen palette) just before the Web colors. Now for the meditative portion, do the same and name all your colors. Numbering your colors sequentially, while a bit rigid, does make some sense.
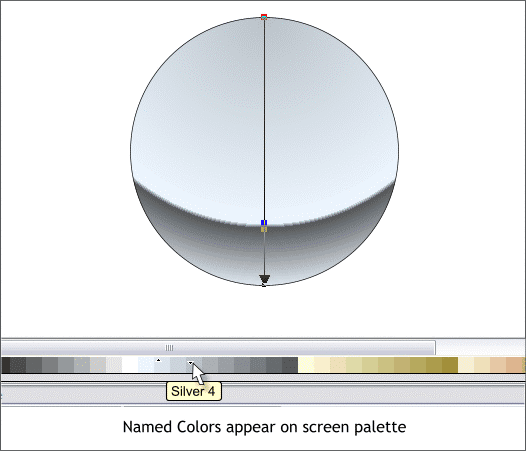
As you can see in the unretouched screen capture above, not only do all the new named colors appear on the screen palette, but if you let your cursor rest over any of the colors for a moment, the name of the color appears in an informative Tool Tip. You can apply these colors in any of the usual methods including dragging the color and dropping it onto an object.
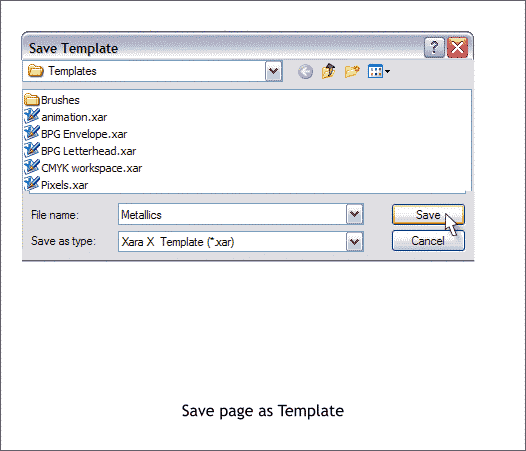
These colors will only be saved with the drawing in which they were created. You can save the drawing and call it custom colors or something catchy like that, or you can save your page as a Template which is what I am doing in the example above. I have created a range of custom templates including my company letterhead and envelope and CMYK Workspace courtesy of Minimiro and available in the Shareware Page > Templates section. Now whenever you wish to work with your custom palette of colors, from the File menu, select New... and your template should appear in the fly out list. NOTE: If your new template does not show up, the reason may be this;. Xara has a limit of 12 templates that can be displayed. So if you do not see your custom template you need to do some pruning. In the Windows Explorer, go to C:\Program Files\Xara\Xtreme\Templates and delete, or move to another folder, some of the templates that you don't think you will need. Remember you can have a maximum of 12 templates that will display in the File > New... fly out menu.
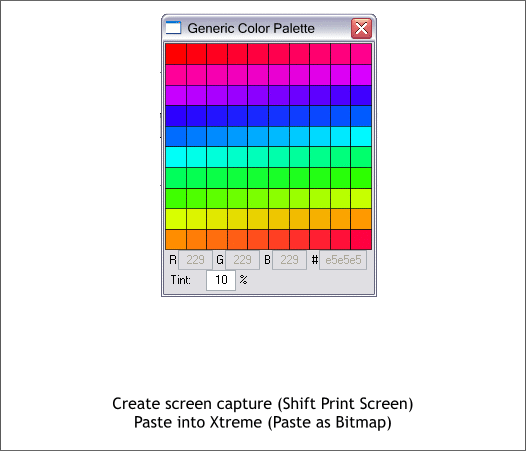
Here's another trick for the busy designer who does not have the time or inclination to create her or his custom palette but insists on having one just like Illustrator's. Open Illustrator then open the palette you so dearly crave. Expand the palette to display all the colors. Hold down the Shift key and press Print Screen on your keyboard. This places a copy of the screen in the Clipboard. Now in Xara press Ctrl V or Edit > Paste. In the Paste Special dialog select Bitmap and press Paste. Crop everything out except the palette.
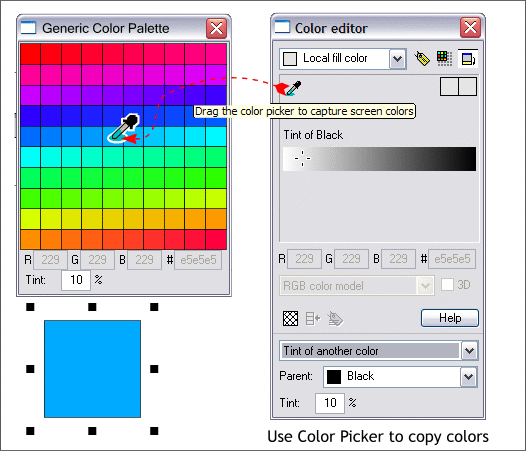
With the captured palette now in Xara, open the Color Editor (Ctrl e). Select the object you wish to fill and drag the Color Picker (the eyedropper icon) to the color on the palette. You can use this for fills, outlines, and with all manners of gradient and fractal fills. How easy was that?
|
||
|
|


