|
|
|
Creating end editing rectangles with curved corners in Xtreme Pro is as easy as pressing an icon on the Infobar. Watch.
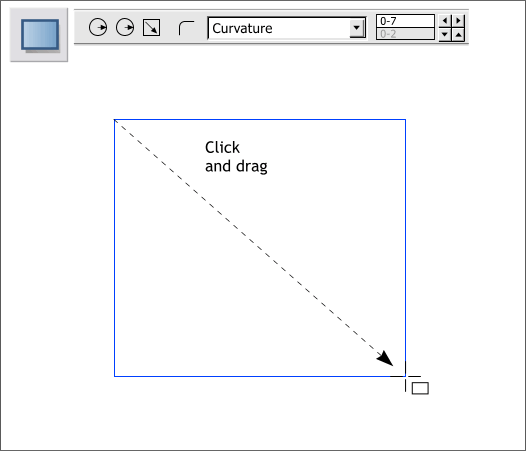
Select the Rectangle Tool (Shift F3). Click the tool on the screen and drag to determine the size of the rectangle. TIP: You can draw a rectangle (or an ellipse), to an exact size. First create a rectangle of any size Before you switch tools, change the Width and Height settings on the Infobar. Press Enter to apply the changes. TIP 2: Hold down the Ctrl key when you drag to create a square or circle. The Ctrl key constrains the proportions as you draw.
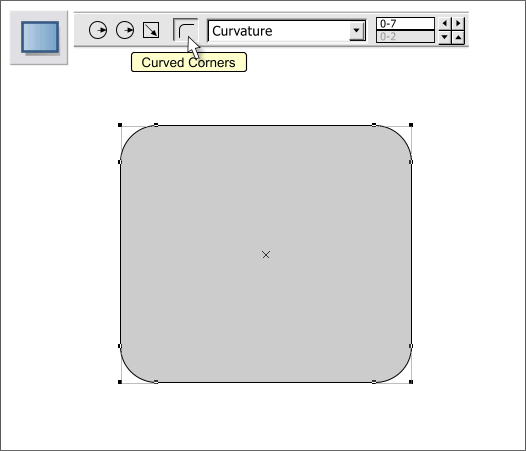
With the rectangle and the Rectangle Tool selected, press the Curved Corners icon on the Infobar at the top of the screen. (To return to a sharp corner press the Curved Corners icon again).
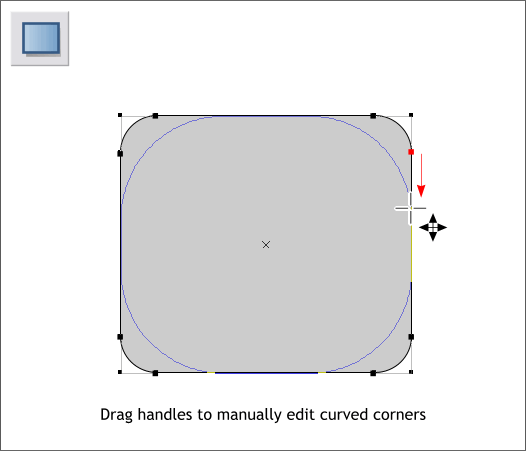
There are two ways to edit the corner curvature. The easiest method is to drag any of the inside control handles (but not the corner handles), with the Text Tool . The curvature changes as you drag. The control handles are the small squares located on the outside of the selection.
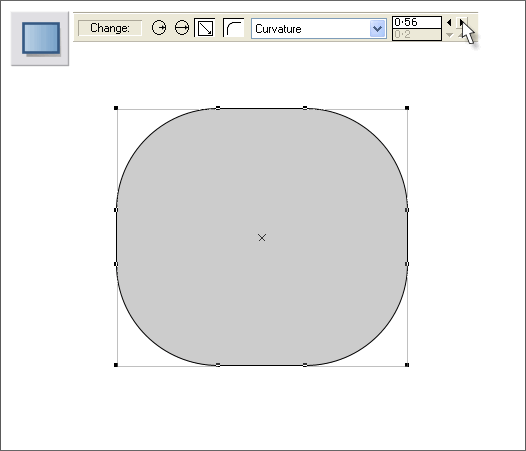
You can adjust the curvature to precise amounts by selecting Curvature from the drop down list on the Infobar then using the arrow keys to increase or decrease the amount. You can also key in an amount in the text entry box and press Enter to apply the change.
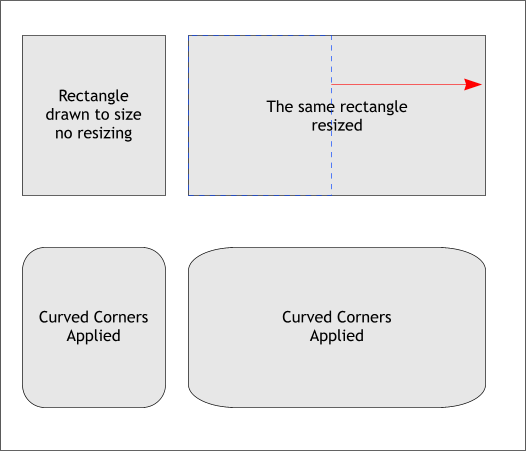
A frequent complaint from new users, and even a few old, is why are the corners not round. This is caused if the rectangle has been resized as you can see in the examples above. The rectangle on the left has been drawn to size and not modified. The rectangle on the right has been stretched to about two times the width. You can see in the bottom example that the corners on the first rectangle are perfectly round while the corners on the stretched rectangle are distorted and are not round at all. So how can you stretch a rectangle and still maintain perfectly round corners:? I'm glad you asked.
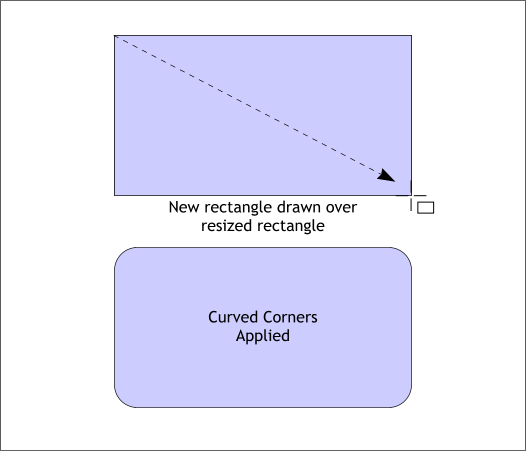
Draw a new rectangle using the resized rectangle for a template. Now when you apply Curved Corners, the corners will be round as shown above. (Delete the resized rectangle).
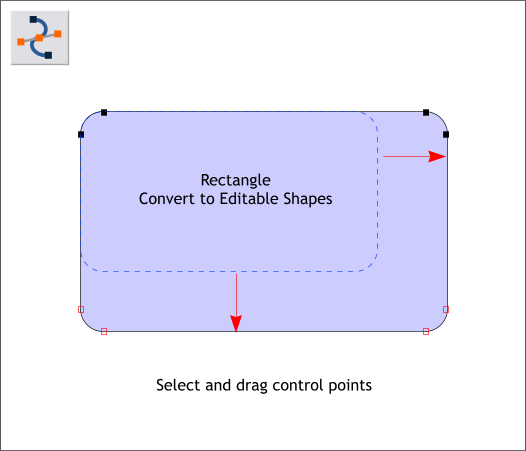
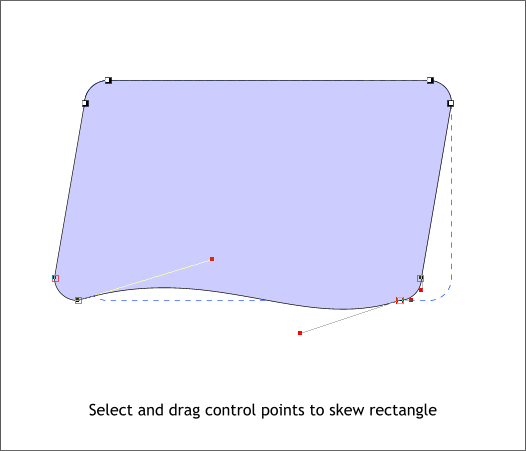
You can edit the corner curvature amount at any time, now or in the next century, as long as the rectangle has not been converted to editable shapes (Arrange menu). Corner Curvature is what is known as a "live effect" and as with all of Xara's live effects, the edits remain with the object and can be further edited or removed. But there are some times when you may want to resize and/or edit the rectangle while maintaining the curved corners. One way to do this is to select the rectangle then Convert to Editable Shapes (Arrange menu). Then with the rectangle selected, switch to the Shape Editor Tool (F4), select the control points (shown above as red outline boxes) and drag or use the arrow keys on your keyboard to modify the size. When you convert a live effect to editable shapes, the ability to edit the live effect is lost. But the shape can now be edited with the Shape Editor Tool as noted in the next example shown below.
In this example the bottom control points have been selected and moved in concert to the left skewing the rectangle. And the bottom side of the rectangle has been curved. The rectangle is now a shape and you can edit it as you wish.
|
||
|
|


