|
|
|
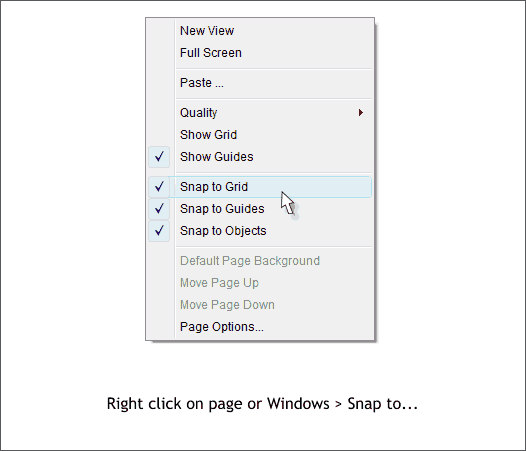
When you enable Snap to Grid, either by right clicking on the page and selecting from the menu, or selecting from Window > Snap to Grid, Xara snaps selected object or objects to points in a predetermined grid. This can be handy when you are trying to align objects evenly. Or if you want to create a rectangle, for example, that is an even increments.
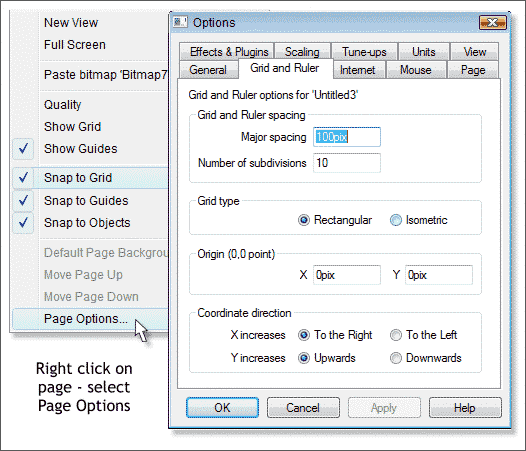
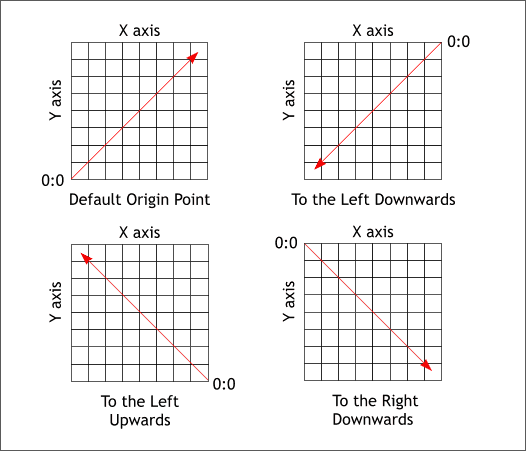
You can customize the setting for Snap to Grid in the Page Options menu. Right click on the page and select Page Options... from the fly out menu, or scroll to the bottom of the Utilities menu and select Options.... Grid and Ruler Options let you specify grid spacing for your selected measurement units as specified in the Units tabbed section. As all of my tutorials are done in Pixels, I have my Major Spacing set to 100pix (100 pixels), and the Number of Subdivisions set to 10. So for every 100 pixels on my screen rulers, there are 10 tics. If you are using Inches, you would set the Major Spacing to 1in (1 inch) and set the number of Subdivisions to 8 or 1/8" intervals. You could set this to 16 or 32 for greater precision. Especially if you are working at high magnification and require a high degree of accuracy. You can choose a Rectangular or Isometric Grid Type. You can numerically determine the Grid Origin Point, which is from which part of the grid Xara starts counting. The default is Upwards and to the Right. The starting point is at 0:0 or at the lower left portion of the page. And the numerical values increase as you go up (the Y axis) and to the right (the X axis) TIP: If you are confused about which direction the X and Y axis are oriented, and who isn't? think of Y as nodding your head up and down as if you were nodding Yes.
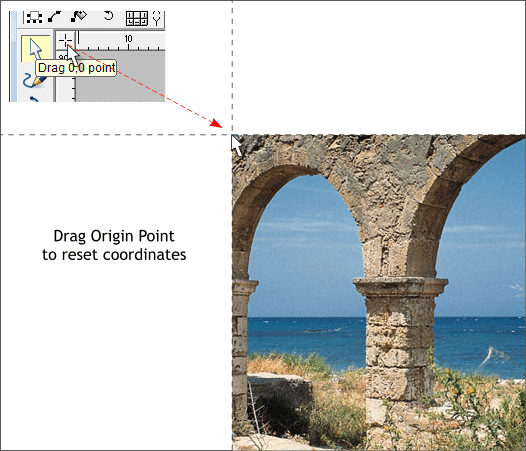
As I just said, Xara uses the page size to determine the starting point beginning in the bottom left corner and increasing in value as you travel up the page (Y axis) and to the right (X axis). But there are times when you might want to reset the rulers to start measuring from a specific point, the edge of a photo, for example. To do this, drag the Origin Point,the + at the conjunction of the vertical and horizontal screen rulers (Ctrl L to display rulers), and snap it to the corner of the object from which you want to the coordinates to originate. NOTE: The Origin Point is only available when the screen rulers are displayed. In the example above, if you select From the Left and Downward in the Grid and Ruler tabbed section, and then you drag the Origin Point + to the top left corner of the photo, the rulers will begin counting from left to right and from top to bottom.
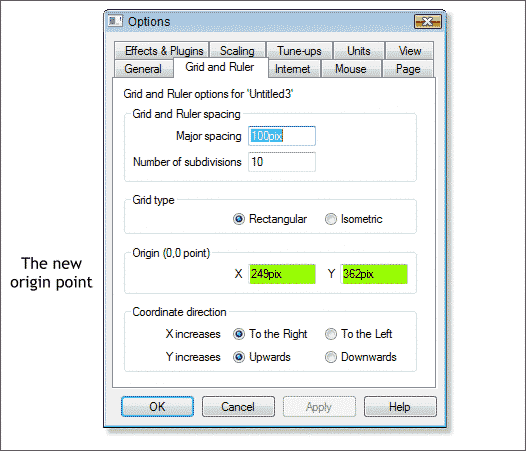
You can also enter a numeric value in the Origin (0,0 point) text entry boxes and then press Enter to apply the change.
The example above illustrates the direction the values increase in the 4 options. In your Editor's humble opinion, going from the left and downward is the most intuitive method.
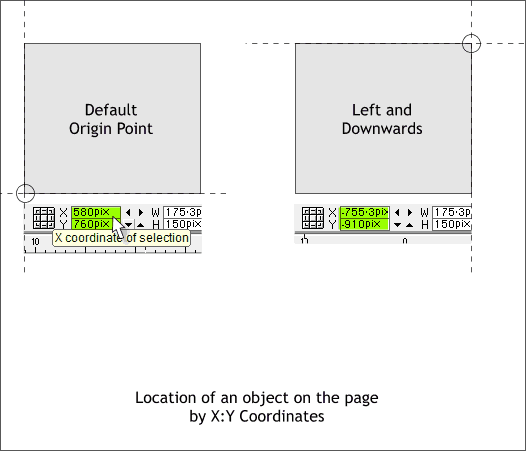
To place an object in a precise location, enter the desired coordinates in the X and Y Coordinates of Selection text entry boxes on the Infobar and press Enter . Depending on your grid orientation (Left, Upwards for example) Xara moves your selection to the specified coordinates. Continued on the next page >
|
||||||
|
|


