|
|
|
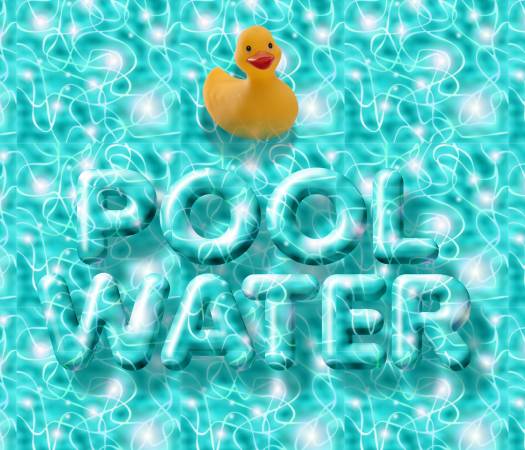
I must be a glutton for punishment. This last tutorial took me almost as long to figure out as most of my long tutorials. My challenge was to create an image that looked like the water in a swimming pool. I came close. I suspect if I worked another week on the effect I might make it better. Then again...
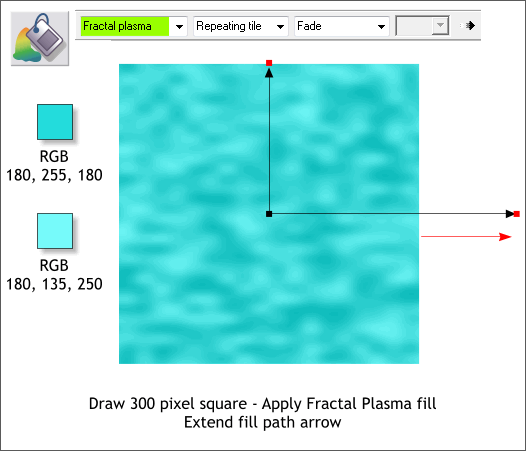
Draw a large 300 pixel square. Select the Fill Tool (F5). From the drop down list of Fill Types on the Infobar, select Fractal Plasma. Click on the inside control point where the two arrows come together and change the color to the first RGB color shown above. Click on either of the outside control points and change the color to the second color. You can mix and edit these colors in the Color Editor (Ctrl e) RGB Color Module. NOTE: If your color units in the Color Editor only go to 100 you need to go to Utilities > Options and change your Color Units to 0-255. Drag the end to extend the horizontal fill path arrow to the right as shown above.
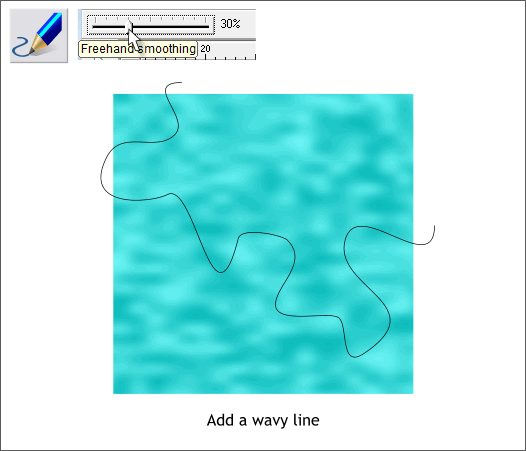
Select the Freehand and Brush Tool (F3). Set the Smoothness slider to about 30 (less smoothing). Draw a meandering line like the one shown above.
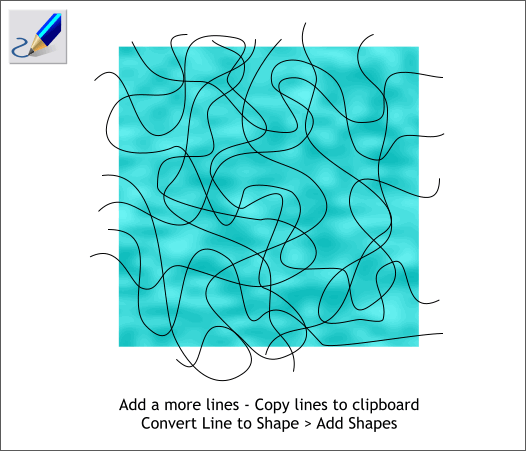
Add more wavy lines until your drawing looks more like a piece of abstract art such as my example above. Select all the lines (but not the square) and copy them to the clipboard (Ctrl c). With all the lines selected, Arrange > Convert Line to Shape and then Combine Shapes > Add Shapes (Ctrl 1).
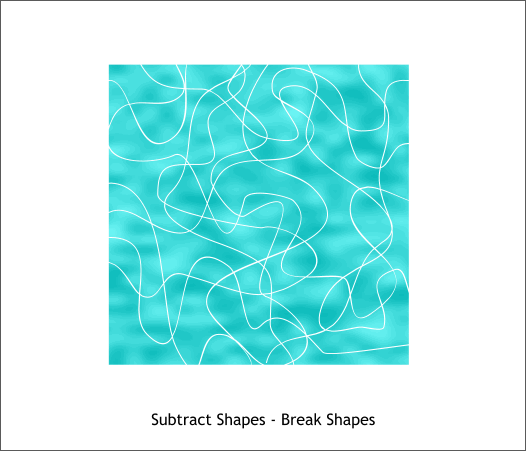
Select the combined lines and the square and Combine Shapes > Subtract Shapes (Ctrl 2) and then Arrange > Break Shapes. Each segment is now a separate shape like a jigsaw puzzle. Group all of these separate shapes.
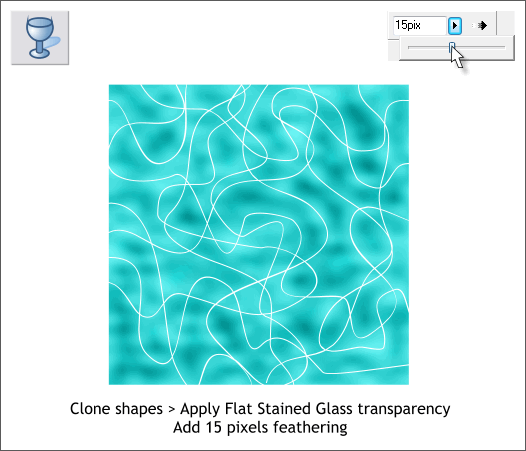
Clone the group (Ctrl k). Select the Transparency Tool (F6) and from the drop down list of Transparency Types on the Infobar, select Stained Glass. With this group still selected, move the Adjust Size of Feather Region slider in the top right area of the Infobar to about 15pix. This gives the water some shape.
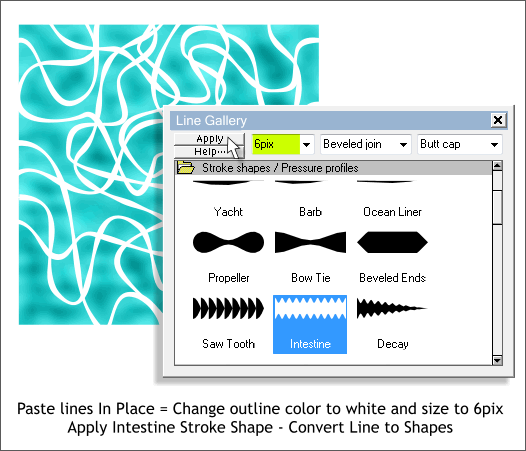
Paste the lines you copied to the clipboard on top using Edit > Paste in Place or by pressing Shift Ctrl v. NOTE: Paste in Place pastes a copy of the clipboard's contents in the exact position from which it was copied. Paste pastes a copy in the center of the screen With the lines still selected, open the Line Gallery (F12), change the Width to 6pix. In the Stroke Shapes folder, scroll down to the bottom and select Intestine and press Apply . Change the outline color to White. Convert all the lines to shape (Arrange menu). Then Combine Shapes > Add Shapes (Ctrl 1).
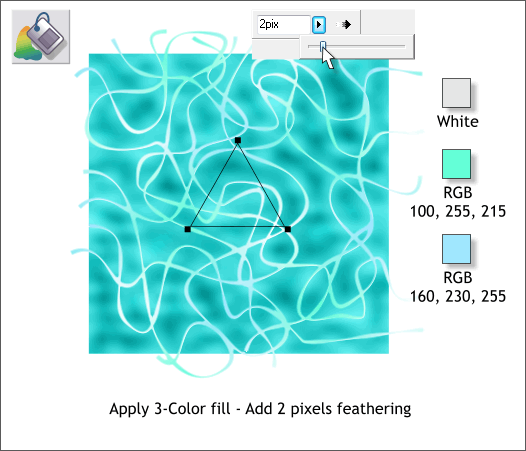
Select the new combined shape with the Fill Tool (F5). From the drop down list of Fill Types on the Infobar, select 3 Color. Configure the fill path arrows into a triangle and add the 3 colors shown above right. Select the Repeating Fill Tiling option. Apply 2 pixels of feathering to soften the shapes.
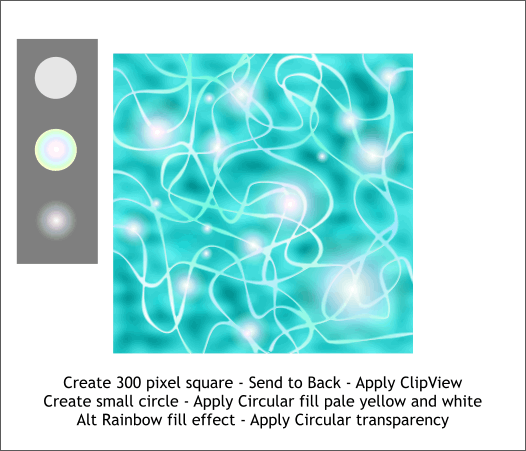
Create a new 300 pixel square. Center it over the aqua colored square and send it to the back (Ctrl b). Select all the shapes and squares and Arrange > Apply ClipView to mask all the overlapping shapes. Create a small 40 pixel circle. Apply a 2 color Circular fill, white in the center and pale yellow on the outside. From the Fill Effects drop down list, select Alt Rainbow. Apply a Circular, Mix transparency. This creates a flare. Make several duplicate flares, some larger some smaller, and place them over the square randomly.
In the final example shown above, the fill was converted to a bitmap (Arrange > Create Bitmap Copy) and applied to the larger rectangle thus; Select the rectangle, open the Bitmap Gallery (F11 ), select the new image, and press Fill. Select the rectangle with the Fill Tool. Click on the end of either fill path arrow and press the left or right arrow key on your keyboard to enlarge or reduce the size of the fill. The fill was also applied to the text and then an Inner Rounded Bevel applied. A Wall Shadow helped to float the text on top of the water. It kind of works. Or am I delusional? Your comments and questions and suggestions are always most welcome and most appreciated. Click the link below to send me an e-mail response. Gary W. Priester |
|
|
|


