|
|
|
This month's Xtreme Pro step-by-step tutorial is a Sacred Datura, another southwestern plant that has been immortalized by Georgia O'Keefe. While I was pleased as punch with the flower, the leaves were not all I would have hoped for. This mini-tutorial (18 steps) gets into a few techniques I was not able to fit into the Datura tutorial. I'm still not knocked out by the final result, but there are a few good moves that you might find enlightening.
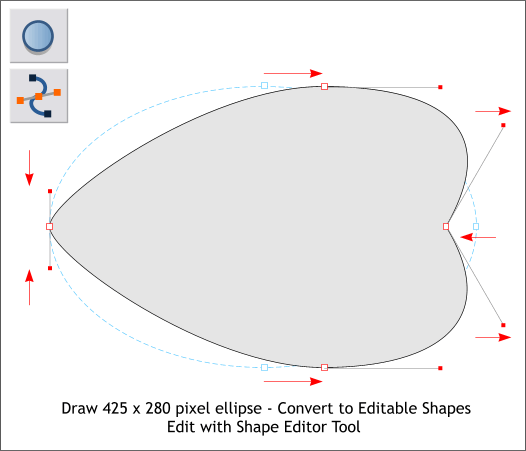
Draw an ellipse approximately to the size shown above. The size is not critical. With the ellipse selected, from the Arrange menu, press Convert to Editable Shapes. Switch to the Shape Editor Tool (F4). Select the top and bottom center control points and move then to the right about 40 pixels. Click on the left control point to show the Bezier control handles. Shorten the length by dragging the red boxes towards the control point until the left end is a soft rounded point. Click on the right control point and drag the Bezier control handles outwards to make a heart shape.
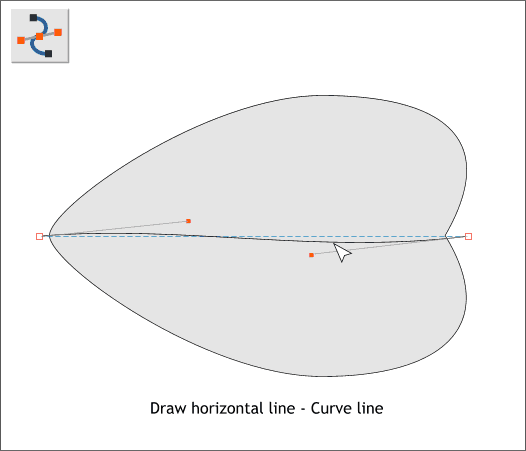
Using the Shape Editor Tool click a control point on the page to the left of the leaf shape and click a second point to the right of the leaf shape to create a line. Drag on the line with the Shape Editor Tool to produce a very gentle S-curve as shown. You can also drag the small red boxes at the ends of the Bezier control handles to shape the line.
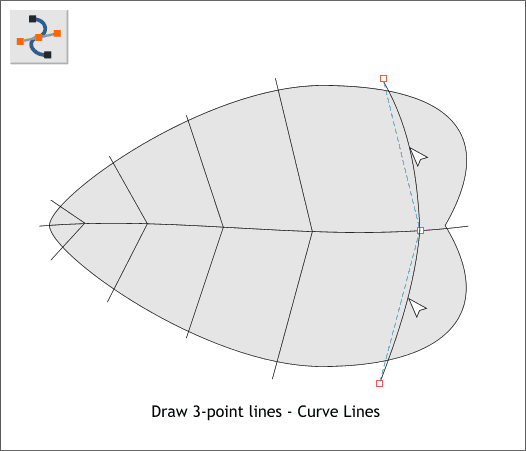
Using the Shape Editor Tool, make a series of V-shapes as shown above. Press the Escape key after each V-shape before you start the next. Curve each V-shape using the Shape Editor Tool.
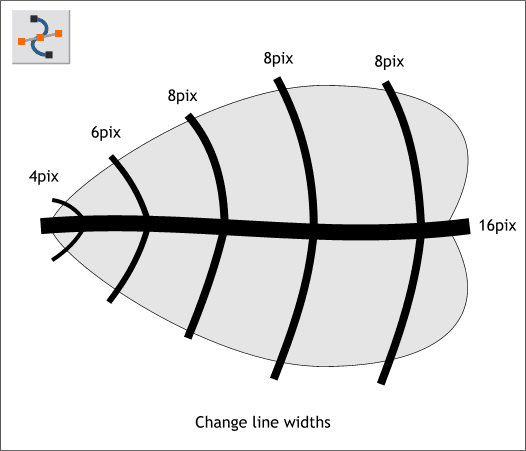
Change the line widths to the sizes shown by selecting a line and then selecting a width from the Width drop down list on the Infobar. For the 6pix line, highlight the width in the text entry box and key in 6 . Press Enter to apply the change.
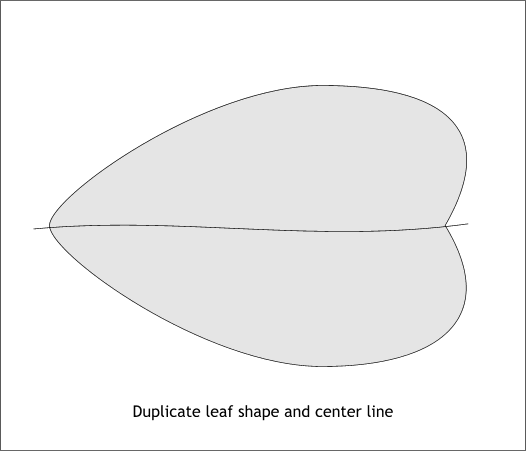
Make a duplicate of the center line and leaf shape (Ctrl d). Reduce the line width for the center line. This is not really necessary but it seems more logical for the next step.
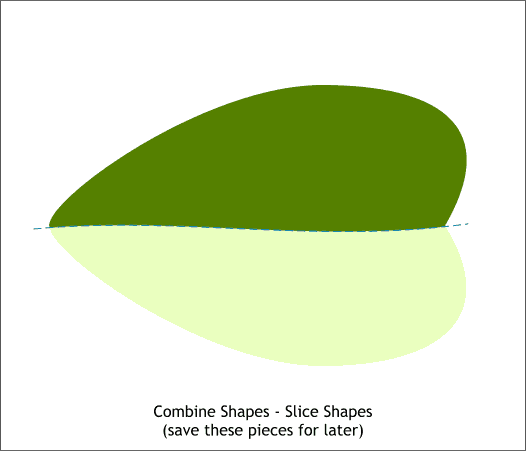
Hold down the Shift key (to select multiple objects), and click on the center line and the leaf shape. From the Arrange menu, select Combine Shapes > Slice Shapes or use the keyboard shortcut Ctrl 4. Set these two shapes to one side. You will need them later on.
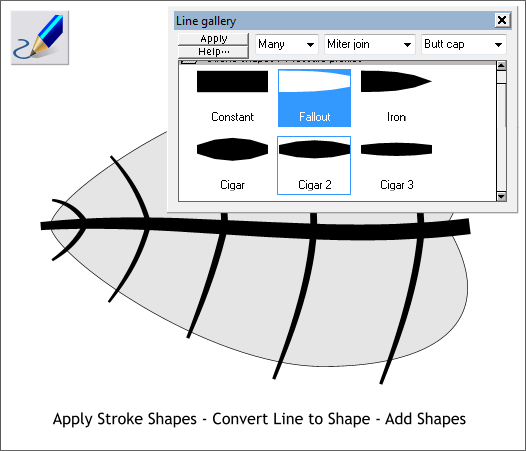
Select the center line. Open the Line Gallery (F12). Open the the Stroke Shapes/Pressure Profiles folder, select the Fallout shape and press Apply. Select all the other lines and apply the Cigar 2 stroke shape. Select all the lines and from the Arrange menu, select Convert Line to Shape. Then Arrange > Combine Shapes > Add Shapes (or press Ctrl 1). The lines (veins) are now one object.
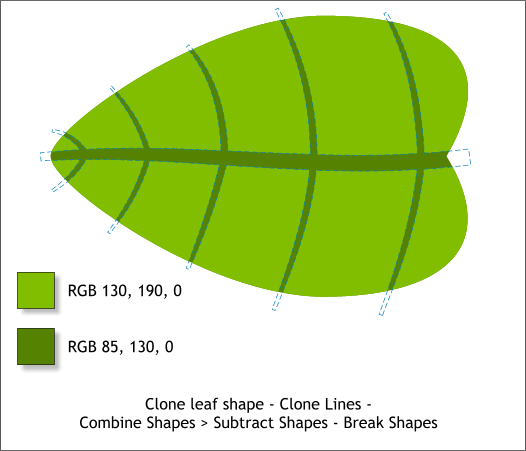
Clone the leaf shape and clone the veins two times. So you will have two extra leaf shapes and 2 vein shapes. Select the leaf and veins and Arrange > Combine Shapes > Subtract Shapes (Ctrl 2). Then Arrange > Break Shapes. I have made the original leaf shape darker green and the new shapes lighter green.
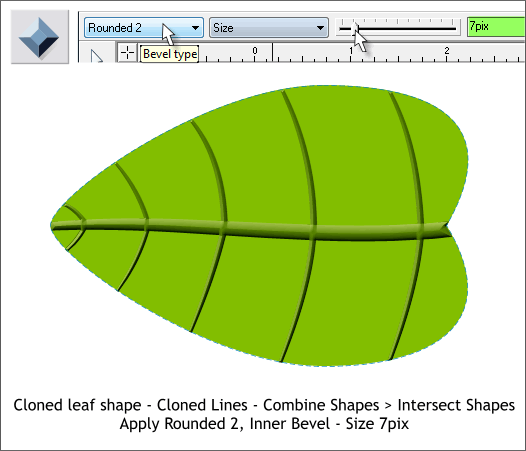
Select the other cloned leaf and cloned veins. Bring the leaf in front of the veins (Ctrl f or Arrange > Bring to Front). Select both and Arrange > Combine Shapes > Intersect Shapes (Ctrl 3). This trims the veins to the shape of the leaf. Select the Veins and then select the Bevel Tool (Ctrl F3). Drag any of the red arrows towards the center a short distance to apply an Inner Bevel. From the Bevel Type drop down list on the top left of the Infobar, select Rounded 2. From the Slider Type drop down list, select Size. Change the slider setting to 7 and press Enter to apply the change. NOTE: If you drag any slider, the change is made automatically. If you key in a new amount in the text entry box, you have to press Enter for the change to be applied.
|
|||||||
|
|
|||||||


