|
|
|
A member of the Xtreme Conference recently wanted to know, how hard is it to make an arrow? The question was prompted by a Photoshop tutorial on arrow creation. How hard indeed! So the question is how easy it is to make an arrow, and a neon arrow at that, in Xtreme. Answer, Xtremely easy.
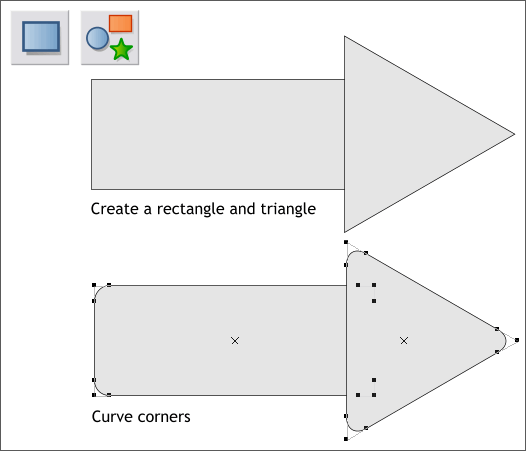
Using the Rectangle Tool (Shift F3) and the QuickShape Tool (Shift F2), make a rectangle and a 3-sided polygon (a triangle), one shape with each tool. Double click on the corners to apply curved corners. You can do this to both objects with the QuickShape Tool. Arrange the two shapes as shown above.
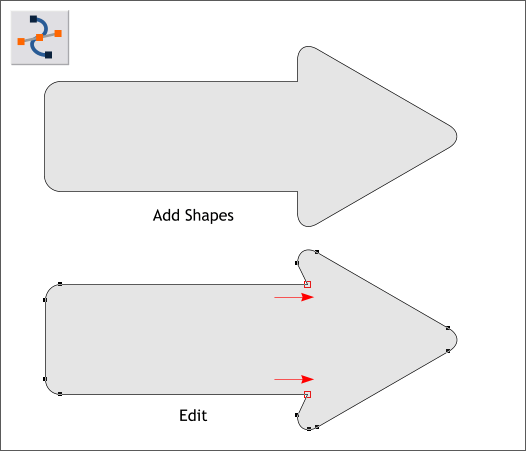
Hold down the Shift key (to select multiple objects) and click on each object. From the Arrange menu, select Combine Shapes > Add Shapes or use the keyboard shortcut Ctrl 1. Switch to the Shape Editor Tool (F4). Select the two control points shown above in red outline. Use the right arrow key on your keyboard to move the points to the right as shown.
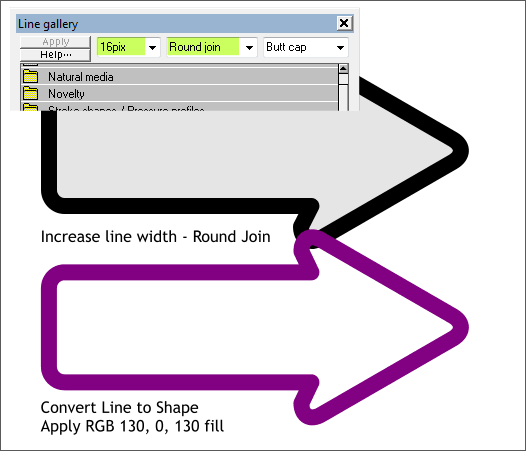
With the arrow selected, open the Line Gallery (F12). Select 16pix from the Width drop down list and select Round Join from the Set Join Type drop down list. From the Arrange menu, select Convert Line to Shape. Change the fill color to a deep magenta or edit the RGB color shown above in the Color Editor (Ctrl e).
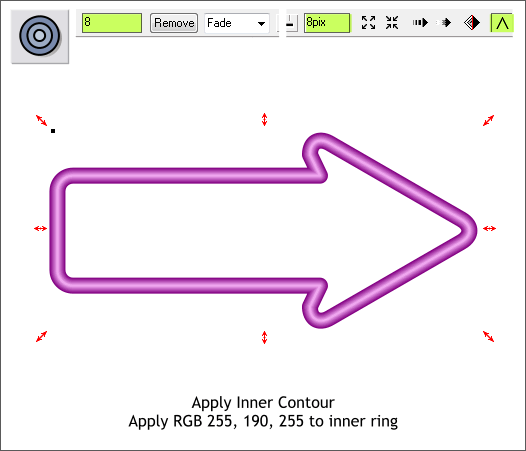
Select the Contour Tool (Ctrl F7). Drag any of the red arrow handles towards the center to apply an Inner Contour. Change the Number of Steps to 8 and press Enter to apply the change. Change the Contour Width slider setting to 8. Hold down the Ctrl key and click on the center of the contour to select just the smallest contour ring, and change the color to light pink or use the RGB color shown. TIP: If you are having a hard time selecting the smallest inner ring, reduce the number of steps to 2. Change the color then reset the number of steps.
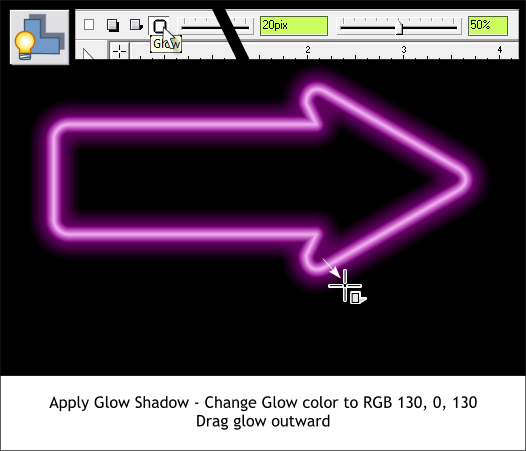
Select the arrow with the Shadow Tool (Ctrl F2). Select the Glow icon on the Infobar. Change the Shadow Blur slider setting to 20pix and the Shadow Transparency slider setting to 50%. Drag the glow outwards a small distance. NOTE: Any time you change a slider setting by dragging the slider button, the change is applied automatically. If you key in a number, the change does not apply until you press Enter (or Return). Ctrl click on the glow to select just the glow and change the shadow color to magenta.
How hard was that?
|
||||||
|
|


