|
|
|
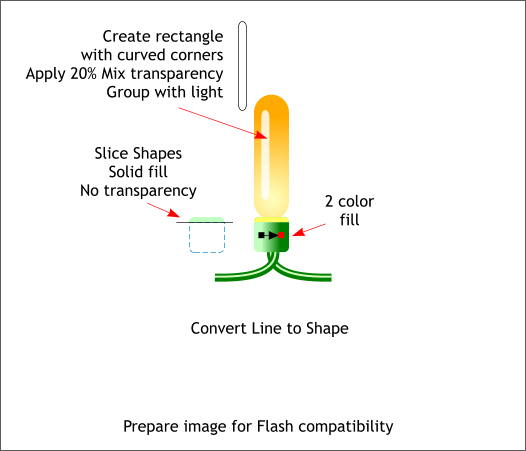
First of all, we need to make some modifications to the light to make it Flash friendly. Xara can do many wonderful things that Flash cannot. So we need to "dumb down" our light to Flash's level. we'll work with just the light you created to make the brush stroke. Select the square with the Linear transparency with the Transparency Tool (F6) and set the transparency to None. Draw a horizontal line across the top portion of the square. Select the line and the square and Arrange > Combine Shapes > Slice Shapes or use the keyboard shortcut Ctrl 4. Delete the bottom part of the square. Apply a pale yellow fill to this sliced shape to represent the colored light on this surface. Change the 4-color fill on the other square to two colors. Flash can only support two color fills. Select the four lines and Arrange > Convert Line to Shape. Flash can be nettlesome with lines. Finally, create a tall thin rectangle, double click on a corner with the Rectangle Tool to curve corners. Apply a Flat White fill with no outline and apply a Flat, 20% Mix transparency. This will be a highlight on the glass.
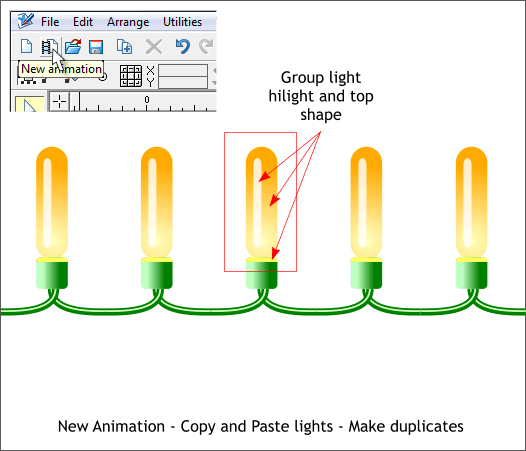
Group the light yellow shape, the highlight, and the sliced top of the square, and group them (Ctrl g or Arrange > Group). Marquee select the group and the line shapes and make several duplicate copies (Ctrl d). Arrange them as shown above so the wires appear to be connected. Select all the lights. sockets, and wires, and copy them to the clipboard (Ctrl c). Press the New Animation icon on the Infobar (shown above) to open a new animation window. Press Ctrl v to paste the lights into the animation window.
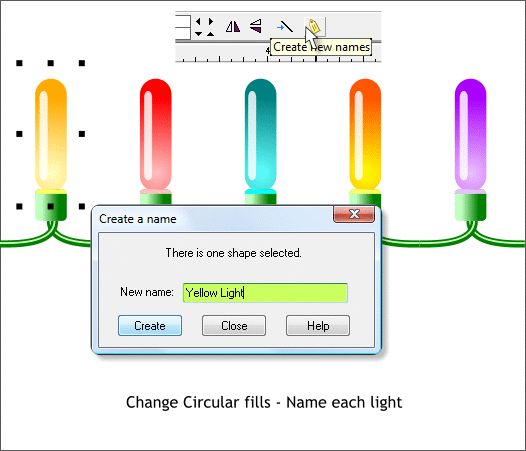
Modify the fill colors for the lights as shown. Ctrl click to select the rounded rectangle with the Circular fill. Change the colors using a lighter and darker color for each Circular fill as shown. Change the fill color for the tops of the squares as well (Ctrl click to select the tops). Select the first light group (but not the square or lines on the bottom) and then click the Create New Names yellow tag icon on the Infobar. Name the selection and press Create . Repeat this for the other lights. The reason we are doing this is Xara can only create a "tween" (in between animation frames) for Named objects.
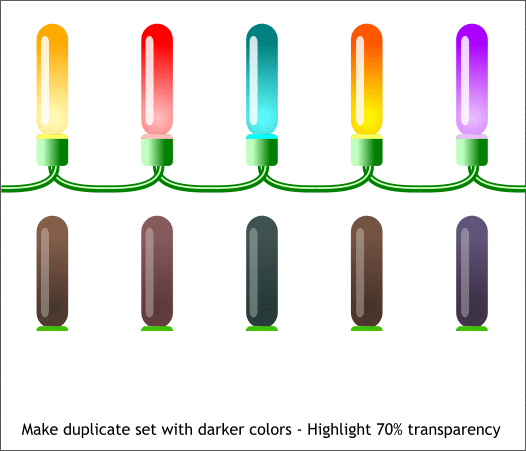
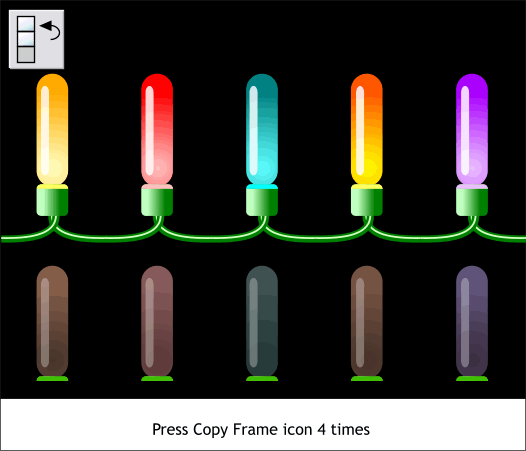
Make a duplicate set of lights as shown above on the bottom and make the colors darker. Make the bottom sections the same color green. Change the Flat transparency setting on the highlights to 70% . These will be the lights turned off.
Add a black filled rectangle (with no outline) behind the lights. Flash is persnickety about outlines. Press the Copy Frame icon (shown above top left) 4 times to copy this frame four times and to create four identical frames. Open the Frame Gallery (Shift F12) and click on Frame 1.
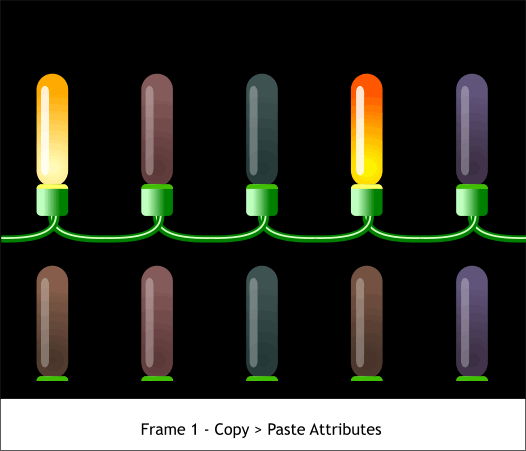
Ctrl click on the Circular fill from the second light on the bottom. Copy the fill to the clipboard (Ctrl c). Ctrl click on the second top Circular filled light shape and Edit > Paste Attributes or press Shift Ctrl a. Repeat this to copy and paste attributes for the base and the highlight. Repeat these steps for lights 3 and 5.
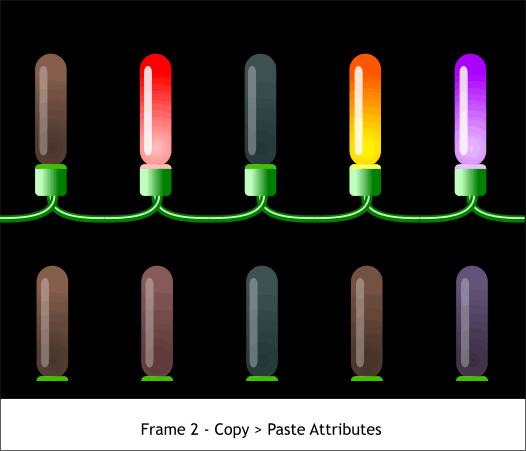
Advance to Frame 2. Make the changes shown above using Copy and Paste Attributes.
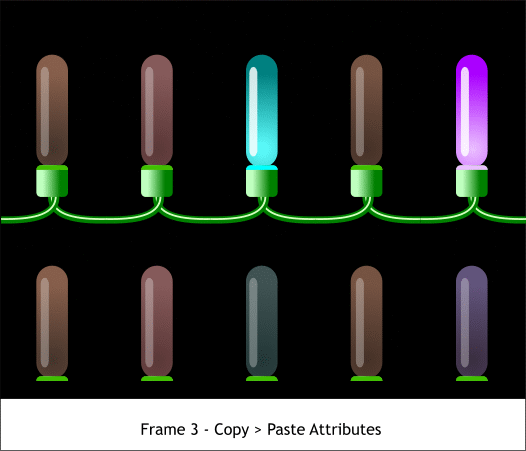
Advance to Frame 3 and make these changes.
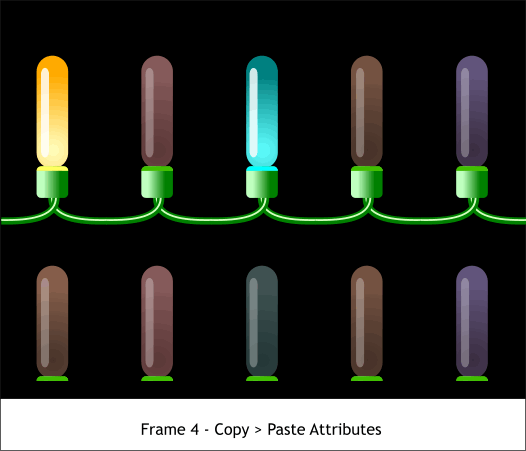
Make these changes for Frame 4.
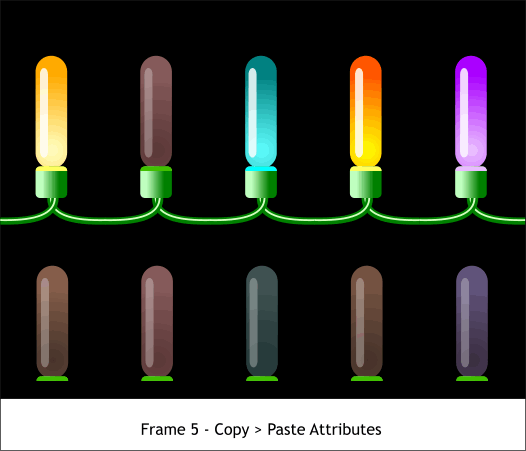
And make these changes for Frame 5.
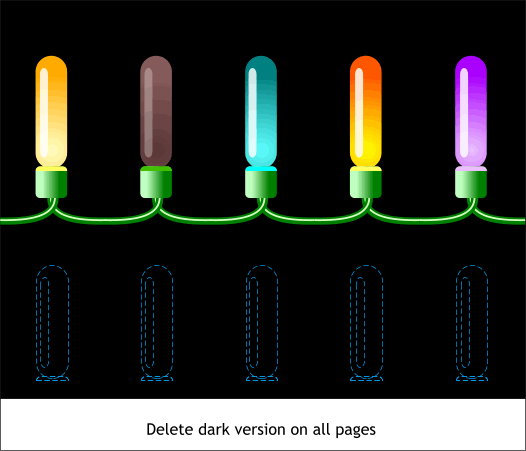
Go back frame by frame, and delete the dark duplicates from each frame. Don't grumble, there are only 5 frames for crying out loud!
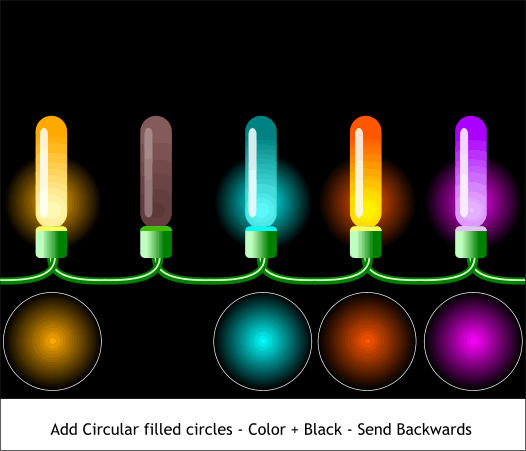
Make a series of circles and apply Circular fills with the color of the light in the center and black on the outside. Send these behind the lights by pressing Shift Ctrl b several times until the circle is behind the light but in front of the black background. I have added a white outline only to identify the size of the circle. Your circles should have no outlines. Flash does not take kindly to outlines. Add these flares on each page behind each of the lighted lights.
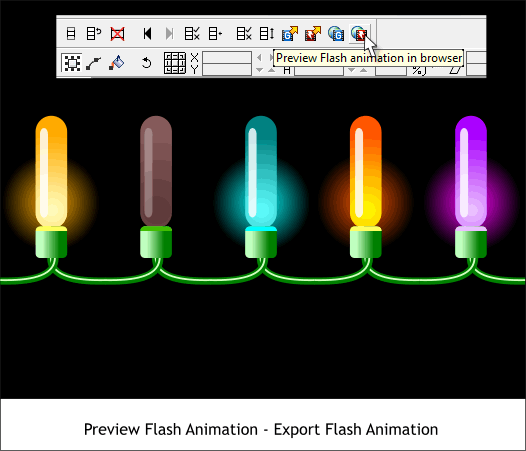
Press Preview Flash Animation in Browser to see if everything is working. Then press Export Flash Animation to save your animation as a SWF Flash movie. Everything we just did is Flash legal and you should not have any Flash errors or tweening errors. But this does not necessarily mean you won't.
If you followed my instructions, your animation, the top part at any rate, should look like this. I knew you'd ask about the text since it was not covered. You are SO predictable. Is a man not entitled to a few secrets?! Create the text in Frame 1 and copy and paste it into all of the other frames using Edit > Paste in Place or Shift Ctrl v. In Frame 1 create a black rectangle that covers just the text. Name the rectangle (press the Create New Names yellow tag icon). Do not use an outline on the rectangle. Flash frowns upon outlines. Paste the rectangle in Place in the Frame 2 and make the height a bit shorter. Copy and paste into Frame 3 and make the height shorter, etc. In Frame 5 reduce the height of the rectangle so you can see all the text.
|
|||||||
|
|


