|
|
|
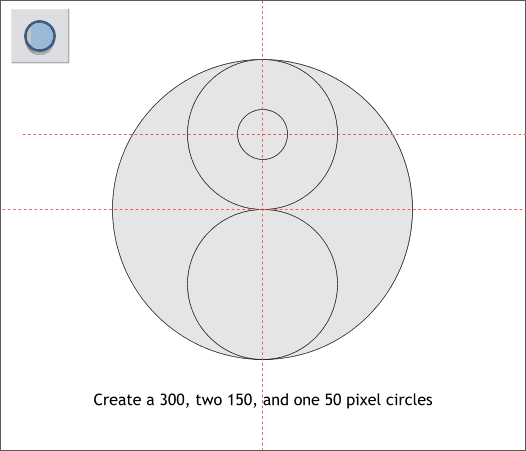
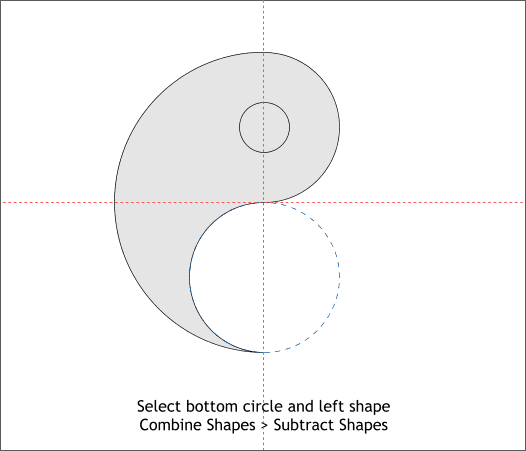
More circles. (Don't tell Allison!) Using the Ellipse Tool (Shift F4), hold down the Ctrl key to constrain the ellipse to a circle, and draw 4 circles to the sizes and alignments shown. NOTE: I have added guidelines as shown above by dragging from the screen rulers (Ctrl L) onto the screen. These will help in the steps to follow. The guidelines pass through the vertical center of the large circle and through the horizontal centers of the top two smaller circles.
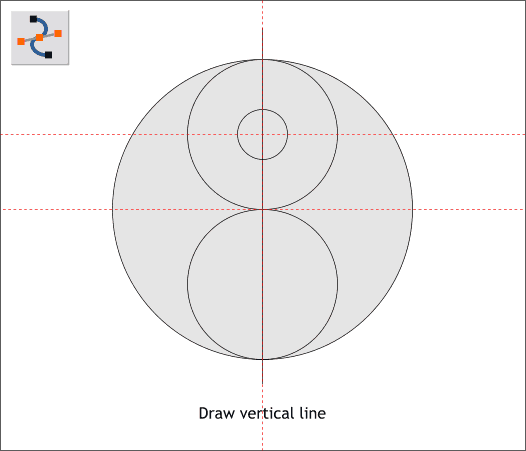
Using the Shape Editor Tool (F4), snap a vertical line to the center vertical guideline. Extend the line above and below the circle.
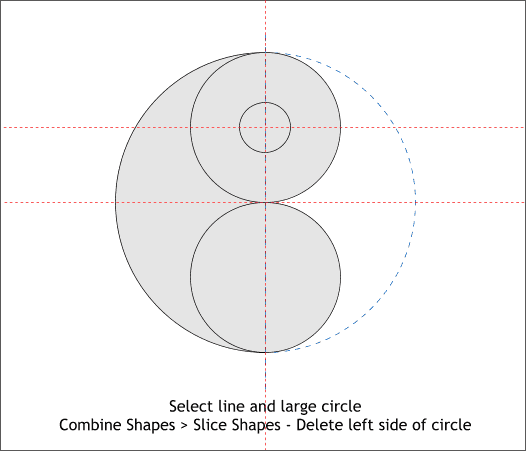
Select the line and the large circle. TIP: The problem with guidelines is they make it difficult to select something like a line that is drawn on top of a guideline. Drag a selection rectangle (a marquee) around the line with the Selector Tool (the arrow pointer) then hold down the Shift key (to select multiple objects) and click on the large circle. You can also drag the Guides layer below Layer 1 in the Layer Gallery (F10 ). If you do this, remember to select the Layer 1 as the active layer before you close the gallery. Back to the tutorial. Select the line and the large circle. From the Arrange menu, select Combine Shapes > Slice Shapes or you can use the keyboard shortcut Ctrl 4 . Select the right half of the large circle and delete it. The blue dashed outline represents the deleted half.
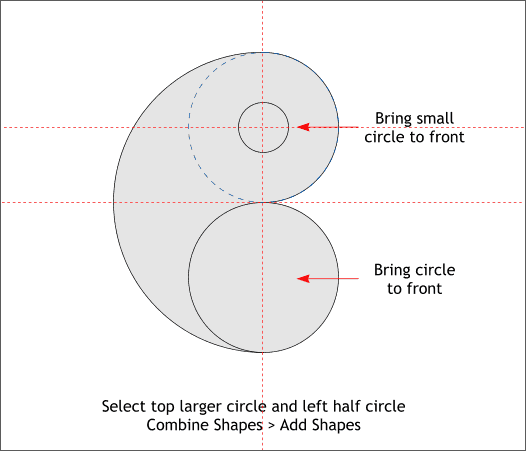
Hold down the Shift key. Select the larger of the top two circles and then the remaining half circle. From the Arrange menu select Combine Shapes > Add Shapes or press Ctrl 1. Ignore my comments to bring the two circles to the front. Instead select the new combined shape and send it to the back (Ctrl b). I don't know what I was thinking!
Select the small circle and the combined shape. Arrange > Combine Shapes > Subtract Shapes (or press Ctrl 2). We now have a Yin. Or a Yang. I suppose it depends on how you look at it.
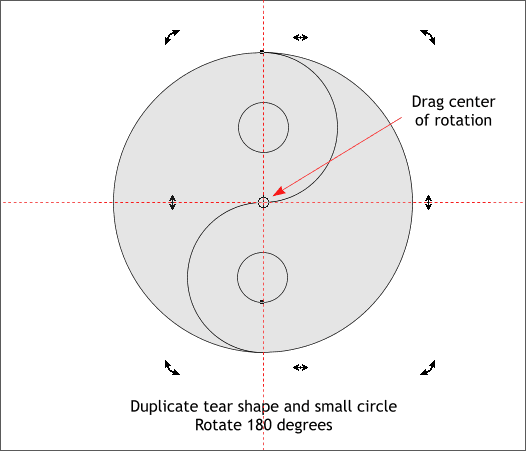
Here's where those pesky guidelines come in handy. Double click on the Yin (or Yang) shape to enable rotate/skew mode. Drag the Center of Rotation bulls eye to the intersection of the center two guidelines. It may help to zoom in to make sure the bulls eye in directly at the intersection. Clone the Yin (or Yang) and the small circle (Ctrl k or Edit > Clone Objects). Hold down the Ctrl key and drag any of the outside curved arrow control handles and rotate the cloned circles 180 degrees. You can also key in 180 in the Angle of Selection text entry box on the Infobar and press Enter if you like to do things by the numbers.
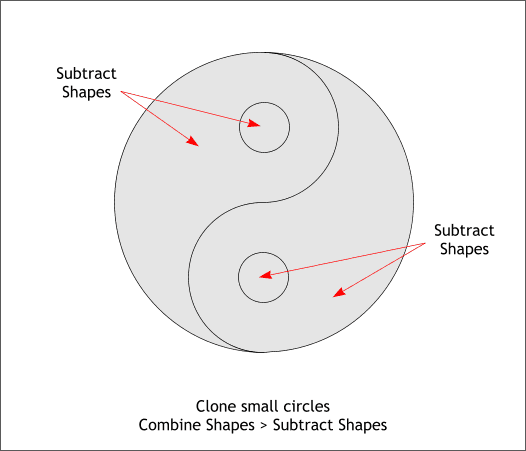
Select and Clone the small circles (Ctrl k). Select the top small circle and its parent shape and Combine Shapes > Subtract Shapes (Arrange menu or Ctrl 2 ). Repeat this step for the other small circle clone and its parent. You won't see any change but you have added two holes to the two shapes.
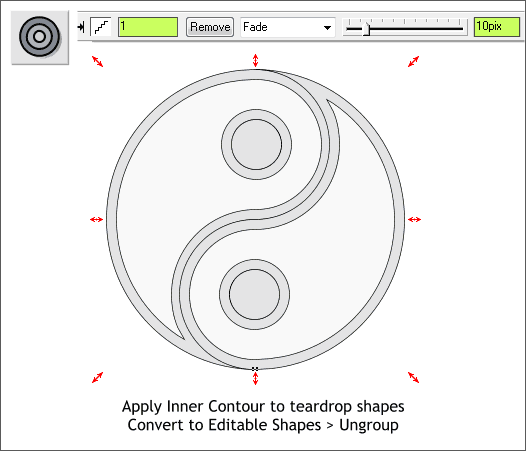
Select the Yin and the Yang (but not the circles). Select the Contour Tool (Ctrl F7). Drag any of the red arrows towards the center a short distance to apply an Inner Contour. Change the number of Contour Steps on the Infobar to 1 and press Enter to apply the change. Change the Contour Size slider setting to 10pix. With the two contours selected, from the Arrange menu, select Convert to Editable Shapes or press Shift Ctrl s. Then Arrange > Ungroup or Ctrl u.
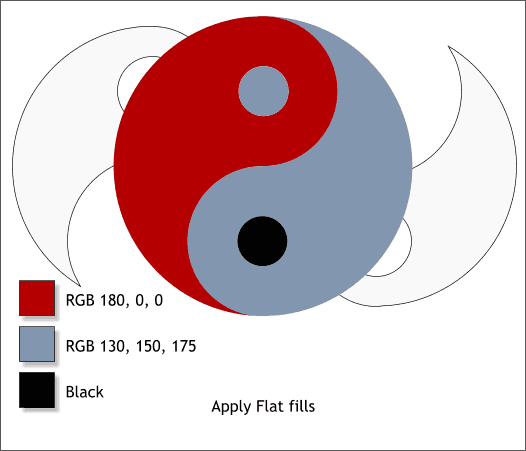
Send the two inside contour shapes to the back for a moment (Ctrl b). Apply the three flat fills as shown.
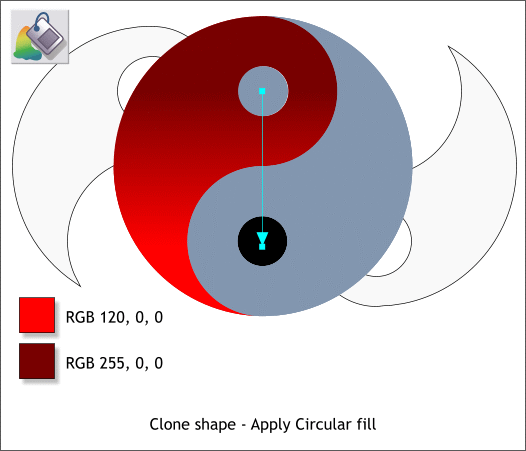
Clone the red shape (Ctrl k). Select the Fill Tool (F5) and select Circular from the drop down list of Fill Types on the Infobar. Move the center of the fill to the center of the small upper circle and extend the fill path arrow to the center of the small lower circle. Use the two colors shown.
|
||||||
|
|
||||||


