|
And now for something beyond the basics!
When we are dragging the Levels sliders around we are always making a tradeoff: To gain some details we will lose other details.
Example 5:
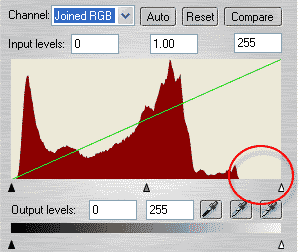
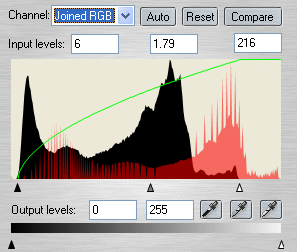
We start with a grayscale photo this time, because this is not about color correction but about tone and details. The histogram (shown below the photograph) graphically shows us the color/tone is well distributed but a bit underexposed. As this is a grayscale image we do not need to worry about color casts, so we adjust the white slider to the left where the histogram ends, and the black slider slightly to the right.


To lighten up the midtones we can drag the gray slider to the right until it reaches a value about 1.80. Of course you could use the black and white
point pickers as well (try the dark parts of the glasses for black point and the wall on the right side of the eye brow for white point).
Now we can see details around the mouth and in the sweater. But the face looks a bit flat and washed out. Here I simulate a neat trick in Photoshop where you can use Adjustment layers: Clone the image, Ctrl K (which puts a
duplicate copy directly on top of the original), then open the clone with XPE and select Levels.
CONTINUED ON THE NEXT PAGE >
|