|
The Xara Xone Workbook - The best, easy and fun Xara X tutorials |
|
|
|
THE XARA CONFERENCES | XARA.COM | XARA ONLINE | GRAPHICS.COM TOP SITES | ALL WORKBOOKS |
|
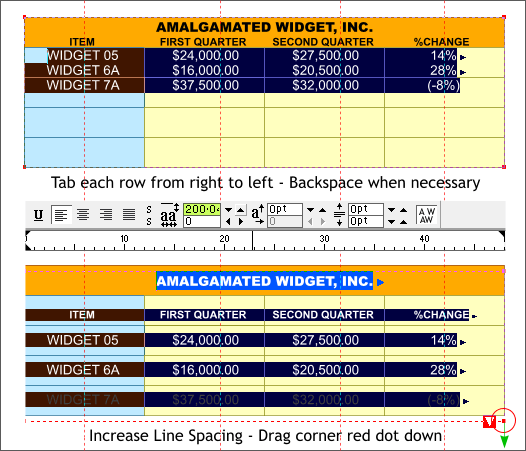
One line at a time, Tab the bottom three rows of text into position. Remember to backspace as necessary and to start tabbing with the last word in each row. Move the entire text area down so the title is centered in the orange rectangle. Highlight all the text. On the Infobar increase the Line Spacing to 200 and press Enter to apply your change. The bottom row of text will not be gray which means it will not print because it is below the text area. Don't worry. Simply drag the tiny red control point at the bottom right of the text area down a short distance to expand the bottom of the text area until the text is black. When that red box with the white triangle disappears, you can stop dragging.
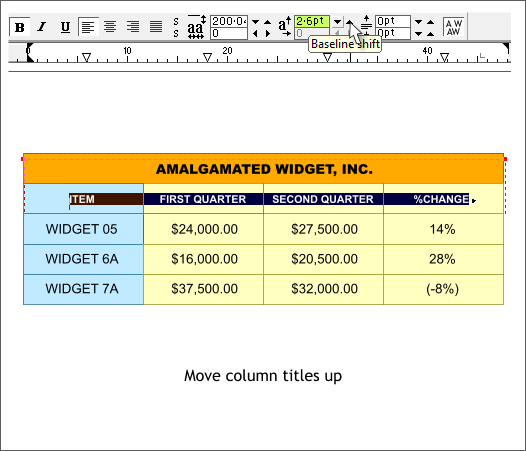
Highlight the column headings. Increase the Baseline Shift distance to 2.6pt. Click the small up arrow next to the text box to change the distance. OK. It was a bit of a slog, but we now have a table that looks like it might have been created in Quark.
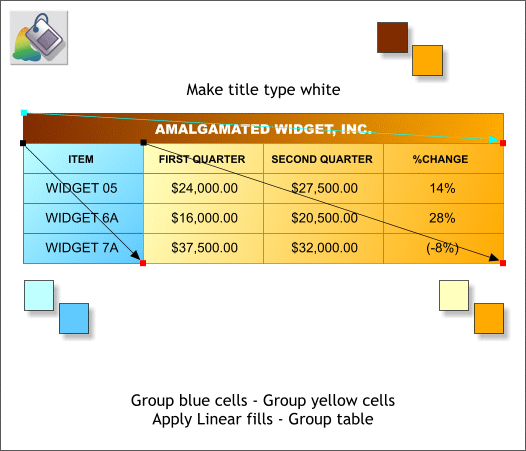
Group the blue cells (the rectangles not the text). Group all the yellow cells. Apply three Linear fills as shown above. Ima does not mind if you change the colors. Just keep your colors light enough to see the text. Make the title text white. (Simply highlight the text, then click the white color on the screen palette). The next step is where Xtreme kicks some serious butt. Try doing this next step in Adobe InDesign or Quark XPress!
|
||||||
|
|
||||||


