Creating Simple Animations
in CorelXARA 2.0 |
| |
|
Gif animations are fun and easy in Xara 2.0. This tutorial is in two parts: Animation Basics, how to create the animation frames, and The Animation Process, where we'll create a simple animation step-by-step. I will keep the projects simple so you can get the basic concept of the process. For more advanced animation examples, visit Xara's Animation Contest Winners.
Animation Basics

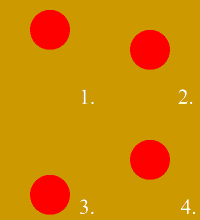
 Look at the four frames on the left. Each frame represents one action in the animation. Even though there are only four frames, our brain will fill in the intermediate steps. Can you imagine what the animation will look like when it plays through?

 Well, you didn't have to wait long, did you? Here's the animation, a bouncing ball. I left the frame numbers in so you could see the frames as they cycle through. Frame 1. is the top of the animation and frame 3. is the bottom. Frames 2. and 4. are intermediate steps. We could add additional frames to make the animation smoother but at the expense of the file size. Each frame is displayed for 10/100ths of a second.
| |
|

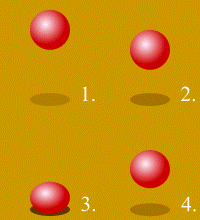
 If we add shading to the red circle, it becomes more spherical or ball-like. Placing an elliptical shadow under the ball adds a sense of ground. Scrunching the ball as shown in Frame 3. and not quite as much in Frame 4. creates the illusion than the ball is flattening as it hits the ground and then springing upward.

 If you can see both animations on your screen compare the first with the second. With a few minor adjustments, our bouncing ball looks more believable. And as I stated above, our brain fills in the in-between steps.
Notice that the shadow gets darker as the ball gets closer and gets lighter as the ball moves upward. How like life, eh? We can use Xara's Transparency features to make the different shades of shadow.
| |
|

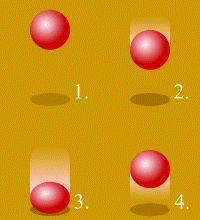
 Finally, we can use Xara's Linear Transparency to add a blur behind the ball. This is more cartoon-like and helps underscore the idea of downward and upward motion. Adjusting the timing for each frame, (more time on the downward motion, less time on the upward motion) adds more realism.

| |
|
|
|
Next we'll create the last animation step-by-step. |
|


