|
|
|
|
|
||
 |
|||
Neon Effect (Continued)
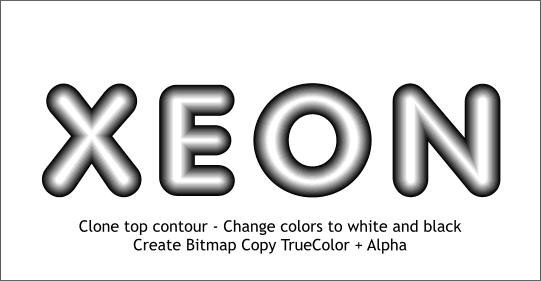
Step 8 Make another clone of the inner contoured text (Ctrl k) and move it to a white area of the page). Ctrl click on the pale violet contour shape on top with the Selector Tool to select just this shape. Change the fill to white. Press the Tab key to select the bottom contour shape (the actual text) and change the fill to black. Right click on the contour and select Create Bitmap Copy... from the pop up menu. By default Xara creates a TrueColor + Alpha (channel) bitmap with a transparent background (that is the alpha part). And in this case it is exactly what we want. Press Create. You can delete the contour version. All we need is the bitmap.
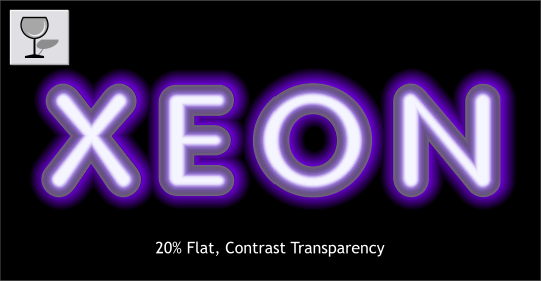
Step 9 Center the bitmap over the two contours. Select the Transparency Tool and apply a Flat, Contrast transparency with a slider setting of 20%. This adds the appearance of the glass tubing.
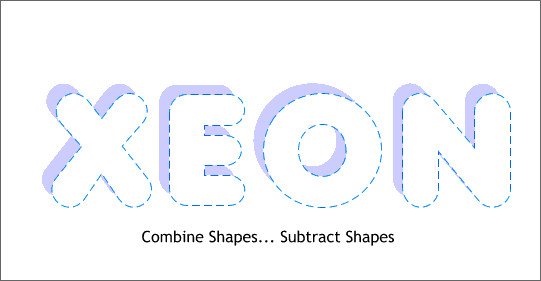
Step 10 Make another duplicate of the top contour object (you will need to press Alt and click twice to "dig down" to the contour under the bitmap). Move it to a clear area of the page. Select the Contour Tool then press Remove to remove the contour and leave just the type. Change the fill to the pale purple color. Make a clone (Ctrl k) then move the clone down and to the right about 8 pixels in each direction. Select both shapes (Shift click to select multiple objects) and from the Arrange menu, select Combine Shapes... Subtract Shapes. This will remove both the top shape and the portion of the top shape overlapping the bottom text.
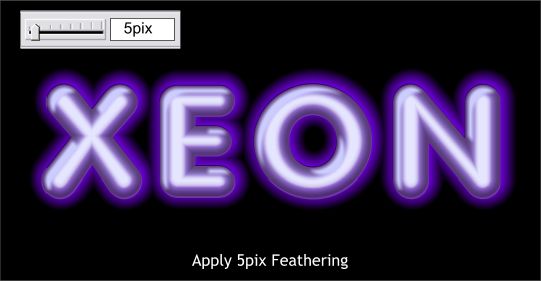
Step 11 Position the subtracted shape over the contours and bitmap. Apply 5pix of feathering to create a reflected highlight. And that is all there is to neon text effect. Question? Comments? Use the form on Page 6 to send me your message. Now onto the Ice. |
|