|
A frequently asked question which is asked very frequently is can I (that’s you not me) create a drop down menu? It is questions like this your editor loves to answer. So, just sit back and listen up.
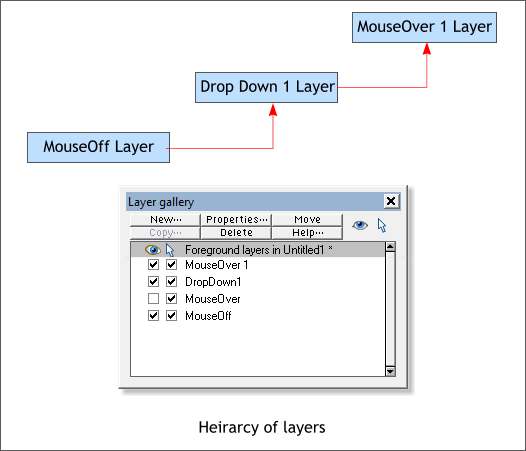
Just as you use layers to create mouse over effects, you use layers to create a drop down (or up or right or left) menu. Here’s how it works. A new named
layer will contain the menu and will be triggered by a mouse over effect (covered later). The new layer contains the mouse off or normal state buttons. A new MouseOver layer will contain the mouse over buttons.
You can create as many drop down menus as you wish, but each new menu needs its own layer and its own MouseOver layer. You can even create fly out
menus from drop down menu items. The basics were expertly covered by Ima Guest in her excellent Guest Tutorial 80.
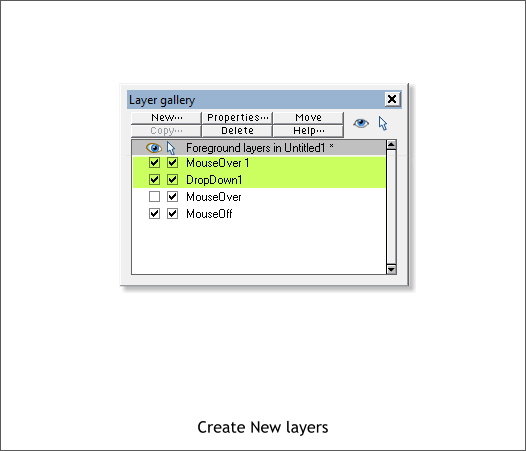
For this exercise, open the Layer Gallery (F10) and create two new layers: DropDown 1 and MouseOver 1. MouseOver must be one word. The number is
not mandatory but it helps identify where you are. Additional menus would be on new layers: DropDown 2, DropDown 3, etc.
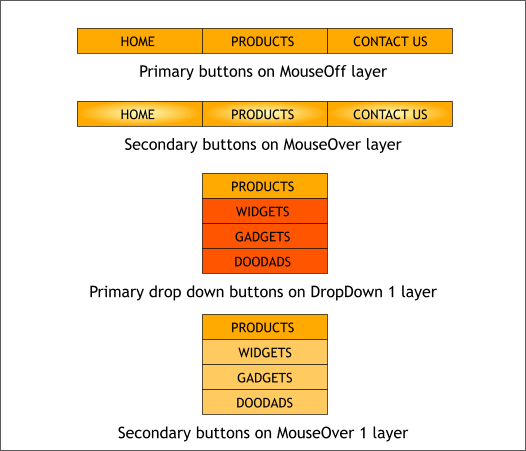
Create some buttons. Three primary level buttons (MouseOff) with secondary mouse over versions, and a series of buttons to go on the drop down menu.
IMPORTANT: Group each button and the text for that button. Extreme treats any text as HTML text but text that is grouped with an object
such as a rectangle is converted to a PNG bitmap. There is an additional reason for doing this which we will cover momentarily. For the curious
(curious is good), if you do not group the text and the button shape, the text will turn blue with an unsightly underline once you add a link.
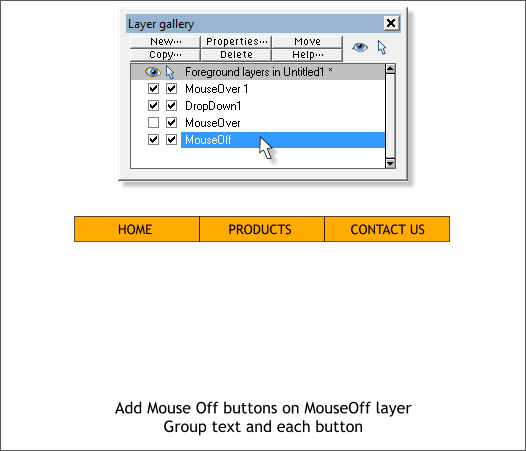
Select the MouseOff layer. Make sure the two check boxes to the left are checked. Add the normal state button groups to the MouseOff layer. These
are the buttons as they will appear when the page loads.
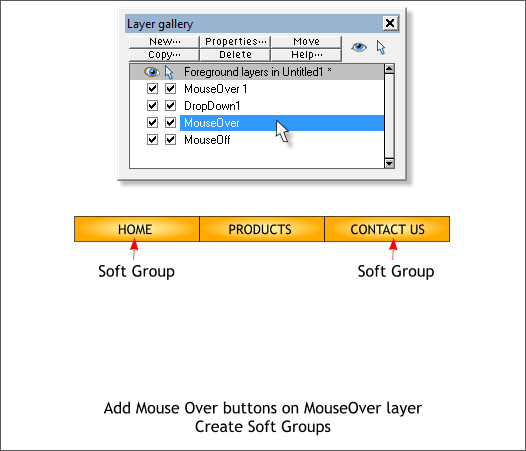
Select the MouseOver layer and add the highlighted version of the buttons to this layer. Center each mouse over button over the mouse off version.
NOTE: The hardest thing when working with layers is remembering which layer you are working on. Keep the Layers dialog open until all the buttons have been placed on the right layers.
Make sure both check boxes are checked for the MouseOver and MouseDown layers. The first check box makes a layer visible or invisible and
the second check box enables (checked) or disables (unchecked) editing on that layer.
Make sure the text and button shape are grouped for the three new buttons.
Drag a selection rectangle around the HOME buttons using the Selector Tool (F2 - the arrow pointer). The status bar in the lower left corner of the page should read 2 Groups Selected.
From the Arrange menu, select Apply Soft Group. Soft groups have several advantages. One of the primary advantages is if you change the text on one
of the buttons, it automatically changes on the other button or buttons in the soft group. The same holds true for links. Soft groups extend between layers
as well. If you add a third button state, MouseDown, which requires a separate layer and which occurs when the visitor clicks down on a button, and it will also be part of soft Soft Group.
Create a Soft Group for the CONTACT US buttons. But do not create a soft group for the PRODUCTS buttons.
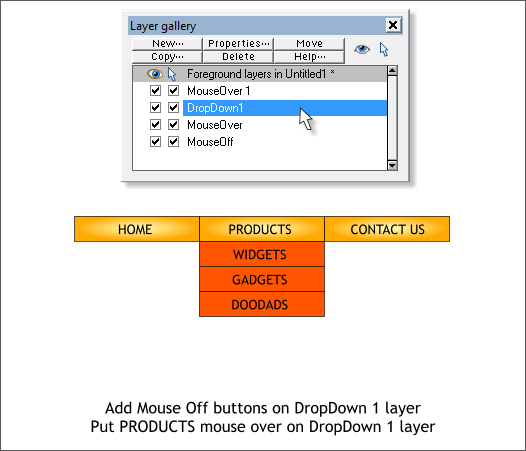
Select the DropDown 1 layer.
Make sure all the check boxes are checked.
Select the mouse over version of the PRODUCTS button and cut it to the clipboard (Ctrl x or Edit > Cut).
From the Edit menu, select Paste in Place or press Shift Ctrl v.
This is a way of cheating the mouse over effect for the PRODUCTS button which would otherwise not be possible. Just trust me on this one.
Add the Mouse Off normal state buttons directly under PRODUCTS onto the DropDown 1 layer.
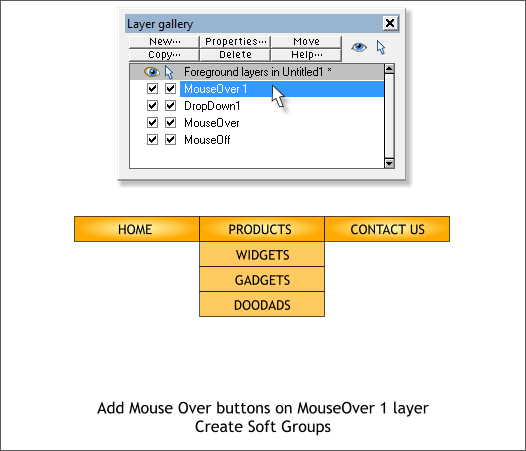
Select the MouseOver 1 layer. Add the mouse over state buttons on top of the mouse down buttons. Create three soft groups.
Select the MouseOff layer. Make the MouseOver layer invisible by unchecking the first check box to the left of the MouseOver layer.

Select the MouseOff version of the PRODUCTS button. Press the Website Properties icon.
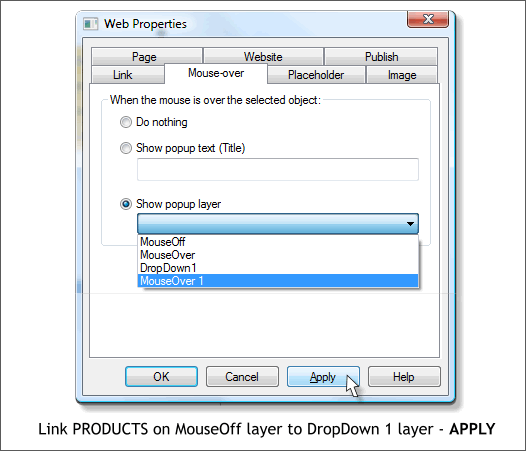
In the Mouse-over tabbed section, click on MouseOver 1 in the Show Popup Layer drop down menu. PRESS APPLY. The effect of this is when the visitor mouses over the PRODUCTS
button, it will trigger the drop down menu. The mouse over version will appear in the drop down menu.
NOTE: Almost anything you do in the Web Properties dialog requires you press Apply for the action to take effect. Burn this into your brain.
The number one reason things do not work as they should is we forget to Apply the changes. And Web Designer will not read your mind.

Press Export and Preview Website to see the results in a new browser window.
Click here to see how the menus should work.
|