Initial setup: Before beginning the slicing, a few options need to be set up for best
results. These settings will ensure your cutting areas are set exactly to cut on a whole pixel, rather than halfway through one, which can result in unwanted anti-aliasing on the cut edges when exported.
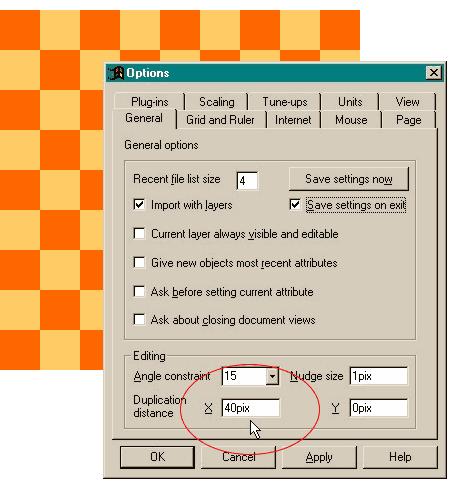
Set up your page (in Utilities > Options) with a grid and ruler spacing of 1pix for the Major Spacing, and Number of Subdivisions set to 1. Page Units should be set to
Pixels.
Before starting your slicing, enable Snap to Grid.
Note
that if you have an existing graphic you wish to slice which has different page settings, you can still use it, but be sure to adjust these options before commencing the slicing.
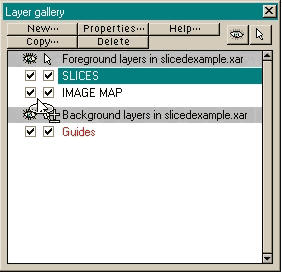
It is best to make a new
layer specifically to hold the slice areas, above the rest of the graphics.
It is easiest now to set up the rectangle tool with no border, and transparency set to 50%, with a strong colour selected. On the
new layer, draw boxes over the graphic which will define the areas to be sliced.
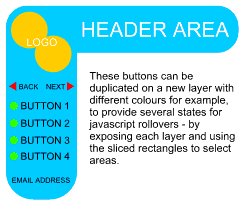
These areas can be defined by allowing for parts which will be buttons, header areas, and parts which are logos. Because of
the grid options, each box can be drawn butted exactly up to each other, leaving no gaps, and no overlaps. Once you have completed these boxes, the graphic should be completely covered.
When you are making
up these slicing boxes, it is important to know roughly how you will create the relevant HTML tables which enclose them. Try for a simple layout whenever possible.
The benefit of using these boxes is that
you can select and use them to export selected areas and with the use of multiple layers for your original graphic, you can define several states for button rollovers for example, or several wording variations for
headers for your pages.
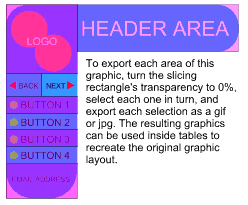
Now, how do you use these slicing boxes to export the graphic areas underneath? Select all the boxes and make their transparency 0. Now you can't see them, but they still can
be selected. By selecting each of them in turn you can use the export function to output GIFs or JPEGs for the areas visible directly underneath a box. If you get lost, you can turn on the transparency a little bit to
see where the boxes are, but make sure to set it back to 0 for each one you are exporting, otherwise you will get a slight shading on the export.


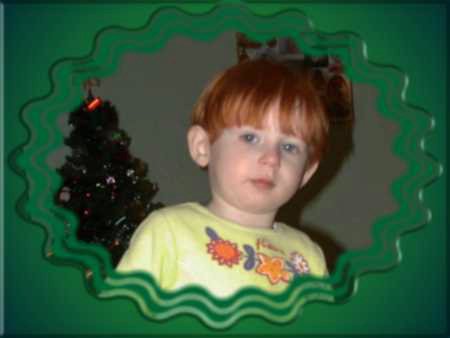
 The frame is a white quick shape star with 20 points, rounded, cloned and enlarged twice with just the outline in white. I applied the frame in green then changed the fill of
the outer section to a green radial fill before applying 'The Boss' 3D filter.
The frame is a white quick shape star with 20 points, rounded, cloned and enlarged twice with just the outline in white. I applied the frame in green then changed the fill of
the outer section to a green radial fill before applying 'The Boss' 3D filter.