|
|
|
I received a frantic e-mail from Tony Ways who implored your editor (that's me), "For the love of all that's decent, please help me. I'd like to have some text wrap on the face of a globe, not around the outside but molded to the face. Can Xara X do it?" But of course. Xtreme can do anything. While Tony was being a little overly dramatic, I could see what he was getting at. The technique for doing this is one I have used many times in the past to make things spherical. So if it seems all too familiar, forgive me but again if it works, use it.
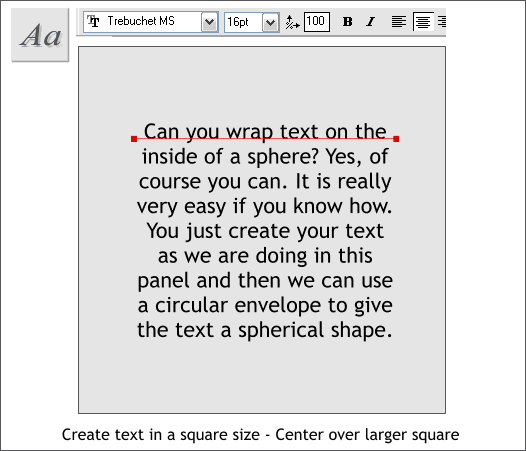
Create your text using Xara's Column Text mode. Drag the Text Tool (F8) cursor to establish the width of the column and then paste or key in your text. Keep the shape of the text block more or less square. In the example above I have used Trebuchet MS at 16pt and centered. You can also justify your text left and right by clicking the Fully Justified icon on the Text Tool Infobar (the same width stacked lines). Add a square that is a bit larger than the text.
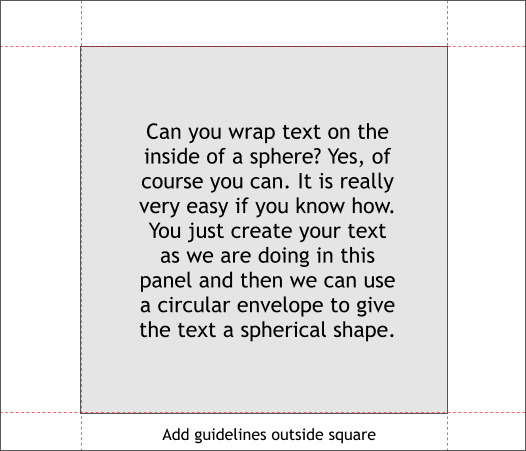
Drag guidelines from the screen rulers (Ctrl L to display rulers) and snap them to the sides of the square.
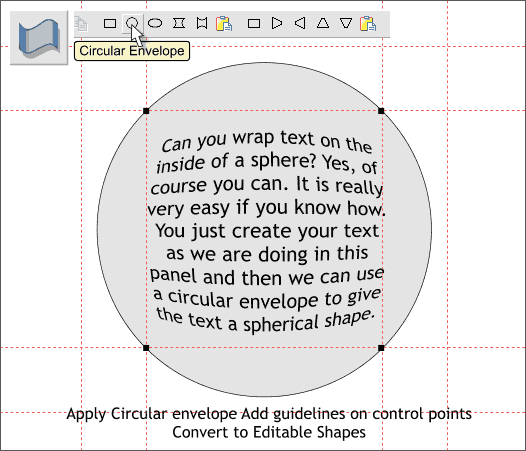
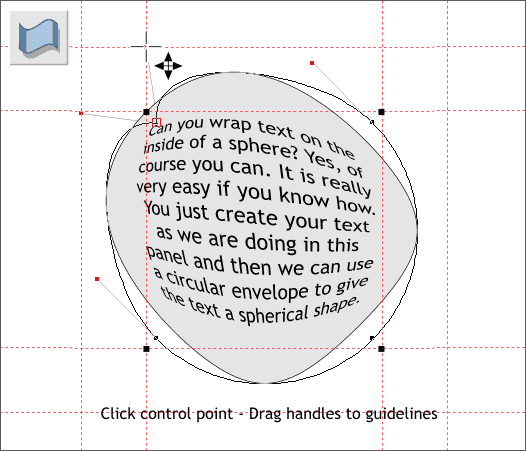
Select the Mold Tool (Shift F6) and click the Circular Envelope icon. With the envelope selected, drag 4 more guidelines through the control points as shown above. From the Arrange menu, select Convert to Editable Shapes.
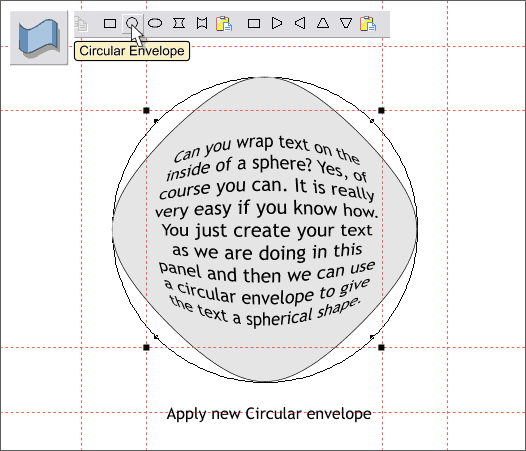
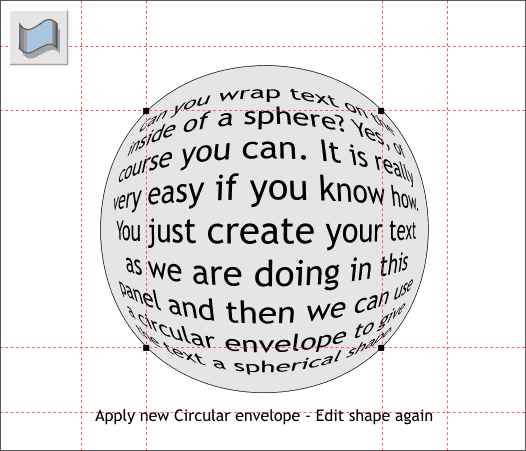
Apply a new Circular Envelope. (Remember you have to convert the previous envelope to editable shapes before you can apply a new envelope).
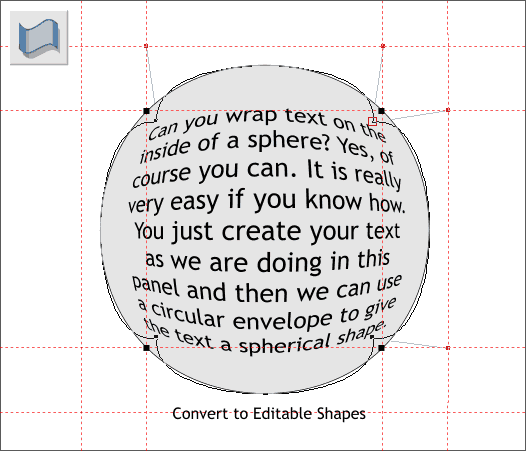
Click on the top left control point. 2 lines with red boxes (control handles) on the ends will appear. Drag these control handles to the intersection of the guidelines as shown above left.
Repeat the last step and snap each of the control handles to the guidelines. Convert to Editable Shapes (Arrange menu).
Apply a new Circular envelope and edit each control point dragging the control handles to the intersection of the guidelines as you did in the last step. The text now looks as though it were wrapped on a sphere.
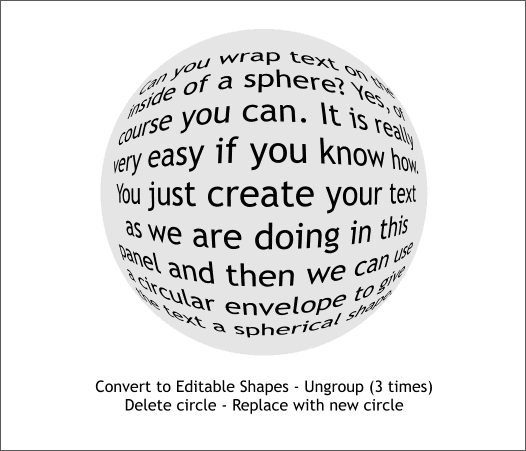
Convert to Editable Shapes and then Ungroup (Ctrl u) 3 times. Replace the molded circle, which is not quite a circle, with a circle drawn with the Ellipse Tool (Shift F4). Hold down the Ctrl key to constrain the ellipse to a circle.
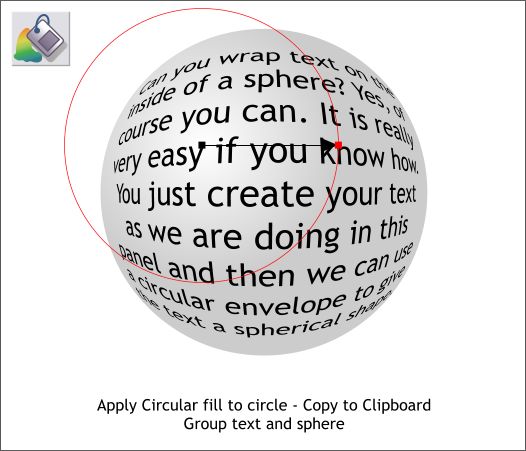
Using the Fill Tool (F5) apply a Circular fill to the circle. In the example above I have used 10% Black and 30% Black. Offset the center of the fill up and to the left and reduce the width of the fill path arrow. Copy the circle to the clipboard (Ctrl c), then group the circle and text (Ctrl g).
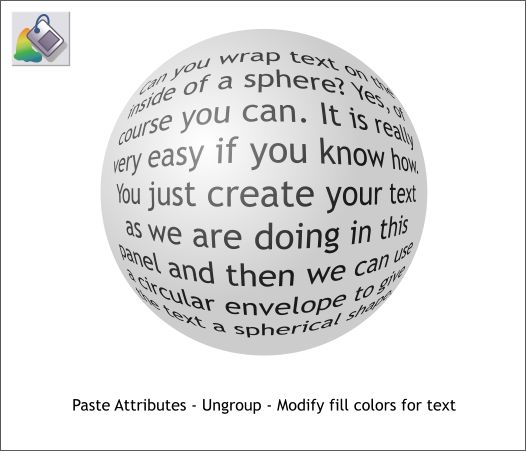
With the group selected, Edit > Paste Attributes or press Shift Ctrl a. Don't panic, your text is still there. The text now has the exact same fill as the circle which makes it appear invisible. Ungroup (Ctrl u) and select the text. Switch to the Fill Tool and modify the colors for the text. In the example above the inside color is 50% Black and the outside color is 80% Black So there you have it. Text you can roll or bounce. Questions, suggestions, and comments are always greatly appreciated and graciously answered (in most cases). Please use the feedback form on the next page to send me your comments. Gary W. Priester
|
||
|
|


