|
|
|
I received an e-mail from Fahed Bizzari recently asking how to achieve a wavy metallic fill for text or other objects. He sent me a link to a Photoshop tutorial. I knew it would be faster easier in Xtreme I searched through the Workbook Index and could not find an example of how to do this although I'm sure I have covered this before. But then a refresher course is never a bad thing.
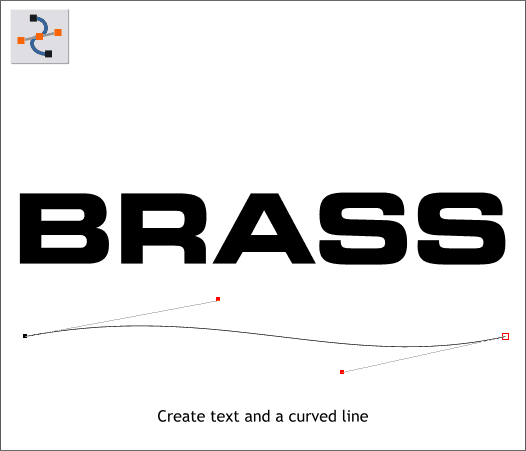
Create your text. Using the Shape Editor Tool (F4) or the Freehand and Brush Tool (F5), create a wavy line that is a little bit wider than the text. Make a duplicate (Ctrl d) of the text and set it to one side. We'll need it in a moment.
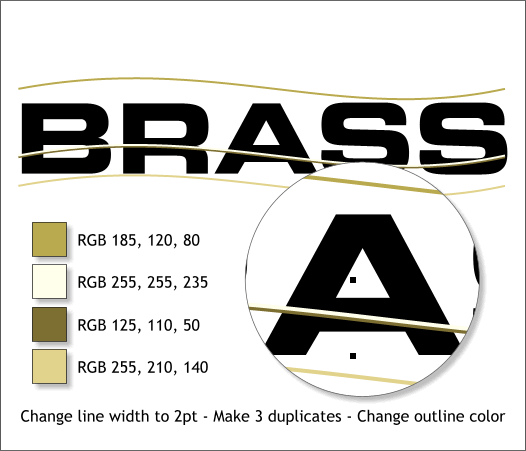
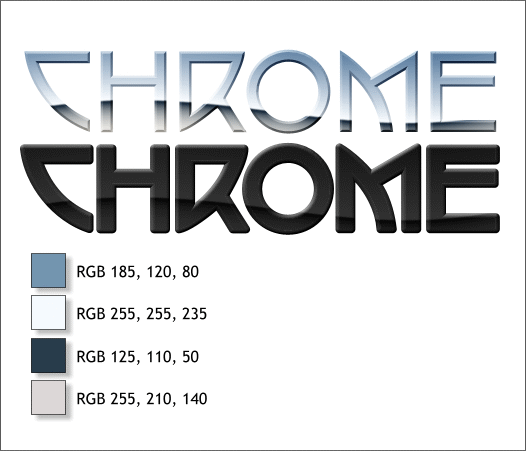
Make three duplicate lines and space them vertically so the top and bottom lines are just above and just below the text. Space the other two lines close together and about 1/3 of the way up from the bottom as shown above. Change the line width to 2pt. Apply a different outline color to each line using the four colors shown above. Edit the Line Colors in the Color Editor (Ctrl e). There is a drop down list at the top for Current Fill Color or Current Line Color. Select Current Line Color.
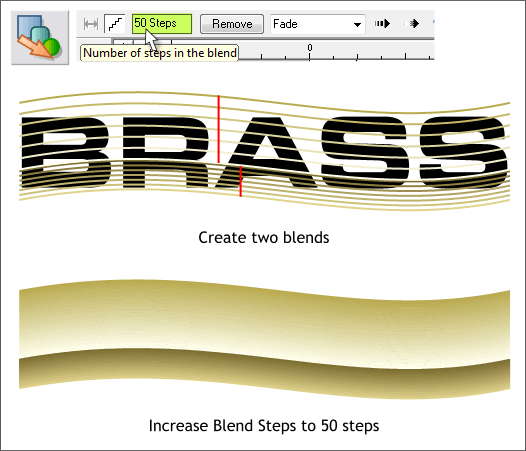
Select the Blend Tool (F7). Drag from the top line to the next line down to create a blend of these two lines. Do the same for the bottom two lines. You will now have two blends. Select both with the Blend Tool (hold down the Shift key and click on each blend to multiple-select). On the Infobar at the top of the screen, change the Blend Steps to 50 and press Enter (or Return) to apply the change.
Center the two blends over the text. Select both blends and the text (drag a selection rectangle around the blends and the text with the Selector Tool (the arrow pointer)). From the Arrange menu, select Apply ClipView. This masks the blends inside of the type. NOTE: The text remains text and you can edit it if you wish. You can change what it says, the size, style, the font, etc.
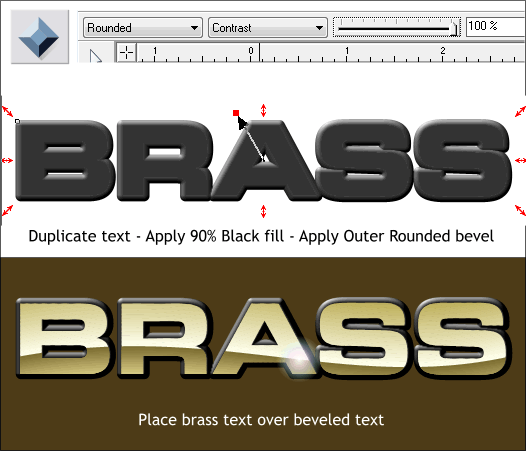
Select the duplicate text you made and change the fill color to 90% Black. Select the text with the Bevel Tool (Alt 4) and apply a Rounded, Outer bevel. Change the Contrast slider setting to 100%. Place the brass text over the bevel.
You can do the same thing with chrome colors. The example above has an Inner Flat bevel applied to the chrome text and an Outer Rounded bevel applied to the dark gray duplicate.
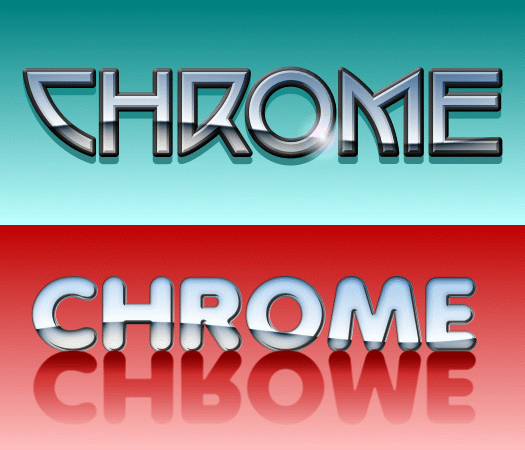
Here are a few serving suggestions. The top example uses another duplicate of the text filled with a deeper shade of the teal green. This creates a kind of reflecting in shiny paint effect when placed over the teal to light teal Linear filled rectangle. The bottom example was shaped using a duplicate of the text to which a, 80% Black fill was applied and then an Inner Contour applied to the gray text. The lighter color was changed to 30% Black by dragging and dropping the lighter gray from the screen palette and dropping it onto the contour. A Position Profile 1 forced the darker color to the outside and then a bitmap copy was made of the text. The bitmap copy of the contour was centered over the text and a Flat, Brightness transparency applied to the bitmap. Comments, questions, suggestions? Please use the email link at the bottom of the text to send me your thoughts. Your feedback is always appreciated. Honest. Gary W. Priester |
||||||
|
|
||||||
|
|


