|
|
|
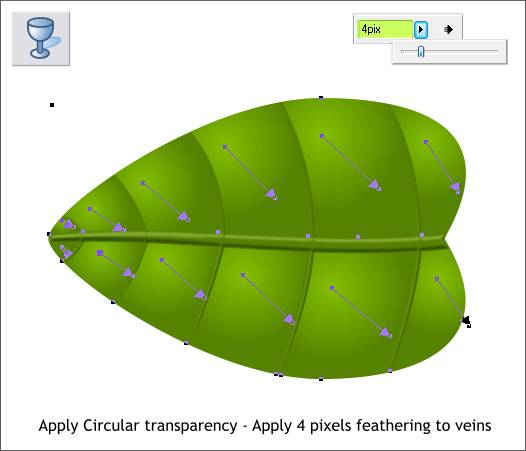
Select one of the larger panels with the Transparency Tool (F6). From the drop down list of Transparency Shapes on the top left of the Infobar, select Circular. Drag the center of the fill up and left. Copy the panel to the clipboard (Ctrl c). Hold down the Shift key (to select multiple objects) and click on each of the leaf sections (not the beveled veins), and Edit > Paste Attributes or Shift Ctrl a. Select the veins and apply 4 pixels of feathering using the Change Size of Feather Region slider found at the top right area of the Infobar.
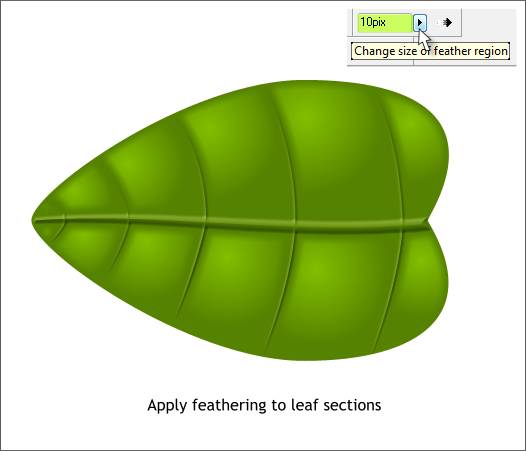
Select all the leaf sections again, but not the veins, and apply 10 pixels feathering.
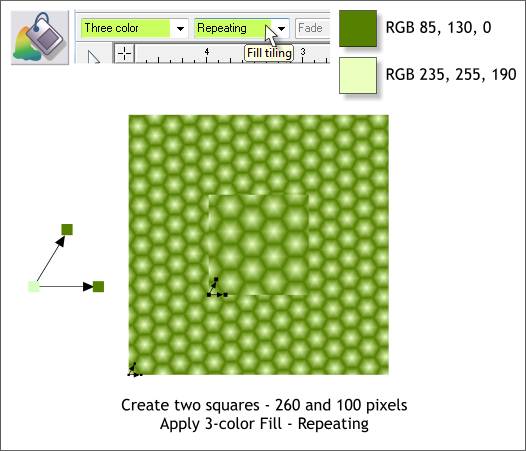
NOTE: Leaves have a series of smaller cells. I wanted to find a simpler way to show these cells rather than to draw a whole lot of lines. Actually, a whole lot of lines would have been a whole lot better. But this technique is interesting so I left it in the tutorial. Create two squares about the sizes shown above. Using the Fill Tool (F5), apply a 3 Color fill (select 3 Color from the Fill Type drop down list) using the two colors shown. Note that the point where the two arrows originate is light green and the two outside points are dark green. Adjust the fill path arrows as shown to create a pattern of hexagons. Apply the same fill to both squares but make the fill pattern for the smaller square a bit larger. In 3.2, hold down the Ctrl key and drag either fill path arrow.
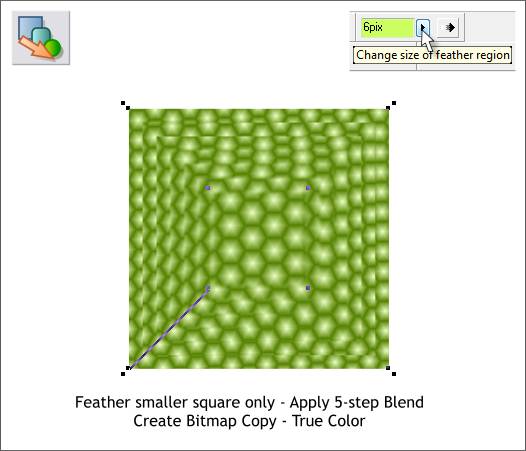
Select the smaller square and apply 6 pixels feathering to soften the edges. Select the Blend Tool (F7). Click on the large square and drag to the small square to apply a blend. Right click on the blend and from the fly out menu, select Create Bitmap Copy... Set the Color Depth to True Color and press Create. Delete the bitmap. We will use a copy that was automatically placed in the Bitmap Gallery when the bitmap was created.
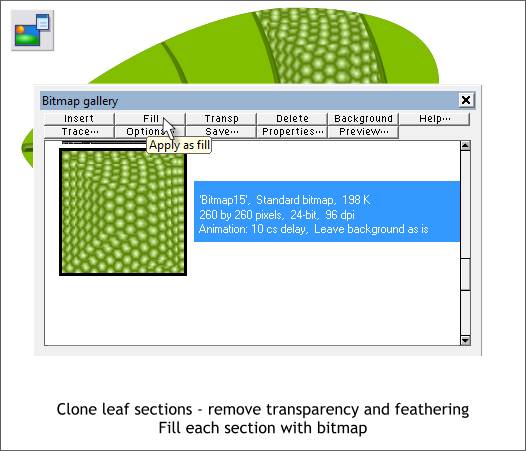
Select all the leaf sections and Clone them. (Ctrl k) Select one of the larger sections. Open the Bitmap Gallery (F11). Select the bitmap copy and press Fill. Copy the section to the clipboard. Select the other cloned sections and Paste Attributes (Edit menu) or press Shift Ctrl a. Someone is for sure going to write and ask why don't you just select all the cloned sections, select the bitmap fill and press Apply? My smart answer. What ever works!
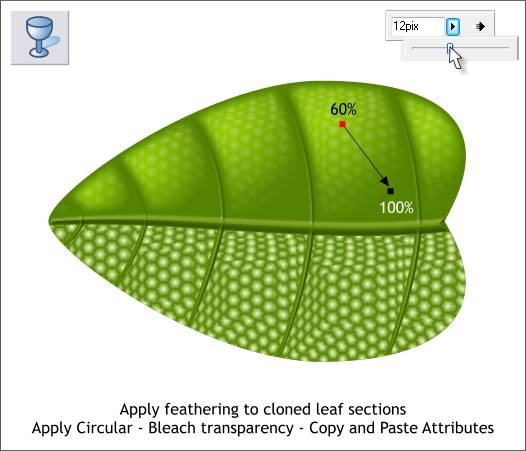
Select one of the sections and apply 12 pixels feathering. Switch to the Transparency Tool (F6). From the drop down list of Transparency Shapes, select Circular. From the Transparency Types drop down list, select Bleach. Drag the center of the transparency up and to the left as shown above. With the center of the transparency still selected, change the Transparency slider setting to 60%. Copy this section to the clipboard (Ctrl c ) and select all the other cloned sections and Paste Attributes. Do this for both the sections shown above on the bottom as well. I have not pasted attributes for the bottom shapes yet so you can see the difference.
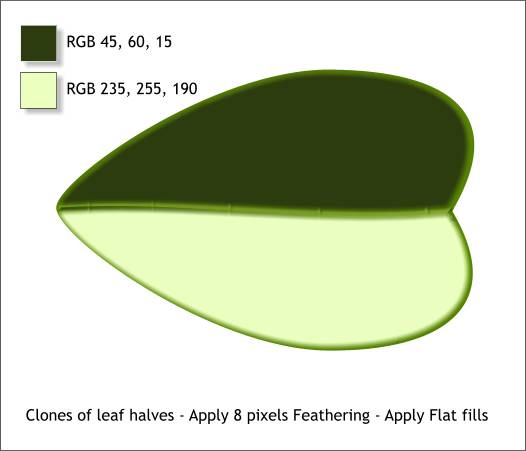
Take the two cloned half leaf sections that you created some time ago and place them on top (Ctrl f to bring to front). Apply the two Flat fills as shown and add 8 pixels of feathering to soften the edges.
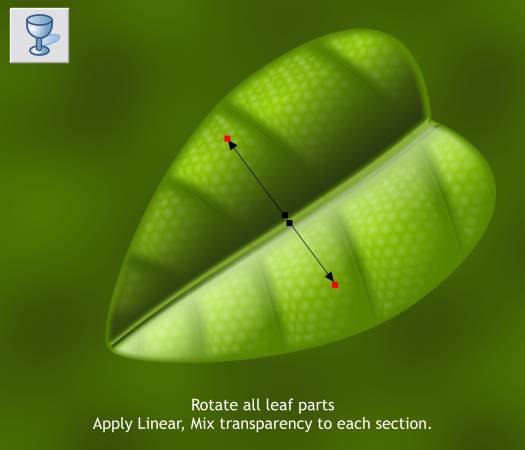
Select all the leaf parts and rotate them about 35 degrees. Using the Transparency Tool apply Linear transparencies starting in the middle of the leaf and fading outward. TIP: You can select the section then select Linear from the Transparency Shape drop down list and then adjust the fill path arrow. But the easier way is simply to click on the leaf section with the Transparency Tool to select it, then click on the inside edge of the shape and drag outward. You can determine the exact angle as you drag. This is called an interactive Linear transparency. Add a rectangle behind the rotated leaf and apply a Fractal Plasma fill using a dark green and a very dark green. You can mix the colors in the Color Editor (Ctrl e).
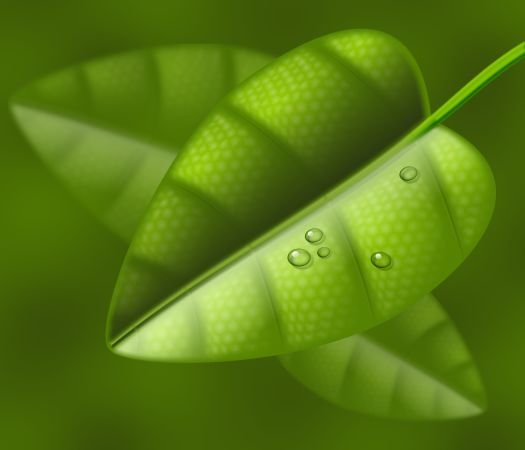
Here's the final leaf. I added a stem and a few water drops. I also created a bitmap copy of the entire leaf, resized and duplicated the bitmap copies, and blurred the bitmap in Xare Picture Editor and placed them behind the leaf.
|
|||||||
|
|
|||||||


