

By Gary W. Priester
![]() Xara has just introduced the newest versions of Xara Web Designer called Xara Web Designer MX and Xara Web Designer MX Premium. The MX has to do with Xara’s parent company Magix. There are many exciting new features, improvements and tweaks that make this powerful, yet intuitive, easy to use, WYSIWYG web design product even better than before. We’ll look at MX Premium in this review.
Xara has just introduced the newest versions of Xara Web Designer called Xara Web Designer MX and Xara Web Designer MX Premium. The MX has to do with Xara’s parent company Magix. There are many exciting new features, improvements and tweaks that make this powerful, yet intuitive, easy to use, WYSIWYG web design product even better than before. We’ll look at MX Premium in this review.
Just Added – Text Styles!
Text Styles add a powerful text formatting component to Web Designer. Users familiar with text styles such as found in Microsoft Word will find Web Designer MX Premium’s styles very similar and even easier to apply.
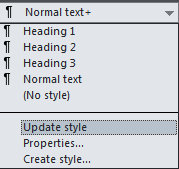
- Figure 01
Text Styles are a quick way to format your text so that it is consistent throughout your site. Text Styles make it easy for you to globally modify or update any text. For example, if you have used Arial for your Normal text (this paragraph is Normal Text), and you want to change all the Normal text to Georgia, simply change a word or line of type to the desired font, size, style, color, etc., and select Update Style from the Style drop down list, and all Normal Text, on all pages in your website document is instantly updated! See Figure 1.
You can quickly and easily create a new style. Create some sample text, format the text, then select Create Style… from the Style menu. Specify what Style the next line of text will be. If you specify Normal, for example, then the next line after your new style will be Normal, text style. See Figure 2.
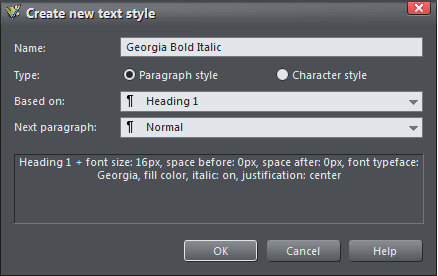
- Figure 2
You can format any portion of an existing paragraph or heading without creating a new style. But if you do this the formatted text will not automatically update. Only text that has had a style applied can be updated automatically.
Embedded Fonts
Are you getting tired of Arial, Times Roman, Georgia and the other limited group of “web-safe” fonts? Well an awesome new feature in Xara Web Designer MX Premium automatically embeds your fonts in your website. So even if your visitor does not have the font you are using installed, she or he will see the font displayed correctly. This works with many fonts but not all. When you publish your site you will see a Warning dialog that tells you if your font can be embedded or not. If not then you should switch to a font that will.
If your font or fonts cannot be embedded you will see a message, “The following fonts are used by the document but are either not installed, or are not in a format that allows them to be embedded in the website.” followed by a list of fonts that are not eligible for embedding.
If the font or fonts can be embedded, you either will see nothing (generally this will happen for most web safe fonts), or you will see a Warning message informing you “The following non-standard fonts will be published with your website….” and “Please ensure the font license allows embedding for websites. If in doubt, contact your font vendor.”
Inline Graphics
Xara Web Designer MX Premium now lets you add small graphics to your text that embeds in, and flows with the text. The graphics can be from a symbol font, a logo, or a vector object that you create. If you resize the text area or add to the copy, the embedded objects maintain their place in the text. Inline Graphics may also be used as bullet points in text or in presentations. See Figure 3.
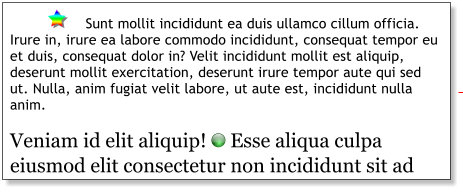
- Figure 3
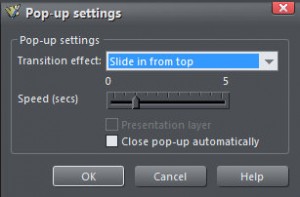
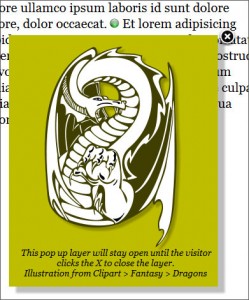
Locking Pop-up Layers
In previous versions of Web Designer, pop up layers (not to be confused with pop-up images) were not locked. If the visitor clicked anywhere on the page outside of the pop-up layer, the layer would close. Now you can make a pop up layer stay open until the visitor clicks a small X button to close the pop up. This is done by un-checking Close Pop-up Automatically in the Pop-up Settings dialog. See Figures 4 & 5.
- Figure4
- Figure 5
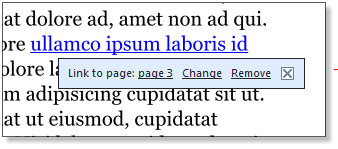
Interactive Links
- Figure 6
In Web Designer MX Premium, any linked object, whether it is linked to a URL, e-mail address, Pop-up layer, or another page displays an interactive pop up that shows the link, and provides the options to change the link, remove the link, or simply close the pop up message. This makes it very easy to identify a link without having to open the Website Properties > Link menu. If you are linking to a page within your site, you can test the link by clicking the link in the pop up. It will take you to the linked page. See Figure 6.
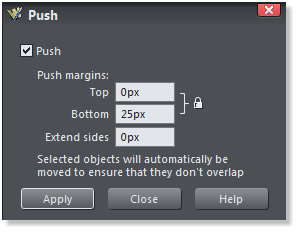
Push Comes to Web Designer MX Premium
- Figure 07
Push Applied to a Text Panel: Text Panels (found in the Design Gallery > Text Panels folder, automatically resize as you add or remove text. Adding Push these panels now will automatically extend the bottom or right side of your page as you add more text or widen the text width. See Figure 8.
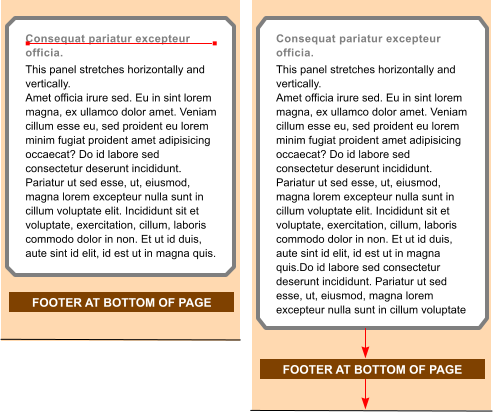
- Figure 08
- Figure 09
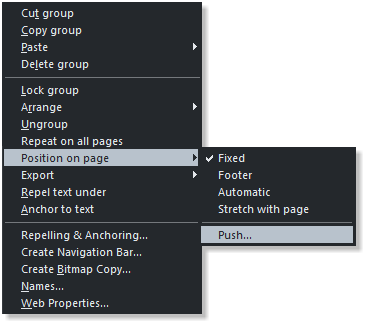
Position on Page Options: There are four additional options in the Position on Page fly out menu (See Figure 9): Fixed: With an object or text object selected, Fixed (previously the only option)
attaches the selection to its current position on the page. If the page is widened or lengthened, the selection stays exactly where it is. Footer: This option ensures the selected object or text object that is located close to, or at the bottom of the page, maintains the same position and distance from the bottom of the page if the page length is modified. Footer only applies to the current page, however. If you want the selection to appear at the same place on all pages, use the Repeat on All Pages command. Automatic: This option retains the relative position of the selection to the top, bottom, left or right side of the page, depending upon which is most appropriate. For example, an object in the right margin of the page will maintain the same spacing from the right edge of the page even if the page is widened. If the selection is closer to a corner, the selection will maintain the same distance from that corner. Stretch with Page: This option is useful if you are using a background rectangle on your site and want it to automatically expand as the page is stretched.


